1. Вступ
The Olvy 2-in-1 Jump Starter and Power Bank (Model QS001) is a versatile and essential device designed to provide reliable emergency starting power for a wide range of 12V vehicles, including cars, trucks, motorcycles, SUVs, vans, and heavy-duty engines. Beyond its powerful jump-starting capability, it also functions as a high-capacity portable power bank and a multi-mode LED flashlight, making it an indispensable tool for any driver.
Engineered for performance in extreme conditions, this device operates effectively in temperatures ranging from -20°C to +60°C. It incorporates 9 layers of intelligent protection to ensure maximum safety and peace of mind during use.

Image: The Olvy Jump Starter is designed to operate reliably in extreme temperatures, from -20°C to +60°C, ensuring functionality in diverse climates.
2. Особливості продукту
- Потужний стартер: Delivers up to 1500A peak current to start 12V diesel and gasoline vehicles, including cars, trucks, motorcycles, SUVs, vans, and heavy-duty engines.
- Безпечний і надійний: Equipped with 9 levels of intelligent protection, including reverse polarity, short circuit, overcurrent, overload, over-temperature, and over-discharge protection.
- All-Weather Operation: Designed to function in extreme conditions from -20°C to +60°C, ensuring reliable starts in cold or hot climates.
- Multi-functional Emergency Light: Integrated LED flashlight with 3 modes: bright light, strobe, and SOS signal for roadside safety and emergencies.
- Портативний Power Bank: Dual USB and Type-C outputs with 8,000 mAh / 10,000 mAh capacity for charging smartphones, tablets, and other electronic devices on the go.

Image: The Olvy Jump Starter is suitable for a wide range of 12V vehicles, including sedans, motorcycles, SUVs, and even heavy-duty engines.
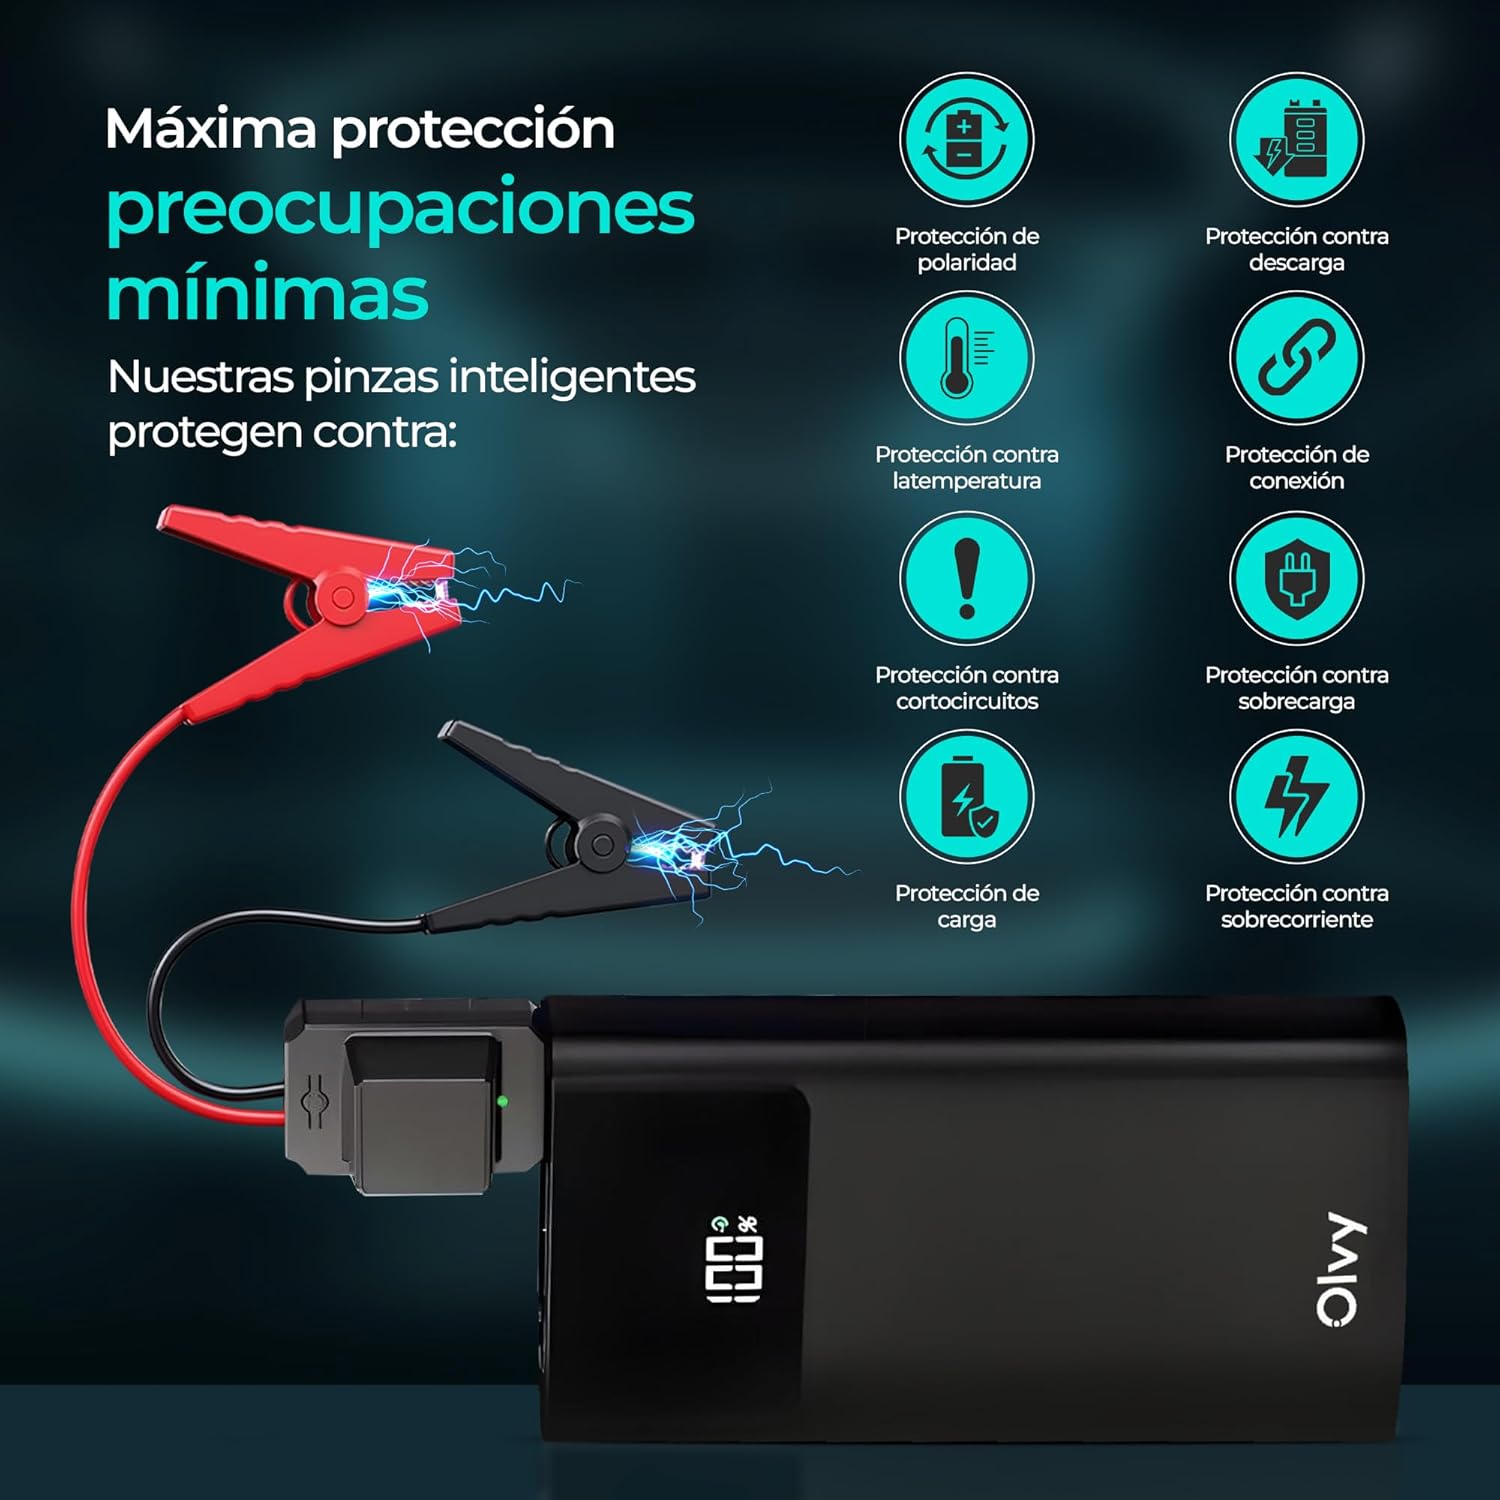
Image: The device features multiple intelligent protections, such as polarity protection, discharge protection, temperature protection, connection protection, short-circuit protection, overload protection, charge protection, and overcurrent protection.

Image: This compact and portable jump starter provides 1500A peak current and includes smart cables for safe and efficient operation.
3. Налаштування
3.1. Вміст упаковки
Перед першим використанням переконайтеся, що всі компоненти присутні в упаковці:
- 1x Olvy Jump Starter and Power Bank
- 1x Smart Battery Clamps
- USB-зарядний кабель 1x
- Сумка для зберігання 1x
- 1x Посібник користувача

Image: The complete package includes the Olvy 2-in-1 Jump Starter, smart battery clamps, a USB charging cable, a storage bag, and a user manual.
3.2. Початкове заряджання
Fully charge the Olvy Jump Starter before its first use. Connect the provided USB charging cable to the device's Type-C input port and a suitable USB power adapter (not included). The LCD screen will display the charging progress. Disconnect once fully charged.
4. Інструкція з експлуатації
4.1. Запуск транспортного засобу за допомогою дроту
- Ensure the jump starter is sufficiently charged (at least 50% recommended).
- Підключіть розумний акумулятор клamps to the jump starter's dedicated port.
- Прикріпіть червоний (+) клamp до позитивного полюса акумулятора автомобіля.
- Прикріпіть чорний (-) клamp to the negative terminal of the vehicle's battery. Ensure a secure connection. The smart clamps will indicate a correct connection (e.g., a green light).
- Запустіть двигун транспортного засобу.
- Як тільки двигун заведеться, негайно зніміть Smart Clampвід акумулятора автомобіля, а потім від’єднайте їх від пускового пристрою.

Image: Simple 4-step process for jump starting: 1. Connect the smart clamps to the jump starter. 2. Clamp to the car battery. 3. Start the car. 4. Disconnect the clamps.
4.2. Використання як портативного зарядного пристрою
The Olvy Jump Starter can charge your electronic devices:
- Connect your device's USB or Type-C charging cable to the corresponding output port on the jump starter.
- Пуск-стартер автоматично почне заряджати ваш пристрій.
- Monitor the charging status on your device and the jump starter's LCD screen.

Image: The device doubles as a power bank with Type-C and USB outputs, offering 8,000 mAh capacity to charge mobile devices.
4.3. Використання світлодіодного ліхтарика
Вбудований світлодіодний ліхтарик пропонує три режими для різних ситуацій:
- Яскраве світло: Press and hold the flashlight button to turn on the bright light.
- Режим стробоскопа: Press the button again to switch to strobe mode for increased visibility.
- Сигнал SOS: Press the button a third time for the SOS signal, useful in emergencies.
- Натисніть і утримуйте кнопку, щоб вимкнути ліхтарик.
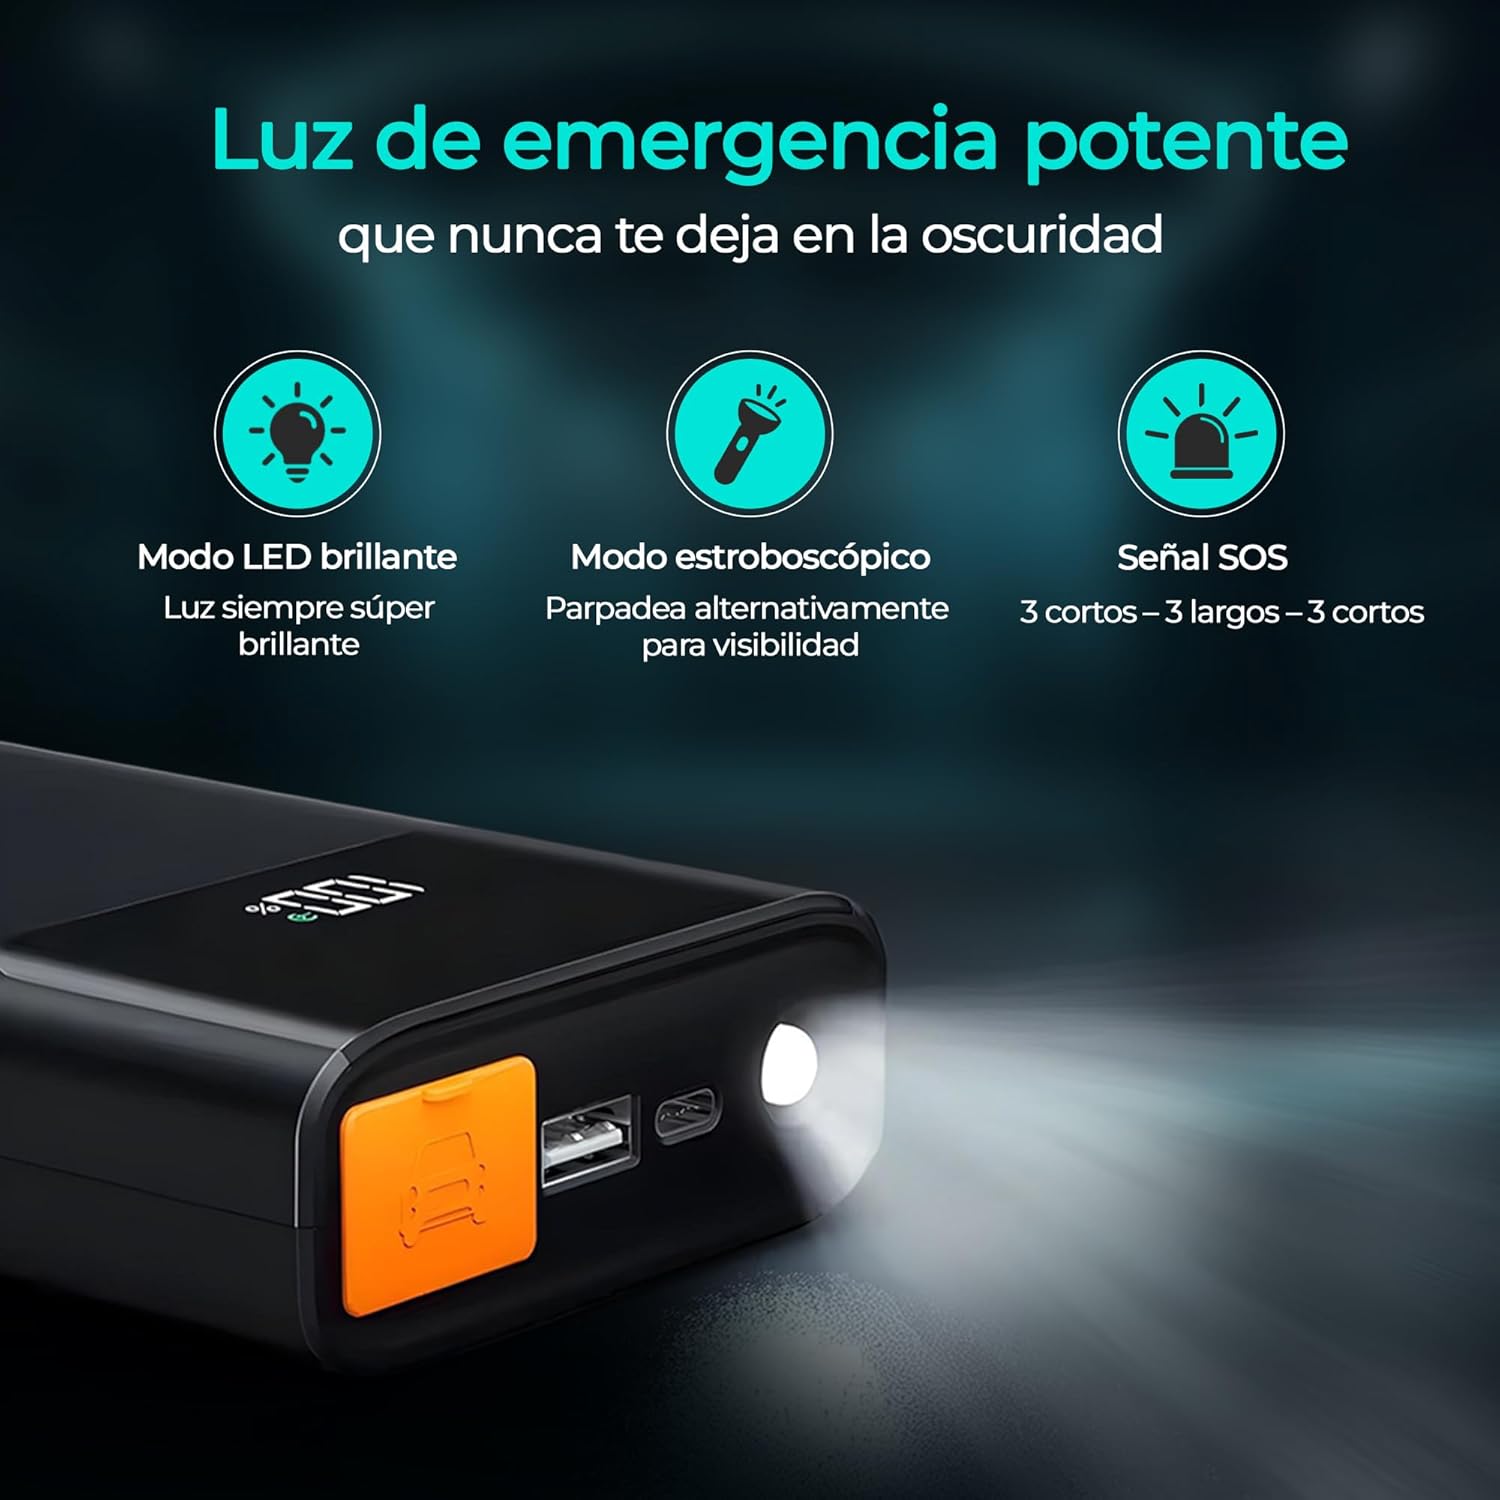
Image: The powerful emergency light features a super bright LED mode, an alternating strobe mode for visibility, and an SOS signal (3 short, 3 long, 3 short flashes).
5. Інформація про безпеку
Please read and understand all safety warnings and instructions before using this product. Failure to follow these instructions may result in electric shock, fire, and/or serious injury.
- Do not short-circuit the smart clamps.
- Не піддавайте виріб впливу дощу або вологих умов.
- Не розбирайте виріб. Звертайтеся до кваліфікованого сервісного персоналу з будь-яким обслуговуванням.
- Зберігати в недоступному для дітей місці.
- Використовуйте лише наданий смарт-ключamps and charging cable.
- Ensure proper polarity when connecting to a vehicle battery (red to positive, black to negative). The smart clamps have built-in reverse polarity protection.
- Не запускайте замерзлий акумулятор.
- Do not use the jump starter if the cables or clamps пошкоджені.
- Видаліть клamps from the vehicle battery immediately after the engine starts.
6. Технічне обслуговування
- Зберігайте стартер у прохолодному, сухому місці, подалі від прямих сонячних променів та екстремальних температур.
- Recharge the device every 3-6 months, even if not in use, to maintain battery health.
- Очистіть зовнішню поверхню м'якою, damp тканина. Не використовуйте агресивні хімікати або абразивні матеріали.
- Тримайте розумний клampчистий та без корозії.
7. Вирішення проблем
7.1. Пристрій не вмикається
- Ensure the device is charged. Recharge if the battery level is low.
- Натисніть і утримуйте кнопку живлення кілька секунд, щоб переконатися, що це не просто швидке натискання.
7.2. Vehicle Not Starting
- Перевірте, чи смарт-клаamps are securely connected to the vehicle battery terminals with correct polarity.
- Переконайтеся, що стартер має достатній заряд.
- The vehicle battery might be severely discharged or damaged. Consult a professional mechanic.
- Якщо смарт-клієнтamps indicate an error (e.g., red light), refer to the smart clamp's specific error codes in the full user manual.
7.3. Device Not Charging
- Ensure the USB charging cable is properly connected to both the device and the power adapter.
- Спробуйте інший USB-адаптер живлення або кабель для зарядки.
8. Технічні характеристики
| Бренд | Olvy |
| Модель | QS001 |
| Піковий струм | 1500 Amperes |
| Ємність акумулятора | 8000 mAh (10000 mAh variant also mentioned) |
| Склад батареї | Літій-іонний |
| томtage | 12 вольт (постійний струм) |
| Робоча температура | від -20°C до +60°C |
| Розміри | 19 х 12.7 х 9 см |
| вага | 1.5 кг |
| Вихід USB | так |
| Вихід Type-C | так |
9. Гарантія та підтримка
For detailed warranty information and customer support, please refer to the warranty card included in your product package or visit the official Olvy webсайт. Зберігайте чек про покупку як підтвердження покупки для будь-яких гарантійних претензій.


