1. Вступ
This manual provides detailed instructions for the installation, operation, and maintenance of your Antec Flux Rear Mid-Tower ATX PC Case. Please read this manual thoroughly before beginning assembly to ensure correct setup and optimal performance.
Інформація про безпеку: Always disconnect power from all components before installation or maintenance. Handle components with care to prevent damage. Wear an anti-static wrist strap when handling sensitive electronic parts.
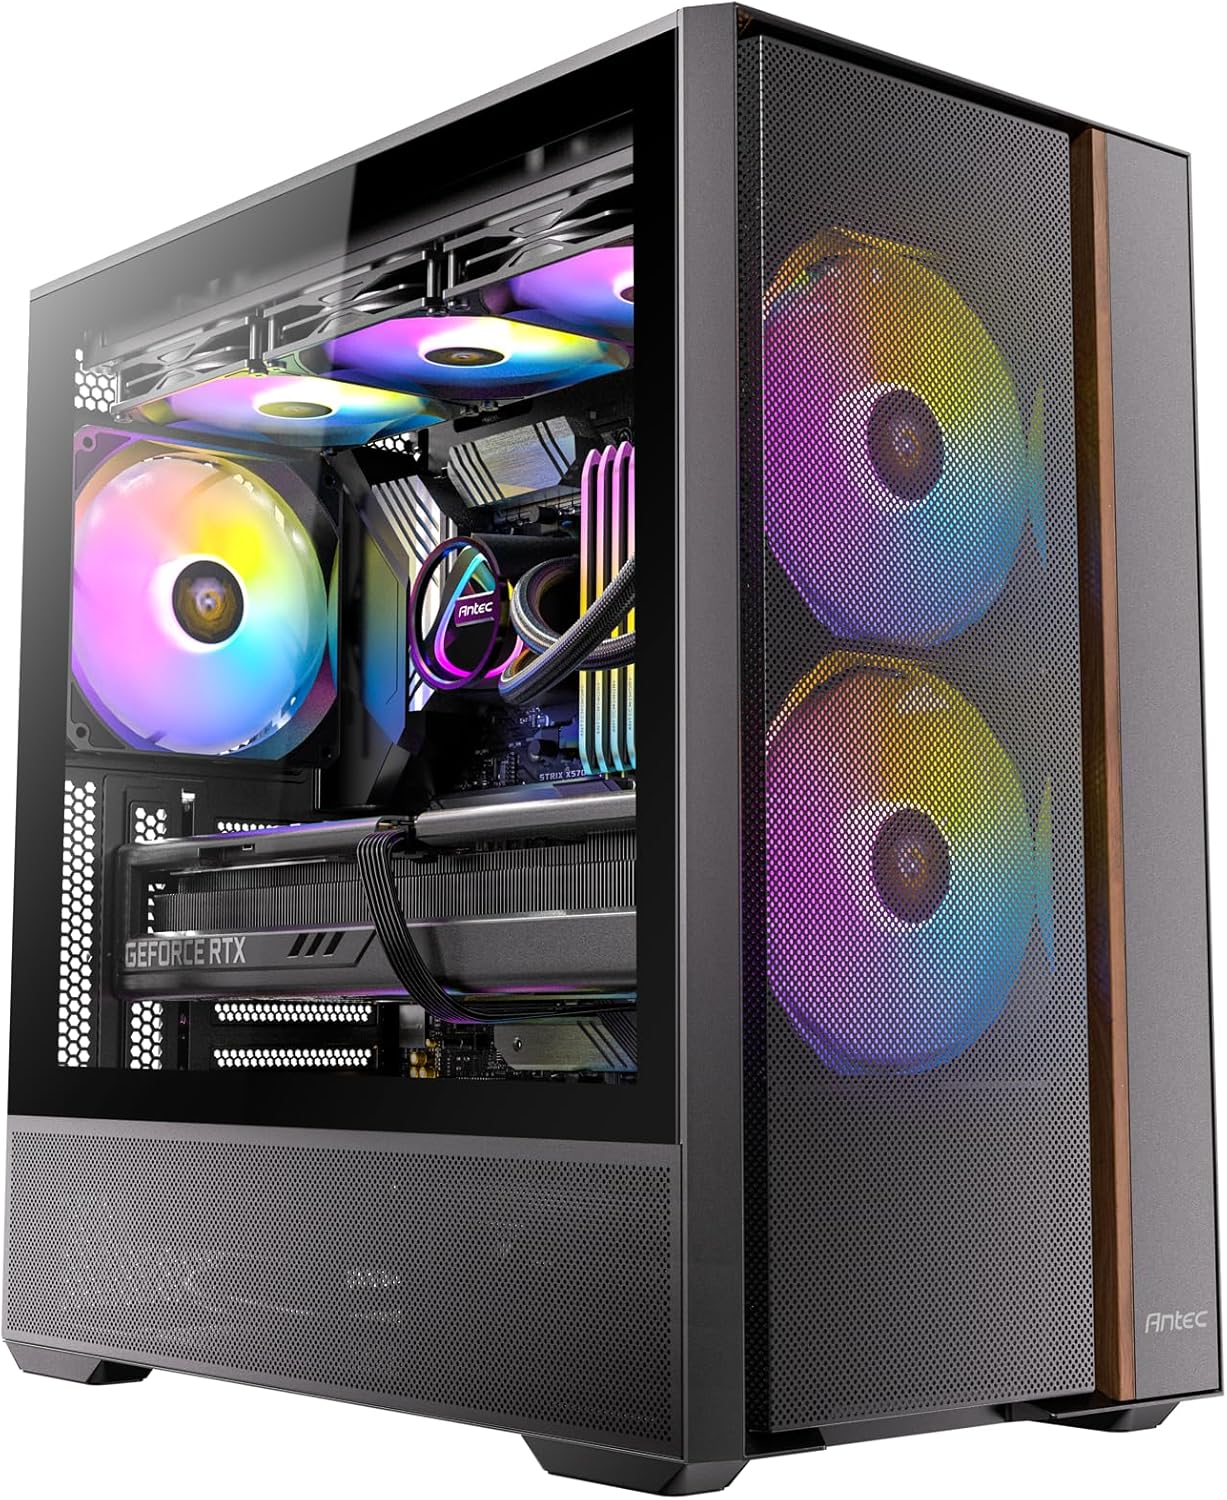
Image: The Antec Flux Rear Mid-Tower ATX PC Case, showcasing its tempered glass side panel, mesh front panel, and pre-installed RGB fans.
2. Вміст упаковки
Перевірте, чи всі перелічені нижче компоненти присутні у вашій упаковці:
- Antec Flux Rear Mid-Tower ATX PC Case
- 2 x 140mm ARGB PWM Fans (Front, pre-installed)
- 2 x 120mm PWM Reverse Fans (PSU Shroud, pre-installed)
- 1 x 140mm ARGB PWM Fan (Rear, pre-installed)
- Коробка з аксесуарами (гвинти, кабельні стяжки, інструкція користувача)
- 13A PSU Extension Cable
- Кронштейн підтримки GPU

Зображення: Вибух view illustrating the various components of the Antec Flux Rear PC case, including the chassis, panels, and fans.
3. Технічні характеристики
| Особливість | Деталь |
|---|---|
| Назва моделі | Flux Rear |
| Тип корпусу | Середній вежі |
| Сумісність материнської плати | ATX, Micro-ATX, ITX (Supports Back-Connect Motherboards) |
| Розміри (ДxШxВ) | 18.11 x 18.11 x 9.45 дюйма (460 x 460 x 240 мм) |
| Вага товару | 18.03 фунта (8.18 кг) |
| матеріал | Легована сталь, загартоване скло |
| Попередньо встановлені вентилятори | 2x 140mm ARGB PWM (Front), 2x 120mm PWM Reverse (PSU Shroud), 1x 140mm ARGB PWM (Rear) |
| Підтримка вентилятора (макс.) | Front: 2x 140mm; Top: 2x 140mm or 3x 120mm; Rear: 1x 140mm or 1x 120mm; PSU Shroud: 2x 120mm |
| Опора радіатора (макс.) | Top: Up to 360mm; Rear: Up to 120mm |
| Максимальна висота охолоджувача процесора | 180 мм |
| Максимальна довжина графічного процесора | 400 мм |
| Монтаж джерела живлення | Front Mount (Max length without cable: 170mm) |
| Привідні відсіки | 1x 3.5", 2x 2.5" |
| Порти введення/виведення | 2x USB 3.0, 1x USB-C 10Gbps, Headphone/Mic Combo Jack, Power Button, LED Control Button |
4. Налаштування та встановлення
4.1 Підготовка справи
The Antec Flux Rear case features a tool-free panel design for easy access during assembly.
- To remove the tempered glass side panel, gently pull it open from the rear hinge.
- The metal right side panel can be removed by sliding it backward and lifting.
- The front mesh panel can be detached by pulling it from the bottom edge.
- The top panel can be lifted off after removing any securing screws.

Image: Illustration of the tool-free panel design, demonstrating how to remove the top, left glass, left metal, and front panels for access.
4.2 Встановлення материнської плати
The case supports ATX, Micro-ATX, and ITX motherboards, including back-connect models.
- Ensure the correct standoffs are installed for your motherboard size.
- Carefully place the motherboard into the chassis, aligning it with the standoffs and I/O shield opening.
- Закріпіть материнську плату за допомогою наданих гвинтів.
- For back-connect motherboards, route all necessary cables through the designated cutouts behind the motherboard tray.

Зображення: Внутрішній view of the case demonstrating support for back-connect motherboards, with highlighted cable routing paths behind the motherboard tray.
4.3 Встановлення блоку живлення
The Antec Flux Rear features a front-mounted PSU chamber.
- Install your power supply unit (PSU) into the front chamber.
- Connect the included 13A extension cable to the PSU and route it to the rear power inlet.
- Ensure the extension cable is securely connected and routed to avoid interference.

Зображення: А view of the front-mounted PSU chamber and the 13A extension cable, illustrating how the power supply is positioned and connected.

Image: Four distinct diagrams illustrating various methods for routing the power extension cable, depending on the power connector's position and desired cable path.
4.4 Встановлення накопичувача (HDD/SSD)
The case provides dedicated mounting points for storage drives.
- Install 3.5" hard disk drives (HDDs) in the designated bay located at the rear of the case.
- Install 2.5" solid-state drives (SSDs) in the mounting locations behind the motherboard tray.
- Secure all drives with the provided screws.

Image: An internal diagram of the PC case, clearly marking the installation areas for the CPU, GPU, Motherboard, SSD, HDD, and Power Supply.
4.5 Встановлення відеокарти
Install your graphics card into the appropriate PCIe slot on your motherboard.
- Зніміть необхідні кришки слотів PCIe із задньої частини корпусу.
- Insert the graphics card firmly into the PCIe slot until it clicks into place.
- Закріпіть відеокарту гвинтами.
- Utilize the built-in GPU support bracket to prevent sag for heavier graphics cards. Adjust the bracket to support the card's weight.

Image: A close-up illustration of the built-in GPU support bracket, demonstrating its function in preventing graphics card sag.
4.6 Встановлення вентилятора та радіатора
The case comes with five pre-installed PWM fans and offers extensive support for additional cooling.
- Вгорі: Підтримує радіатори до 360 мм або 2x 140 мм / 3x 120 мм вентилятори.
- задній: Supports 1x 140mm or 1x 120mm fan, or a 120mm radiator (with thickness between 55-70mm).
- Спереду: Supports 2x 140mm fans.
- Кожух блоку живлення: Supports 2x 120mm fans.
- When installing radiators, ensure proper clearance with other components.

Image: A diagram illustrating the various fan and radiator mounting locations within the PC case, along with their supported sizes.

Image: An illustration detailing the installation process for a 360mm radiator and a rear fan in the top section of the PC case.
4.7 Організація кабелів
The case offers 37mm of space behind the motherboard tray for cable management, equipped with grommets and Velcro straps.
- Route power and data cables through the grommets and tie-down points.
- Use the included Velcro straps to bundle and secure cables, ensuring a clean interior and unobstructed airflow.
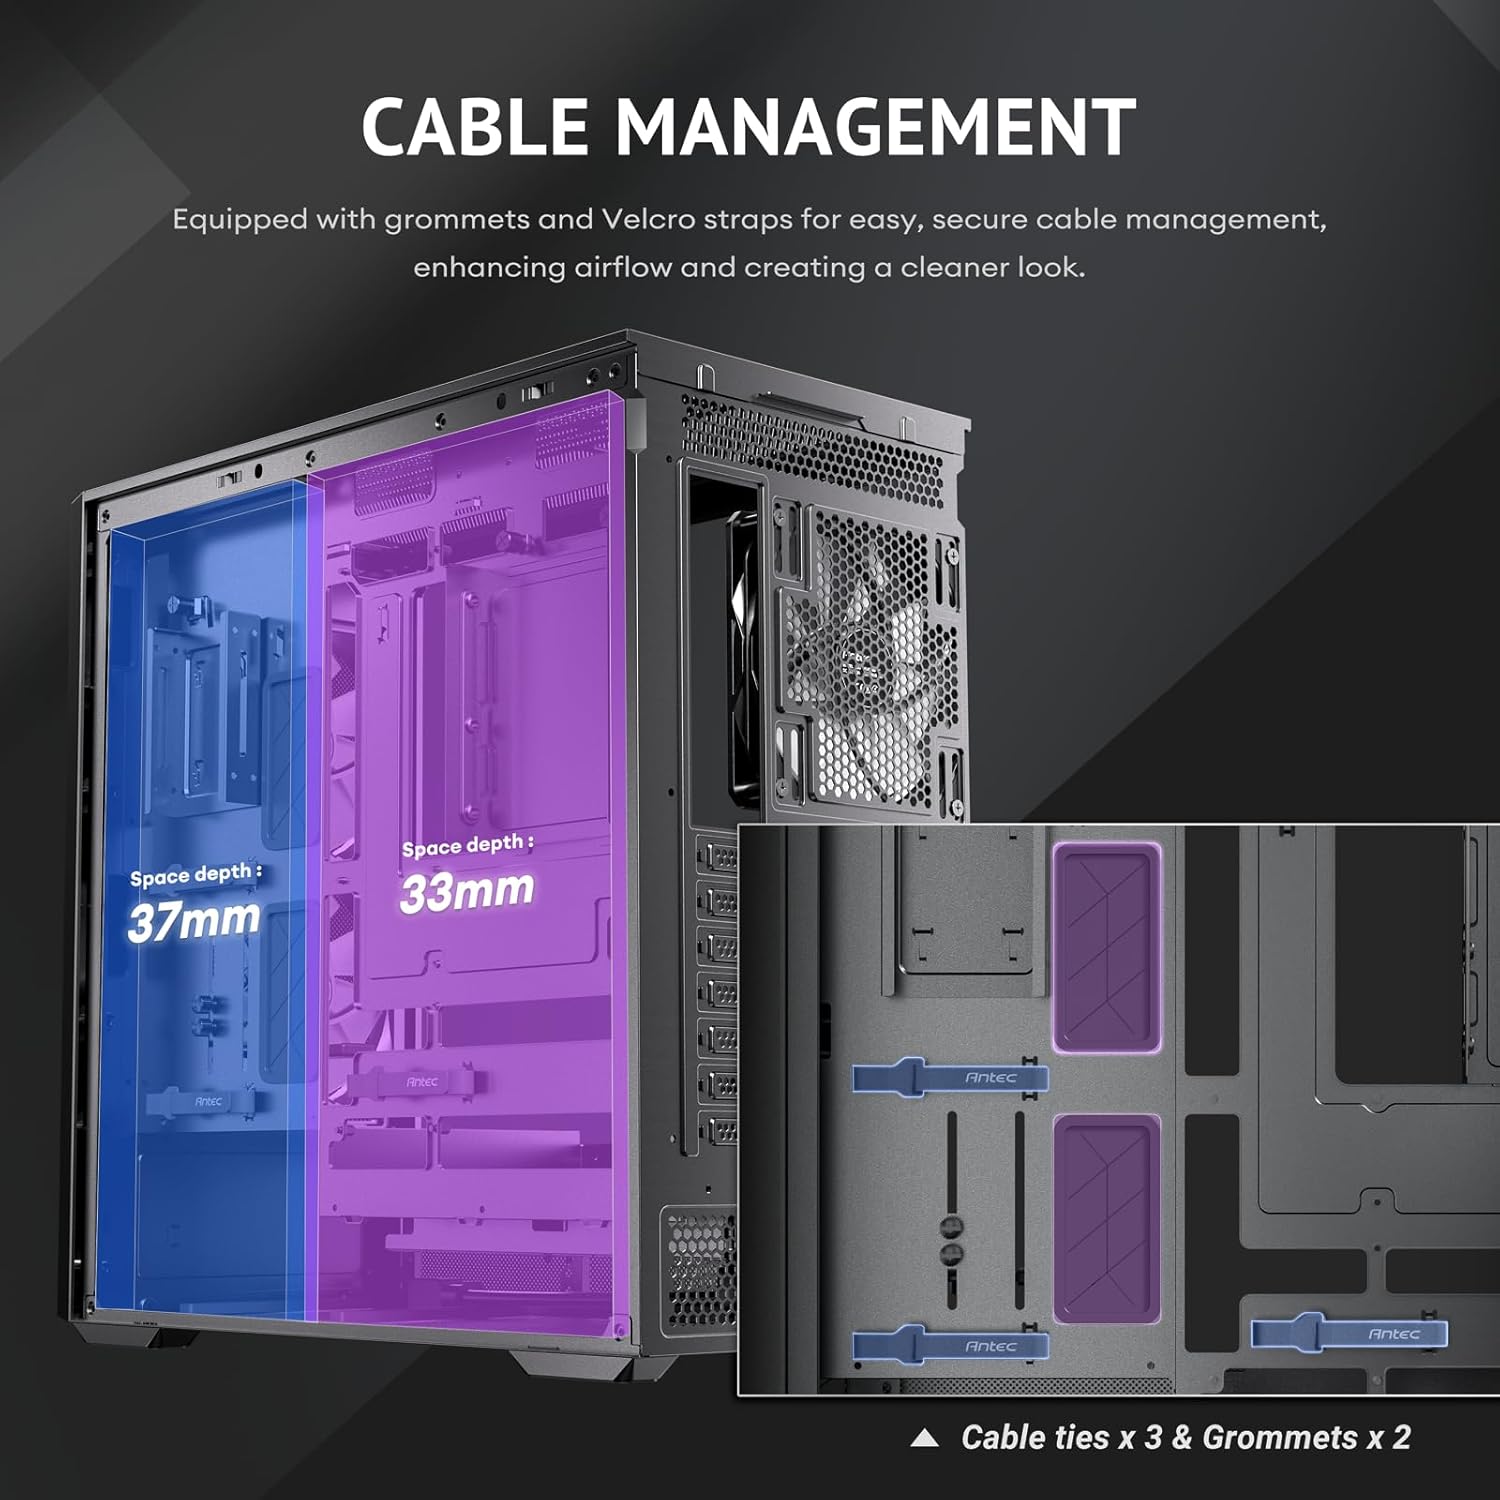
Image: A diagram illustrating the cable management features behind the motherboard tray, including space depth, cable ties, and grommets.
5. Операція
5.1 Увімкнення
After completing all installations and connections, ensure the power cable is securely plugged into the rear of the case and a power outlet. Press the power button located on the top I/O panel to start your system.
5.2 Функції панелі вводу/виводу
Верхня панель вводу/виводу забезпечує зручний доступ до основних портів та елементів керування:
- Кнопка живлення: Вмикає/виключає систему.
- Порти USB 3.0 (x2): Для підключення пристроїв USB 3.0.
- USB-C 10Gbps Port: For connecting USB-C devices with high-speed data transfer.
- Комбінований роз'єм для навушників/мікрофона: Для аудіовходу/виходу.
- Світлодіодна кнопка: Controls the lighting effects of the ARGB fans.

Зображення: Крупний план view of the top I/O panel, detailing the power button, USB 3.0 ports, USB-C 10Gbps port, headphone/mic combo jack, and LED control button.
5.3 Потік повітря та охолодження
The Antec Flux Rear case is designed with the F-LUX Platform for optimized airflow and cooling performance.
- Платформа F-LUX: Features a front-mounted PSU chamber that creates an unobstructed airflow path at the bottom of the case, enhancing GPU cooling.
- Multi-directional Vent Design: Incorporates extensive air intakes at the bottom, power supply chamber, lower sides, top, and a large-area mesh front panel to create a dedicated airflow channel.
- Попередньо встановлені вентилятори: The five pre-installed PWM fans are strategically placed to facilitate efficient air movement throughout the case.

Image: A diagram illustrating the 'Flow Luxury' F-LUX Platform, showing the internal airflow paths designed to enhance GPU cooling.

Image: A diagram detailing the 'Flux Airflow' system, indicating the positions and directions of the pre-installed fans within the PC case.
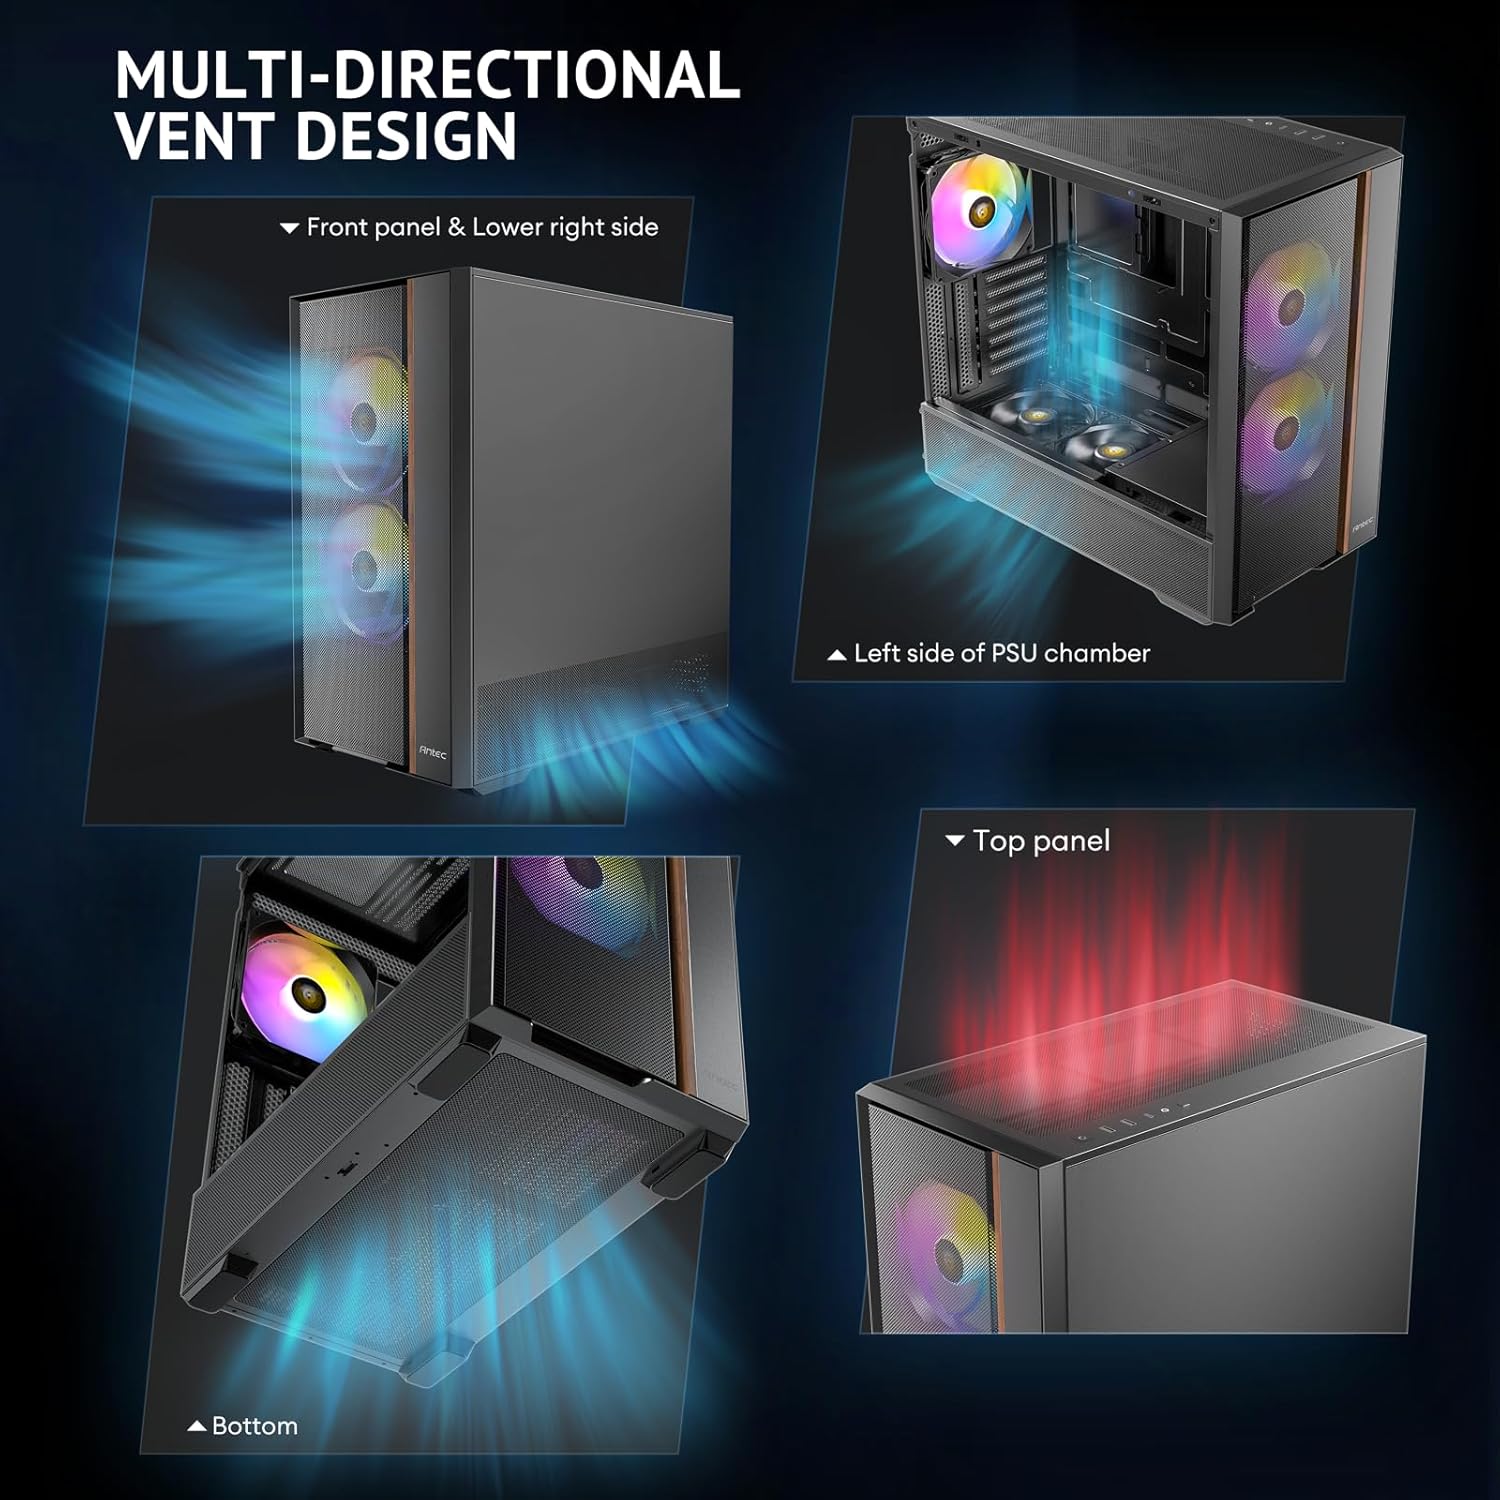
Image: Four separate images highlighting the multi-directional vent design, showing air intake points on the front panel, lower right side, left side of the PSU chamber, and the top panel.

Image: A diagram illustrating the optimized bottom air intake, specifically designed for efficient GPU cooling, with measurements for graphics card space and bottom clearance.
6. Технічне обслуговування
Регулярне технічне обслуговування допомагає забезпечити оптимальну продуктивність та довговічність корпусу вашого ПК.
- Пилові фільтри: Періодично знімайте та очищуйте пилові фільтри, розташовані спереду, зверху та знизу корпусу. Використовуйте стиснене повітря або м’яку щітку для видалення накопиченого пилу.
- Зовнішнє очищення: Протріть зовнішні поверхні м’якою, damp тканиною. Уникайте абразивних засобів для чищення або розчинників, які можуть пошкодити покриття.
- Прибирання салону: With the system powered off and unplugged, use compressed air to clear dust from internal components and fans.
7. Вирішення проблем
If you encounter issues with your PC case, refer to the following common problems and solutions:
- Система не вмикається:
- Ensure the PSU is properly installed and connected to the 13A extension cable.
- Verify that the power button cable is correctly connected to the motherboard's front panel header.
- Перевірте, чи справна розетка.
- Fans Not Spinning or No RGB:
- Confirm that fan power cables are securely connected to the motherboard or fan controller.
- Ensure ARGB cables are connected to the motherboard's ARGB header or a compatible controller.
- Press the LED button on the I/O panel to cycle through lighting modes or ensure it's enabled.
- USB-порти не працюють:
- Check if the USB 3.0 and USB-C cables from the front panel are correctly connected to the motherboard headers.
8. Гарантія та підтримка
Antec products are covered by a limited warranty. For specific warranty terms and conditions, please refer to the warranty card included with your product or visit the official Antec webсайт.
For technical support, product inquiries, or assistance with troubleshooting, please contact Antec customer service through their official webсайт або контактну інформацію, надану в документації до вашого продукту.


