1. Продукт закінчивсяview
The Anycubic 3D Printer Camera provides remote and real-time video supervision for your 3D printing process. It features ultra-clear resolution and is compatible with Anycubic Kobra 3, Kobra 2 Series, and Klipper printers. This camera allows you to monitor printing progress and identify potential issues from anywhere using the Anycubic APP.
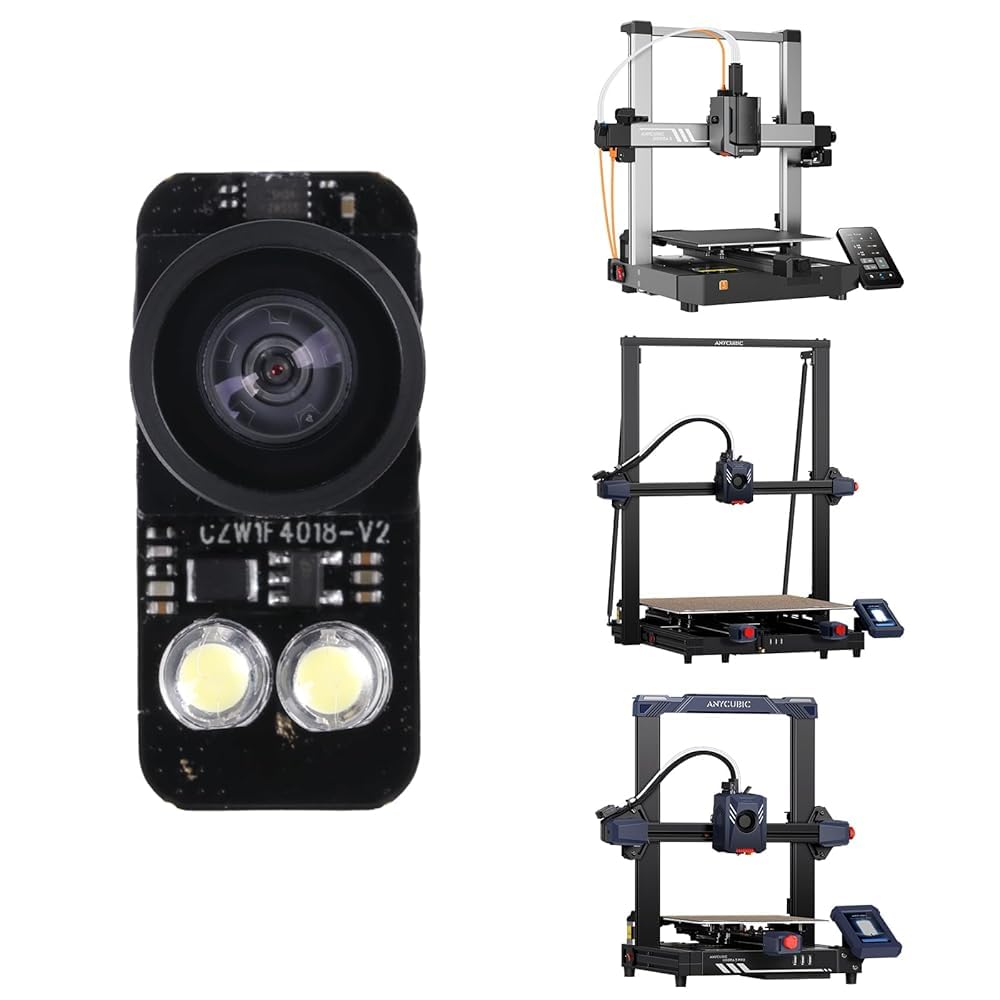
Image: The Anycubic 3D Printer Camera mounted on a 3D printer, with a smartphone showing the remote monitoring interface.
2. Вміст упаковки
Перевірте наявність усіх компонентів в упаковці:
- Anycubic 3D Printer Camera module
- кабель USB
- Кріпильний гвинт

Image: The camera module, USB cable, and a mounting screw, laid out next to the product packaging.
3. Технічні характеристики
| Особливість | Значення |
|---|---|
| FOV (Поле View) | 113° |
| роздільна здатність | 1920*1080 |
| Формат відео | MJPG/YUY2 |
| Фокусна відстань | 300 мм-∞ |
| Вхідний обtage | DC5V |
| Спосіб підключення | USB2.0 |
Note: Anycubic Kobra 2 series and Anycubic Kobra 3 products only display 480P resolution.

Image: A table detailing the technical specifications of the camera, including FOV, resolution, video format, focal length, input voltage, and connection method.
4. Сумісність
The Anycubic 3D Printer Camera is designed for broad compatibility with various Anycubic 3D printer models and systems:
- Anycubic Kobra 2 Pro
- Anycubic Kobra 2 Plus
- Anycubic Kobra 2 Max
- Anycubic Kobra 3
- Klipper Machine
- комп'ютер

Image: A visual representation of the camera's compatibility with different Anycubic Kobra 2 and Kobra 3 series printers, as well as Klipper machines and computers.
5. Налаштування та встановлення
5.1 Підключення камери
Installation is straightforward. Simply connect the camera to the USB interface of your compatible 3D printer. Ensure the camera is inserted into the left USB port if your printer has multiple ports.

Image: A six-step visual guide demonstrating how to assemble the camera housing and connect the camera to the left USB port of an Anycubic Kobra 3 printer.
5.2 DIY Frame Customization
The camera's frame is replaceable, allowing for customization. You can create and install unique frames to personalize your camera setup.

Image: Six different colored camera frames, demonstrating the DIY customization option for the camera.
6. Інструкція з експлуатації
6.1 Real-Time and Remote Monitoring
Utilize the Anycubic APP to view the printing status of your models in real-time. This feature allows you to monitor printing progress from any location, enabling timely identification and resolution of potential issues such as layer adhesion problems or filament jams. This helps improve printing success rates and conserves filament material.

Image: A sequence of six images showing the real-time monitoring of a 3D print, illustrating the layer-by-layer progression of the model.
6.2 Video Supervision and Time-lapse Photography
The camera supports remote video supervision and time-lapse photography. This functionality allows you to capture the entire printing process, providing valuable insights and enabling you to create engaging time-lapse videos of your prints.
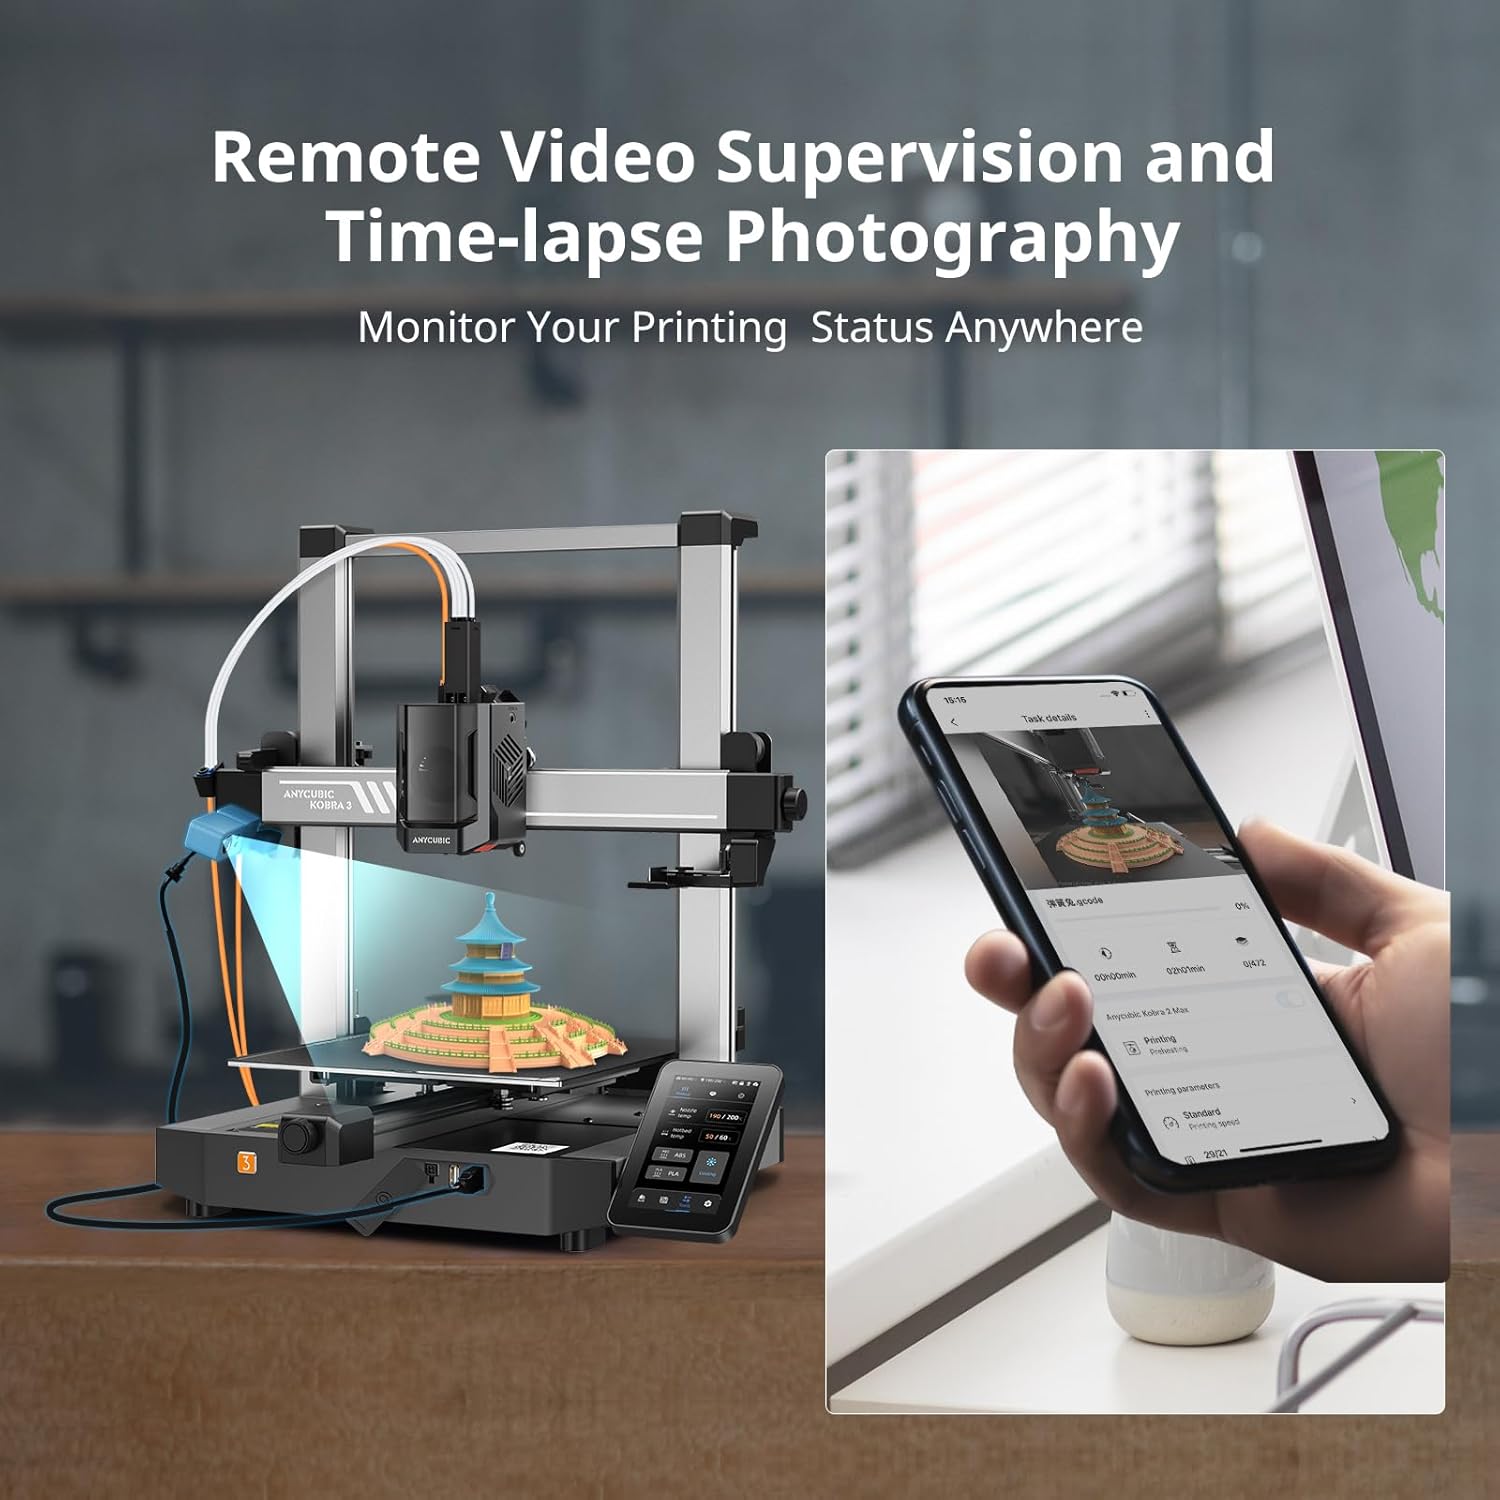
Image: The Anycubic 3D Printer Camera positioned above a 3D printer, with a smartphone displaying the remote monitoring and time-lapse photography options.
7. Вирішення проблем
If you encounter issues with your Anycubic 3D Printer Camera, consider the following common troubleshooting steps:
- Немає проблем із зображенням/з’єднанням: Ensure the USB cable is securely connected to both the camera and the correct USB port on the printer (left port if multiple are present). Verify that the printer and camera are powered on.
- Погана якість зображення: Check for any obstructions on the camera lens. Ensure adequate lighting in the printing area. Note that for Kobra 2 and Kobra 3 series, the display resolution is 480P.
- App Not Detecting Camera: Confirm that the Anycubic APP is updated to the latest version. Ensure your smartphone is connected to the internet and the printer is properly configured for network access.
- Laggy Video Feed: This can be due to network congestion or a weak Wi-Fi signal. Try moving your printer closer to your Wi-Fi router or reducing network traffic.
8. Технічне обслуговування
To ensure optimal performance and longevity of your Anycubic 3D Printer Camera, follow these maintenance guidelines:
- Очищення лінзи: Gently wipe the camera lens with a soft, lint-free cloth to remove dust or smudges. Avoid using abrasive materials or harsh chemicals.
- Перевірка кабелю: Periodically inspect the USB cable for any signs of wear, damage, or kinks. Replace the cable if necessary to prevent connection issues.
- Оновлення прошивки: Regularly check the Anycubic official website or APP for any available firmware updates for your camera. Keeping the firmware updated can improve performance and add new features.
9. Гарантія та підтримка
Each Anycubic 3D Printer Camera undergoes strict testing and is provided with excellent packaging before delivery. It comes with 3 months of after-sale product service і довічна технічна підтримка. For any questions or assistance, please contact Anycubic customer support.


