1. Вступ
This manual provides detailed instructions for the installation, operation, and maintenance of your ASHATA H110 MATX Motherboard. Please read this manual thoroughly before proceeding with installation to ensure proper setup and functionality.
2. Продукт закінчивсяview
The ASHATA H110 MATX Motherboard is designed to support LGA 1151 processors (6th, 7th, 8th, and 9th generation) and features dual-channel DDR4 memory support up to 64GB. It includes a PCIe 3.0 X16 slot, an M.2 interface, VGA, USB 3.0, and USB 2.0 ports, making it suitable for various computing needs.
- DDR4 SO DIMM: Supports dual-channel DDR4 SO DIMM memory, with a maximum capacity of 64GB.
- High-Speed M.2 Interface: Equipped with an M.2 disk interface supporting a transmission speed of 32GB/s, compatible with NGFF and NVME protocols.
- SATA3.0 Interface: Features SATA3.0 interfaces for strong compatibility and fast data reading speeds.
- Solid-State Capacitors: Utilizes all solid-state capacitors for stable performance and extended motherboard lifespan.
- Параметри розширення: Includes HD Multimedia Interface and VGA for display output.
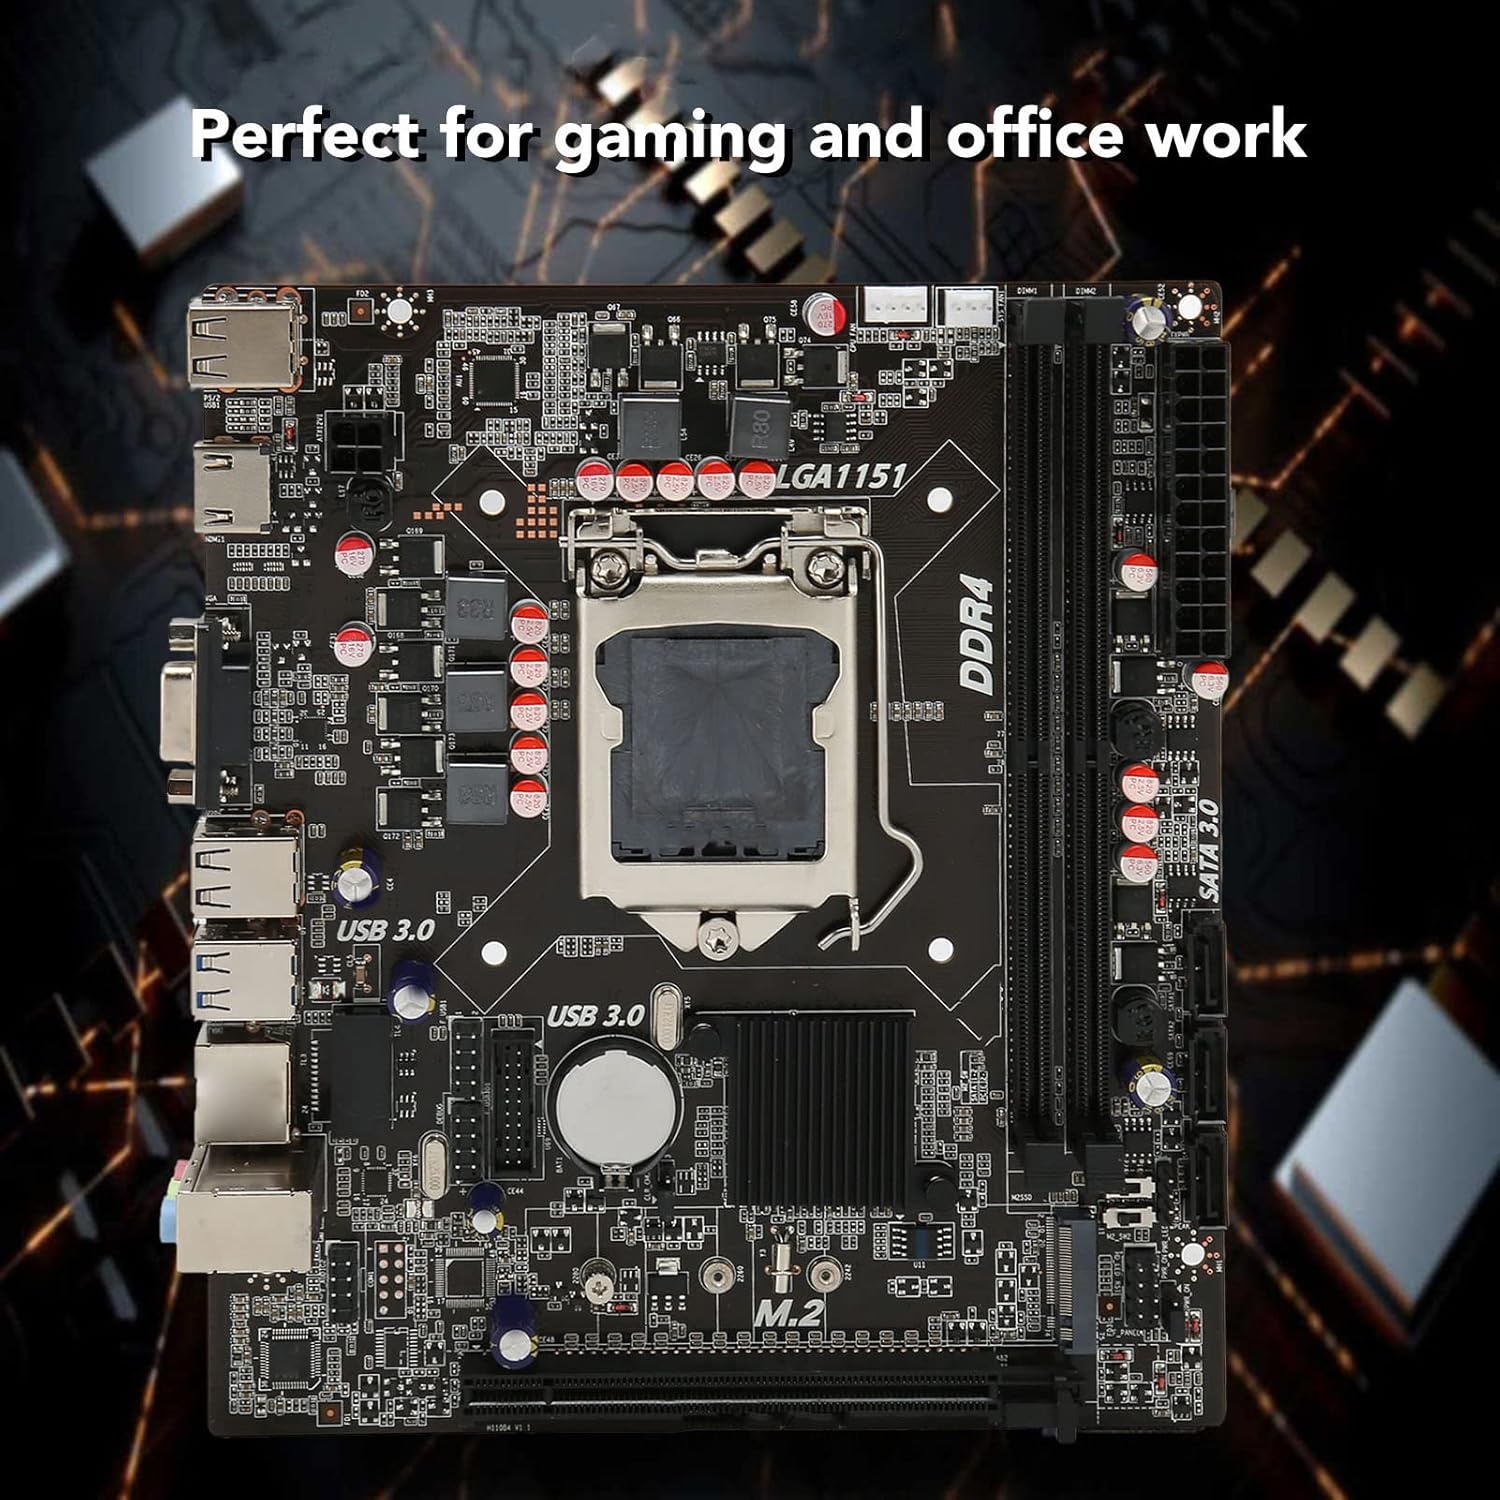
Image: The ASHATA H110 MATX Motherboard, showcasing its layout and components. This motherboard is suitable for both gaming and office work.
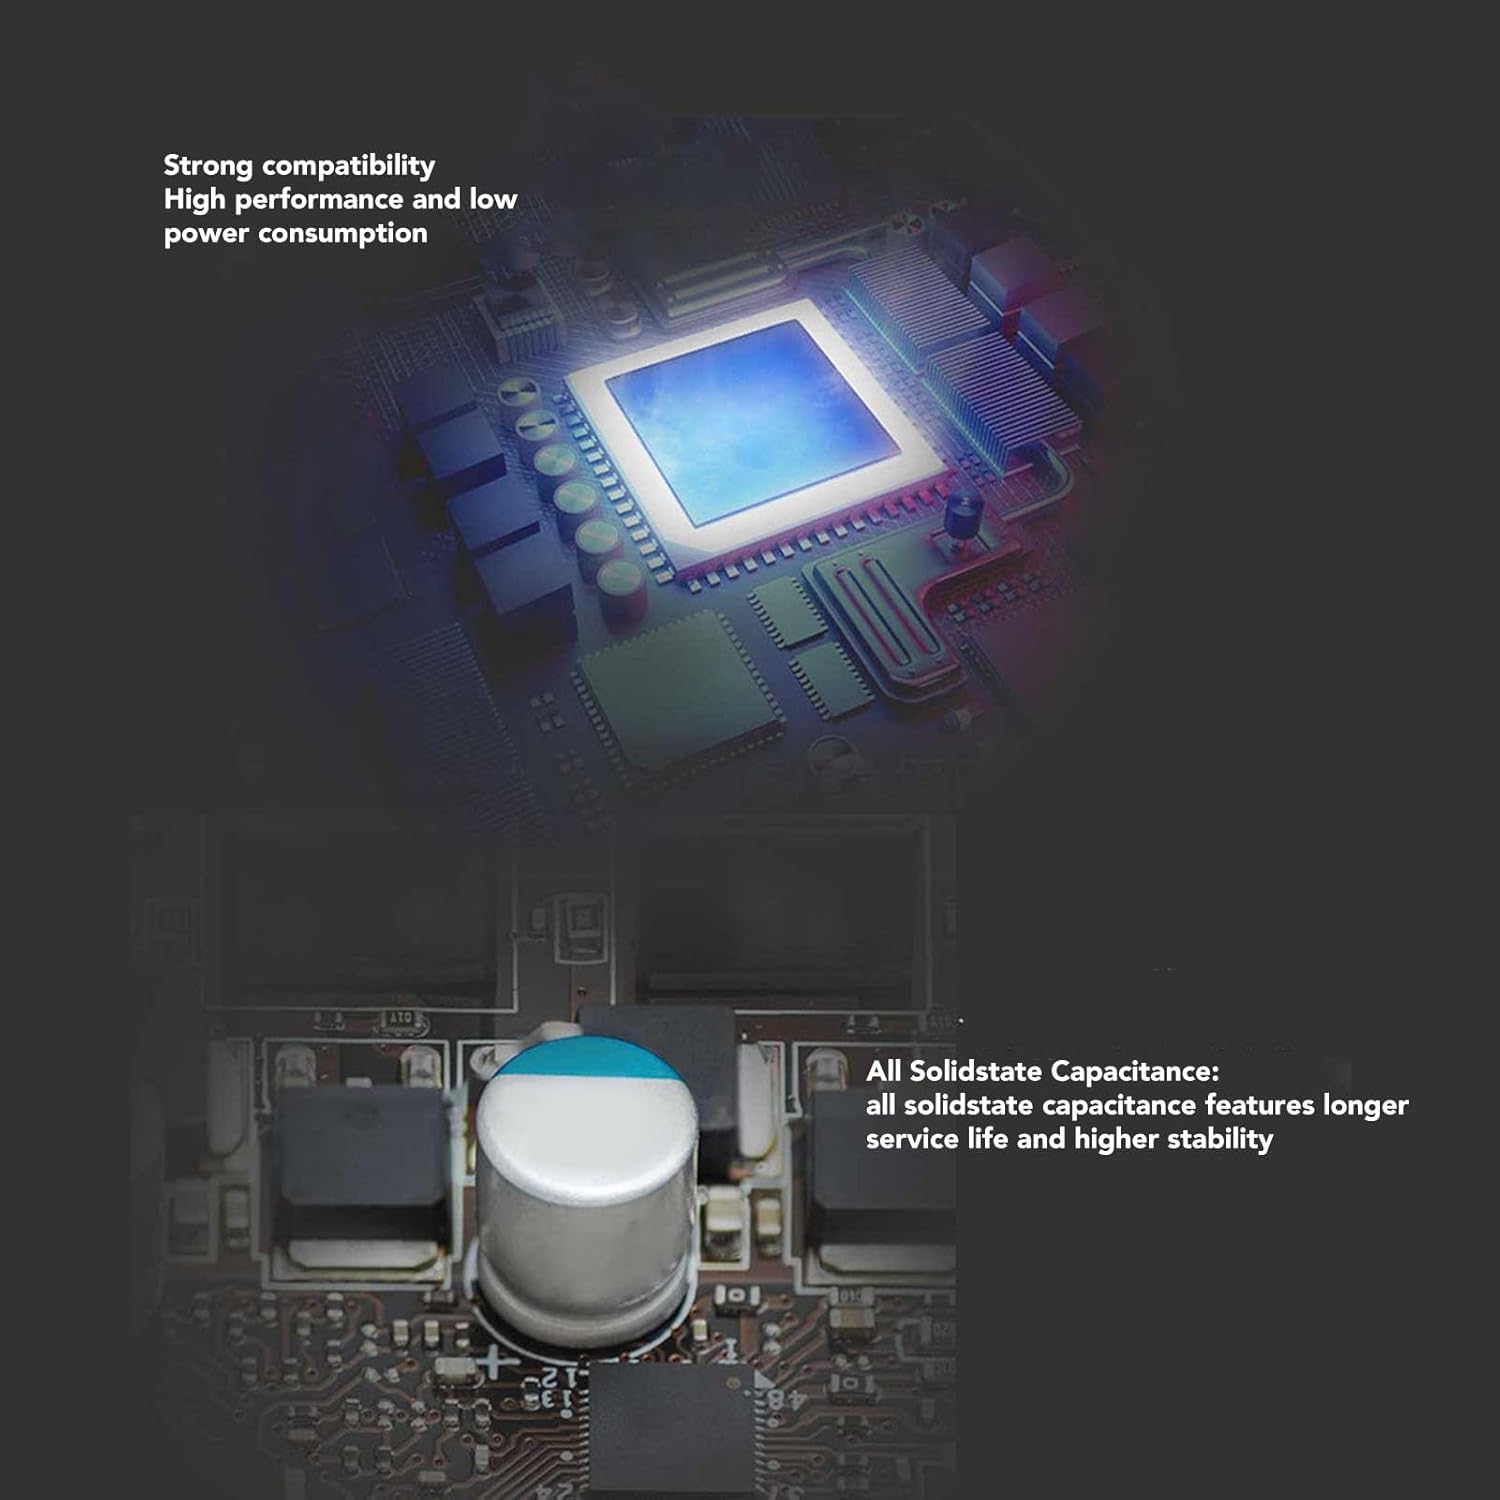
Зображення: Крупний план view of the motherboard highlighting solid-state capacitors, which contribute to stable performance and a longer service life.
3. Технічні характеристики
| Особливість | Деталь |
|---|---|
| Бренд | АШАТА |
| Номер моделі | ASHATAbdfoh2evgm |
| Чіпсет | H110 |
| Форм-фактор материнської плати | M ATX |
| Розміри (Д x Ш) | Approx. 190 x 170 mm (7.5 x 6.7 inches) |
| Гніздо ЦП | LGA 1151 |
| Сумісні процесори | Intel Core i3/i5/i7 (6th/7th/8th/9th Gen), Intel Core i9 (8th/9th Gen) |
| Тип пам'яті | 2 x DDR4 SO DIMM |
| Максимальна ємність пам'яті | 64 ГБ (2 x 32 ГБ) |
| Інтерфейс зберігання | 3 x SATA3.0, 1 x M.2 (NGFF, NVME protocol supported) |
| Слоти розширення | 1 x PCIe 3.0 X16 |
| Відеовихід | 1 x HD Multimedia Interface, 1 x VGA |
| USB порти | 2x USB 3.0, 4x USB 2.0 |
| Аудіо | ALC897 |
| Роз'єми живлення | 1 x 24-контактний, 1 x 4-контактний |
| Тип батареї | CR2032 Button Cell (integrated) |
| Ємність акумулятора | 240 мАг |
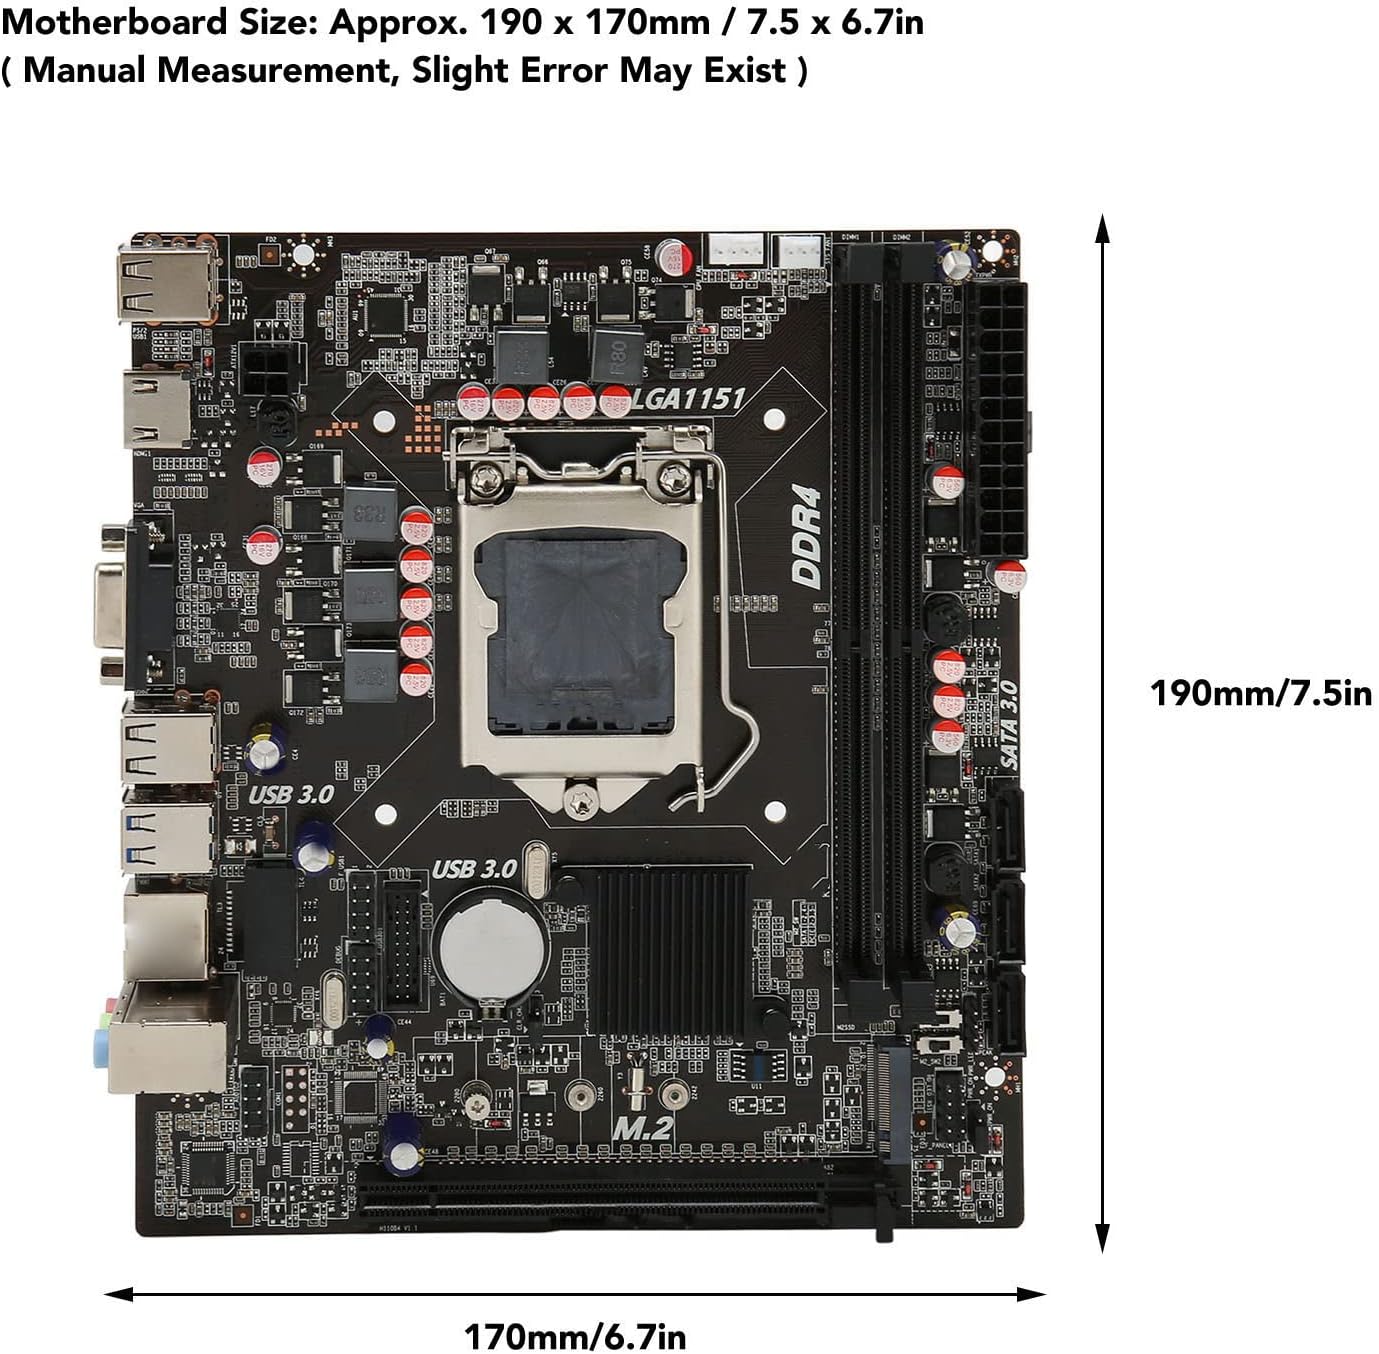
Image: Diagram illustrating the approximate dimensions of the ASHATA H110 MATX Motherboard (190 x 170 mm).
4. Налаштування та встановлення
Follow these steps carefully to install your ASHATA H110 MATX Motherboard and its components.
4.1 Розміщення материнської плати
Secure the motherboard within your computer case. Ensure all standoffs are correctly aligned and fastened to prevent short circuits.
4.2 Встановлення ЦП
Install the CPU into the LGA 1151 socket by following these instructions:

Image: Step-by-step guide for CPU installation on the LGA 1151 socket. This image shows how to open the socket, align the CPU, and secure it.
- Press down the wire buckle on the CPU socket and lift it upward. Не знімайте чорну кришку перед встановленням процесора.
- Observe the three bayonets (alignment notches) in the base of the motherboard socket and the three corresponding bayonets on the CPU itself (indicated by red circles in the figure). Carefully align the left side of the CPU with the socket's alignment points, then gently place the CPU into the socket.
- Once the CPU is seated, it should look as shown in the figure after installation.
- Put the wire buckle back down. At this point, the black cover will automatically eject. Remember not to remove the black cover before installing the CPU, as it protects the pins.
4.3 Component Connections
Connect all other components to their respective ports on the motherboard. Refer to the motherboard interface diagram for port identification.

Image: Detailed diagram of the ASHATA H110 MATX Motherboard interfaces, including CPU_FAN, DDR4 slots, USB ports, VGA, HD Multimedia Interface, LAN, Audio, M.2 interface, PCIe 3.0 X16, SATA 3.0, and front panel connectors.
- Джерело живлення: Connect the 24-pin main power connector and the 4-pin CPU power connector from your power supply unit (PSU) to the corresponding ports on the motherboard.
- Пам'ять (RAM): Insert DDR4 SO DIMM modules into the memory slots until they click into place.
- Пристрої зберігання даних: Connect SATA drives to the SATA3.0 ports. Install M.2 SSDs into the M.2 slot.
- Відеокарта: If using a dedicated graphics card, install it into the PCIe 3.0 X16 slot.
- Роз'єми передньої панелі: Connect the power LED, power switch, reset switch, and USB/audio headers from your case to the F-PANEL and other corresponding pins on the motherboard.
- Периферійні пристрої: Connect USB devices, display cables (VGA or HD Multimedia Interface), and audio devices to the rear I/O panel.
5. Інструкція з експлуатації
After completing the hardware installation, ensure all connections are secure before powering on your system.
- Початкове ввімкнення: Натисніть кнопку живлення на корпусі комп'ютера. Система має розпочати процес завантаження.
- Налаштування BIOS/UEFI: During startup, press the designated key (usually Del, F2, or F10) to enter the BIOS/UEFI setup utility. Here you can configure boot order, system time, and other advanced settings.
- Встановлення операційної системи: Встановіть бажану операційну систему із завантажувального USB-накопичувача або DVD-диска.
- Встановлення драйвера: After OS installation, install all necessary drivers for the motherboard chipset, graphics, audio, and network to ensure optimal performance.
6. Технічне обслуговування
Регулярне технічне обслуговування допомагає забезпечити довговічність та стабільну роботу вашої материнської плати.
- Видалення пилу: Періодично очищайте материнську плату та компоненти від пилу за допомогою стисненого повітря. Перед чищенням переконайтеся, що система вимкнена та відключена від мережі.
- Оновлення BIOS/UEFI: Перевірте виробника website for BIOS/UEFI updates. Update only if necessary and follow the instructions carefully.
- Оновлення драйверів: Keep your system drivers updated to ensure compatibility and performance.
- Умови навколишнього середовища: Operate the motherboard in a well-ventilated environment with stable temperature and humidity to prevent overheating and component degradation.
7. Вирішення проблем
У цьому розділі розглядаються поширені проблеми, з якими ви можете зіткнутися під час налаштування або роботи.
7.1 No Power / System Does Not Turn On
If the device cannot be turned on and the power indicator light is off:
- Перевірте підключення живлення: Ensure that the power supply unit (PSU) is connected to a working power outlet and that the 24-pin and 4-pin power connectors are securely attached to the motherboard.
- Verify PSU Functionality: Confirm that your power supply is functioning correctly. You can often tell if the CPU fan is spinning when the system attempts to power on. If the CPU fan does not spin, the PSU might be faulty or not properly connected.
- Підключення передньої панелі: Double-check that the power switch cable from your case is correctly connected to the F-PANEL header on the motherboard.
- Батарея CMOS: A dead CMOS battery can sometimes prevent boot-up. Consider replacing the CR2032 button cell battery if other troubleshooting steps fail.
7.2 Немає виводу на дисплей
- Підключення монітора: Ensure your monitor is correctly connected to the motherboard's VGA or HD Multimedia Interface port, or to your dedicated graphics card.
- Розсадка в RAM: Reseat the DDR4 memory modules. Incorrectly seated RAM is a common cause of no display.
- Відеокарта: If using a dedicated graphics card, ensure it is properly seated in the PCIe slot and has adequate power connected.
7.3 Нестабільність системи / Збої
- Перегрів: Ensure CPU cooler is properly installed and fans are working. Check for adequate case airflow.
- Проблеми з драйверами: Update all motherboard and component drivers to the latest versions.
- Тест пам'яті: Run a memory diagnostic tool to check for faulty RAM modules.
8. Гарантія та підтримка
For warranty information and technical support, please refer to the ASHATA official webабо зв’яжіться зі своїм продавцем.
- Запчастини: Інформація щодо наявності запасних частин наразі недоступна.
- Оновлення програмного забезпечення: Інформація щодо гарантованих оновлень програмного забезпечення наразі недоступна.
Для отримання додаткової допомоги, будь ласка, відвідайте ASHATA Brand Store.
