вступ
This manual provides detailed instructions for the setup, operation, and maintenance of your Gioteck SC3 Wireless Pro Controller. Designed for use with Nintendo Switch, PC, and mobile devices, this controller features programmable back buttons, customizable RGB lighting, and changeable magnetic thumb sticks for an enhanced gaming experience.
1. Налаштування
1.1 Вміст упаковки
- Gioteck SC3 Wireless Pro Controller
- USB-кабель для зарядки
- Additional Magnetic Thumb Sticks (if included)
- Посібник користувача (цей документ)
1.2 Заряджання контролера
Before initial use, fully charge the controller. Connect the supplied USB charging cable to the controller's charging port and the other end to a USB power source (e.g., Nintendo Switch dock, PC USB port, or USB wall adapter).
- Світлодіодний індикатор покаже стан зарядки.
- Повна зарядка зазвичай займає приблизно 2-3 години.
Зображення: Нижня частина view of the Gioteck SC3 controller, highlighting the USB-C charging port located between the two textured grips.
1.3 Сполучення з Nintendo Switch
- У головному меню Nintendo Switch виберіть Контролери, тоді Змінити захоплення/порядок.
- On the SC3 controller, press and hold the Кнопка сполучення (usually a small button on the top or back) for a few seconds until the LED indicators begin to flash rapidly.
- Once the controller is recognized by the Switch, the player LED(s) on the controller will illuminate solid, indicating successful pairing.
- Натисніть Кнопка для підтвердження.
Note: For subsequent uses, the controller should automatically reconnect to the last paired Switch console when powered on.
1.4 Connecting to PC/Mobile (Bluetooth)
- Ensure Bluetooth is enabled on your PC or mobile device.
- On the SC3 controller, press and hold the Кнопка сполучення for a few seconds until the LED indicators flash rapidly.
- On your PC/mobile device, navigate to Bluetooth settings and search for new devices.
- Select "Gioteck SC3" or similar from the list of available devices to pair.
- The controller's LED will become solid upon successful connection.
1.5 Installing Magnetic Thumb Sticks
The SC3 controller features changeable magnetic thumb sticks. To replace them:
- Gently pull the existing thumb stick straight up to remove it.
- Align the desired magnetic thumb stick with the base and gently push it down until it snaps into place.

Зображення: спереду view of the Gioteck SC3 controller, showcasing the magnetic thumb sticks and button layout.
2. Інструкція з експлуатації
2.1 Розкладка кнопок
The SC3 controller features a traditional button layout. Refer to the image below for button identification.

Зображення: Кутова передня частина view of the Gioteck SC3 controller, displaying the full button layout including face buttons, D-pad, analog sticks, and shoulder buttons.
- Лівий/правий аналогові джойстики: Для керування рухом та камерою.
- D-Pad: Спрямований вхід.
- Кнопки A/B/X/Y: Кнопки дій.
- Кнопки L/R/ZL/ZR: Плечові та спускові кнопки.
- Кнопки +/-: Start/Select equivalents.
- Кнопка "Додому: Returns to the console's home menu.
- Кнопка захоплення: Робить скріншоти.
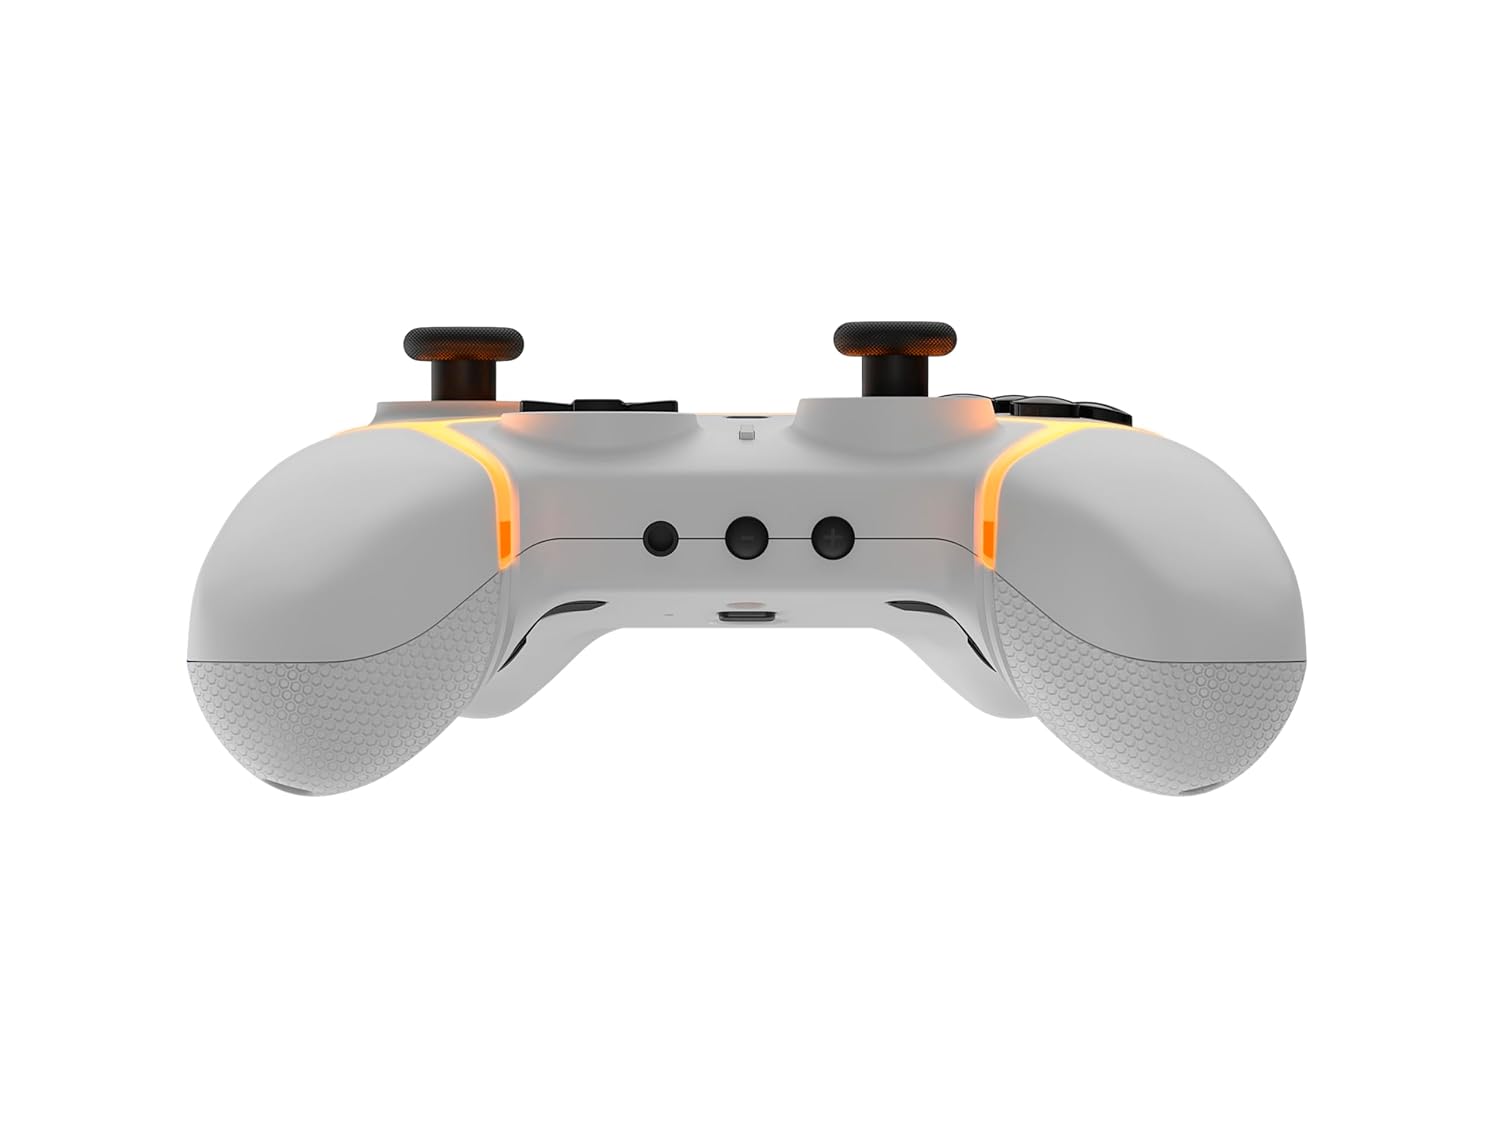
2.2 Програмовані кнопки «Назад»
The SC3 controller includes programmable back buttons (M1, M2, M3, M4) for custom assignments.

Зображення: Задня частина view of the Gioteck SC3 controller, clearly showing the four programmable back buttons (M1, M2, M3, M4) and textured grips.
Етапи програмування:
- Натисніть і утримуйте Кнопка програми (refer to diagram if available, usually a small button on the back) until the LED indicator flashes.
- Натисніть Кнопка "Назад". (M1, M2, M3, or M4) you wish to program. The LED will flash slowly.
- Натисніть Кнопка введення (e.g., A, B, X, Y, L, R, ZL, ZR, D-pad direction) you want to assign to the back button.
- Натисніть Кнопка програми again to save the assignment. The LED will stop flashing.
- Repeat for other back buttons as desired.
To clear a programmed button, follow steps 1-2, then press the Program Button again without pressing an input button.
2.3 Налаштування RGB-підсвічування
The controller features customizable RGB lighting. Specific instructions for changing colors or effects are typically found in the product's quick start guide or by pressing a dedicated button combination (e.g., Function + R3).
Consult the quick start guide included with your controller for precise button combinations to adjust RGB lighting.
2.4 Керування рухами
The SC3 controller supports motion controls, allowing for immersive gameplay in compatible Nintendo Switch titles. No special setup is usually required; motion controls activate automatically when supported by the game.
2.5 Audio Headset Jack
A 3.5mm audio headset jack is located on the controller for connecting compatible headsets. It includes dedicated mute and volume control buttons.
- Збільшення/зменшення гучності: Налаштуйте аудіовихід.
- Кнопка вимкнення звуку: Mute/unmute microphone input.

Зображення: Верх view of the Gioteck SC3 controller, highlighting the 3.5mm audio jack, volume controls, and mute button.
3. Технічне обслуговування
3.1 Очищення
Для очищення контролера використовуйте м’яку суху тканину. Для стійкого бруду злегкаampпромокніть тканину водою. Уникайте використання агресивних хімікатів, абразивних засобів для чищення або розчинників, оскільки вони можуть пошкодити покриття контролера та внутрішні компоненти.
- Do not immerse the controller in water or any other liquid.
- Перед заряджанням або підключенням пристроїв переконайтеся, що всі порти сухі.
3.2 Зберігання
Зберігайте контролер у прохолодному, сухому місці, подалі від прямих сонячних променів та екстремальних температур. Уникайте розміщення важких предметів на контролері, щоб запобігти пошкодженню.
3.3 Догляд за акумулятором
The controller contains a rechargeable battery. To prolong battery life:
- Уникайте частого повного розряджання акумулятора.
- Charge the controller regularly, even if not in use for extended periods (e.g., once every 3-6 months).
- Do not expose the controller to temperatures above 60°C (140°F).
4. Вирішення проблем
4.1 Контролер не підключається/не сполучається
- Перевірте батарею: Переконайтеся, що контролер достатньо заряджений.
- Повторна пара: Follow the pairing instructions in Section 1.3 or 1.4.
- Перешкоди: Move closer to the console/device and away from potential sources of wireless interference (e.g., Wi-Fi routers, other Bluetooth devices).
- Скидання контролера: Locate a small reset button (often a pinhole) on the back of the controller. Use a paperclip to press and hold it for a few seconds. Then attempt to re-pair.
- Update Console/Device Software: Ensure your Nintendo Switch, PC, or mobile device's operating system is up to date.
4.2 Buttons/Sticks Not Responding
- Повторна синхронізація: Від'єднайте та знову підключіть контролер.
- чистий: Переконайтеся, що навколо кнопок або джойстиків немає сміття.
- Test in another game/menu: Determine if the issue is specific to a game or system-wide.
- Скидання контролера: Perform a hard reset as described above.
4.3 Motion Controls Not Working
- Сумісність ігор: Verify that the game you are playing supports motion controls.
- Перекалібрувати: On Nintendo Switch, you can recalibrate motion controls in the system settings.
- Скидання контролера: Виконайте апаратне скидання.
5. Технічні характеристики
| модель: | Gioteck SC3 Wireless Pro Controller |
| Сумісність: | Nintendo Switch (Original, Lite, OLED), PC, Mobile Devices |
| Підключення: | Бездротовий Bluetooth |
| Розміри (прибл.): | 2.87 x 5.35 x 6.34 дюйми (7.29 x 13.59 x 16.1 см) |
| Вага (прибл.): | 10.6 унцій (300 грам) |
| Аудіороз'єм: | 3.5mm with mute and volume controls |
| Особливості: | Programmable back buttons, Magnetic thumb sticks, RGB lighting, Motion controls |
6. Інформація про гарантію
The Gioteck SC3 Wireless Pro Controller comes with a manufacturer's warranty. For specific details regarding warranty coverage, duration, and claims process, please refer to the warranty card included with your product or visit the official Gioteck webсайт.
Будь ласка, збережіть підтвердження покупки для гарантійних цілей.
7. Підтримка клієнтів
If you encounter any issues or have questions not covered in this manual, please contact Gioteck customer support. Contact information can typically be found on the product packaging or the official Gioteck webсайт.
Gioteck Official Webсайт: www.gioteck.com


