1. Важлива інформація з безпеки
Please read all safety warnings, instructions, illustrations, and specifications provided with this power tool. Failure to follow all instructions listed below may result in electric shock, fire, and/or serious injury.
Зберігайте всі попередження та інструкції для подальшого використання.
Note: The product description did not provide specific safety warnings. Always refer to the complete safety manual included with your product for detailed safety guidelines before operation.
2. Продукт закінчивсяview
The Parkside PRTA 20-Li C3 is a 20V cordless grass trimmer designed for efficient lawn edge trimming and light grass cutting. This tool offers cordless convenience for garden maintenance.

Малюнок 2.1: Закінченоview of the Parkside PRTA 20-Li C3 Cordless Grass Trimmer. This image shows the complete assembled unit, highlighting its ergonomic design and cordless nature.
2.1 Компоненти
- Головна ручка з вимикачем живлення
- Допоміжна ручка
- Телескопічний вал
- Триммерна головка з шпулькою
- Охоронна охорона
- Battery Slot (Battery and charger sold separately)

Figure 2.2: Illustration indicating that the battery and charger are not included with the grass trimmer and must be purchased separately.
3. Налаштування та складання
Before first use, ensure all components are present and undamaged. Follow these steps for assembly:
-
Attach the Protective Guard: Secure the protective guard to the trimmer head using the provided fasteners. Ensure it is firmly in place to prevent debris from being thrown towards the user.

Малюнок 3.1: Збільшений план view of the auxiliary handle and the protective guard attachment area, showing how the guard is positioned.
- Встановлення допоміжної ручки: Slide the auxiliary handle onto the shaft and adjust it to a comfortable working position. Tighten the locking mechanism.
-
Відрегулюйте довжину вала: Extend or retract the telescopic shaft to achieve an ergonomic working height. Lock the shaft in position.

Figure 3.2: The trimmer shaft can be adjusted for angle, allowing for comfortable operation and versatile trimming positions.
-
Вставте батарею: Ensure the battery (not included) is fully charged. Slide the battery into the battery slot on the main handle until it clicks into place.

Figure 3.3: Detail of the main handle and the battery slot, where a 20V battery (sold separately) is inserted to power the trimmer.
4. Інструкція з експлуатації
4.1 Запуск тримера
- Ensure you are wearing appropriate personal protective equipment (PPE), including safety glasses, gloves, and sturdy footwear.
- Міцно тримайте тример обома руками, однією за основну ручку, а іншою за допоміжну.
- Натисніть кнопку блокування запобіжника (якщо є), а потім натисніть на курок, щоб запустити двигун.
4.2 Техніка обрізки
- Повільно та рівномірно переміщуйте тример по ділянці, яку потрібно підстригти.
- Maintain a slight angle to the ground for effective cutting.
- Avoid hitting hard objects like stones, fences, or concrete, as this can damage the trimmer line and head.
- The cutting width is approximately 25 cm. Plan your passes accordingly.
4.3 Зупинка тримера
Release the trigger switch to stop the motor. The trimmer line will cease rotation.
5. Технічне обслуговування
5.1 Очищення
- Завжди виймайте акумулятор перед чищенням або будь-яким технічним обслуговуванням.
- Clean the trimmer head and protective guard after each use to remove grass clippings and debris. Use a damp тканину; не використовуйте агресивні хімікати.
- Ensure ventilation slots are clear of obstructions to prevent overheating.
5.2 Заміна котушки з ліскою тримера
When the trimmer line becomes too short or breaks, it needs to be replaced. This model uses a specific type of line spool.
- Вийміть батарею з тримера.
- Locate the spool cover on the trimmer head.
- Press the tabs or twist the cover to remove it.
- Зніміть стару котушку.
- Insert a new, pre-wound trimmer line spool, ensuring the line feeds through the eyelet.
- Replace the spool cover, ensuring it clicks securely into place.
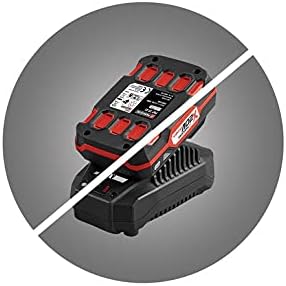

Figure 5.1: Images of replacement trimmer line spools, indicating the type of spool required for this model.


Малюнок 5.2: Верх і низ views of the trimmer head, showing the line exit points and the spool housing.
6. Вирішення проблем
This section provides solutions to common issues you might encounter with your grass trimmer.
| проблема | Можлива причина | Рішення |
|---|---|---|
| Тример не запускається | Акумулятор вставлено неправильно або розряджено. Запобіжний вимикач не задіяний. | Ensure battery is fully charged and correctly inserted. Press safety lock-off button before squeezing trigger. |
| Волосінь тримера не подається | Spool tangled or empty. Debris in trimmer head. | Remove battery, then remove spool cover and check for tangles or replace spool. Clear any debris from the trimmer head. |
| Знижена продуктивність різання | Trimmer line worn or too short. | Replace the trimmer line spool. |
| Надмірна вібрація | Damaged trimmer head or unbalanced line. | Inspect trimmer head for damage. Ensure line is properly wound and balanced. If problem persists, seek professional service. |
7. Технічні характеристики
| Особливість | Специфікація |
|---|---|
| Назва моделі | PRTA 20-Li C3 |
| Номер моделі | IAN-100375563 |
| Бренд | Parkside |
| Джерело живлення | Battery-powered (20V compatible) |
| Ширина різання | 25 Сантиметри |
| Розміри продукту (Д x Ш x В) | 5 х 2 х 12.7 см |
| Вага товару | 2 кілограма |
| Колір | Зелений, Чорний |
| Потрібна збірка | немає |
8. Гарантія та підтримка
Information regarding product warranty and customer support was not available in the provided product details. Please refer to the official Parkside documentation included with your purchase or visit the manufacturer's website for warranty terms, registration, and support contact information.