1. Вступ
This manual provides detailed instructions for the installation, operation, and maintenance of your Xigmatek Aero Black Micro-ATX Case. Please read this manual thoroughly before beginning assembly to ensure proper setup and to maximize the lifespan of your components.
2. Продукт закінчивсяview
The Xigmatek Aero is a compact Micro-ATX PC case designed for efficient component housing and airflow. It features a simple and stylish design, incorporating a tempered glass front panel and an acrylic side panel for visibility of internal components.
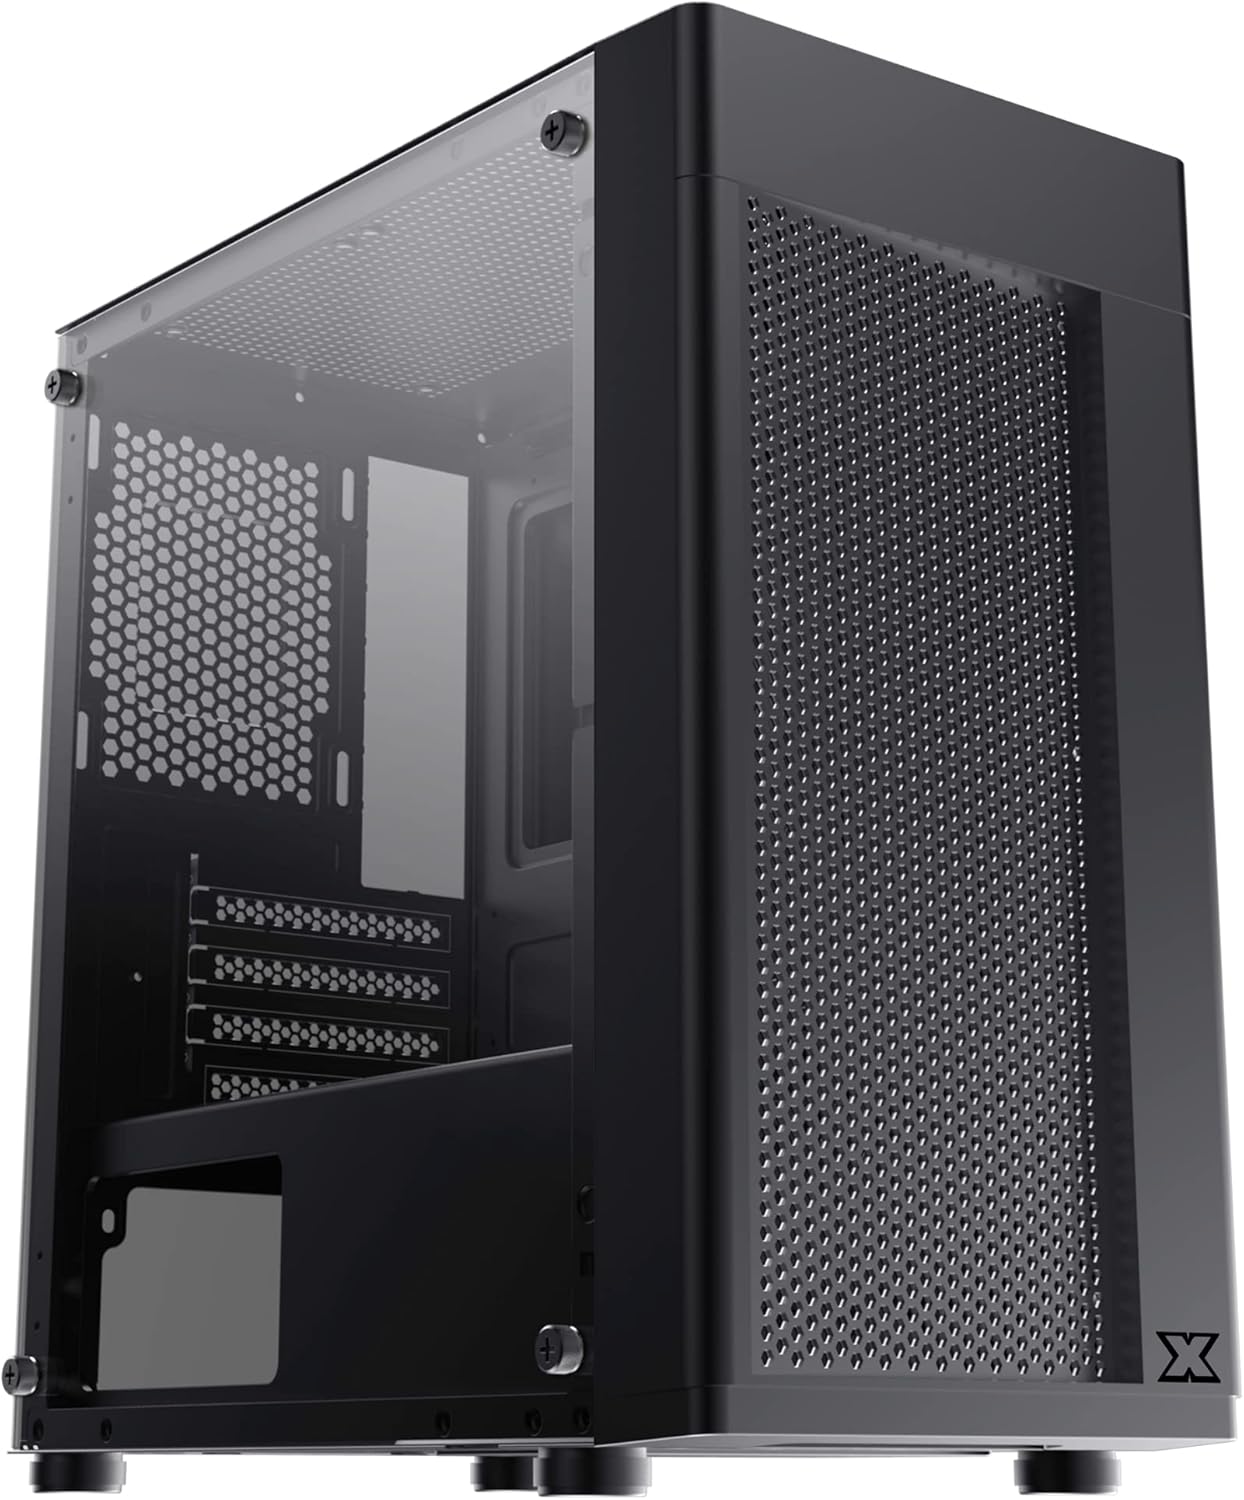
Рисунок 2.1: Передній лівий view of the Xigmatek Aero Black Micro-ATX Case, showcasing the tempered glass front panel and acrylic side panel.
3. Ключові характеристики
- Бічна панель із загартованого скла: Забезпечує чітке view внутрішніх компонентів.
- Bottom Mounted PSU: Dedicated compartment for power supply unit, aiding in thermal management and cable routing.
- Mesh Design Front Panel: Enhances airflow for improved cooling performance.
- Просте управління кабелем: Designed with routing options and a PSU shroud to facilitate neat cable organization.
- Compact Micro-ATX Form Factor: Optimized for smaller builds while maintaining compatibility with standard components.
4. Вміст упаковки
Please verify that all items are present in the package before proceeding with installation:
- Xigmatek Aero Black Micro-ATX Case
- Accessory Box (containing screws, standoffs, zip ties)
- Посібник користувача (цей документ)
5. Налаштування та встановлення
Follow these steps carefully for proper installation of your PC components into the Xigmatek Aero case.
5.1 Підготовка справи
- Поставте корпус на рівну, стійку поверхню.
- Carefully remove the tempered glass side panel by unscrewing the four thumb screws. Set the panel aside on a soft, non-abrasive surface to prevent scratches.
- Remove the rear side panel (solid metal panel) by unscrewing the two thumb screws at the back and sliding it off. This provides access for cable management.
Малюнок 5.1: Сторона view of the case, showing the tempered glass panel secured by four thumb screws.
5.2 Встановлення блоку живлення (БП)
- Locate the PSU mounting area at the bottom rear of the case, within the PSU shroud.
- Slide your PSU into the designated slot from the rear of the case. Ensure the PSU fan faces downwards (if the case has a bottom vent) or upwards, depending on your cooling preference and PSU design.
- Закріпіть блок живлення гвинтами ззаду корпусу.
- Route necessary PSU cables through the cutouts in the PSU shroud to the main compartment.

Малюнок 5.2: Внутрішній view highlighting the PSU shroud and cable routing options.
5.3 Встановлення материнської плати
- Встановіть екран вводу/виводу (якщо є) у задній отвір корпусу.
- Align your Micro-ATX motherboard with the pre-installed standoffs. Ensure the screw holes on the motherboard match the standoffs.
- Закріпіть материнську плату за допомогою наданих гвинтів. Не перетягуйте.

Малюнок 5.3: Внутрішній view of the case, showing the motherboard tray and standoff locations.
5.4 Встановлення накопичувача
The case supports 3.5-inch HDDs and 2.5-inch SSDs.
- 3.5-дюймовий жорсткий диск: Locate the drive cage under the PSU shroud. Slide the HDD into the drive bay and secure with screws. Note: Some users find it easier to remove the drive caddy by unscrewing from the underside of the case first.
- 2.5-дюймовий твердотільний накопичувач: SSDs can typically be mounted on dedicated brackets behind the motherboard tray or on top of the PSU shroud. Secure with screws.
5.5 Відеокарта та плати розширення
- Remove the necessary expansion slot covers from the rear of the case. These are break-off covers, so bend them carefully until they detach.
- Insert your graphics card or other expansion cards into the appropriate PCIe slots on your motherboard.
- Закріпіть карти гвинтами.

Малюнок 5.4: Задня частина view of the case, showing expansion slots and I/O shield opening.
5.6 Fan and Cooling Installation
The Xigmatek Aero supports multiple fan configurations for optimal airflow.
- Спереду: Up to 2x 120mm or 140mm fans. Can also support a 240mm AIO liquid cooler.
- Вгорі: Up to 2x 120mm fans.
- задній: 1x 120-мм вентилятор.
Install fans by aligning them with the screw holes and securing them with fan screws. Pay attention to airflow direction (intake vs. exhaust).
5.7 Організація кабелів
Використовуйте вирізи та точки кріплення за лотком материнської плати для прокладання та закріплення кабелів. Це покращує потік повітря та естетику.

малюнок 5.5: View from the rear of the motherboard tray, showing space for cable routing.
5.8 Підключення передньої панелі
Connect the front panel cables (USB 3.0, USB 2.0, Audio, Power LED, HDD LED, Power Switch, Reset Switch) to the corresponding headers on your motherboard. Refer to your motherboard manual for exact pin layouts.

Малюнок 5.6: Верх view of the case, illustrating the front I/O ports including USB 3.0 and audio jacks.
5.9 Остаточне складання
- Після встановлення всіх компонентів та прокладання кабелів, знову прикріпіть задню бічну панель.
- Carefully reattach the tempered glass side panel and secure it with the four thumb screws.
6. Експлуатаційні міркування
To ensure optimal performance and longevity of your system:
- Потік повітря: Ensure proper fan configuration for intake and exhaust to maintain good internal temperatures. The mesh front panel is designed for excellent air intake.
- Розміщення: Place the PC case on a hard, flat surface to allow adequate airflow to the bottom-mounted PSU and any bottom intake fans. Avoid placing it on carpet.
7. Технічне обслуговування
Regular maintenance helps preserve your system's performance and extends its lifespan:
- Очищення від пилу: Periodically clean dust from the case interior and fan filters. The top panel features a magnetic dust filter for easy removal and cleaning.
- Зовнішнє очищення: Використовуйте м'який, damp cloth to clean the exterior surfaces. Avoid abrasive cleaners. For the tempered glass and acrylic panels, use a microfiber cloth and a gentle glass cleaner.
8. Вирішення проблем
Якщо під час або після складання у вас виникли проблеми, зверніть увагу на наступне:
- Система не вмикається:
- Ensure all PSU cables are securely connected to the motherboard and components.
- Перевірте, чи правильно підключено кабель вимикача живлення на передній панелі до роз'єму материнської плати.
- Check the PSU switch is in the 'ON' position.
- Вентилятори не обертаються:
- Confirm fan cables are properly connected to motherboard fan headers or a fan controller.
- Поганий потік повітря/Високі температури:
- Check fan orientation (intake/exhaust).
- Ensure dust filters are clean.
- Переконайтеся, що жодні кабелі не перешкоджають потоку повітря.
9. Технічні характеристики
| Особливість | Деталь |
|---|---|
| Номер моделі | EN46584 |
| Форм-фактор | Micro-ATX Tower |
| Розміри (Д x Ш x В) | 34.5 х 20 х 29 см |
| вага | 3.53 кг |
| матеріал | Tempered Glass, Acrylic, Steel |
| Сумісність материнської плати | Мікро ATX, Mini-ITX |
| Монтаж блоку живлення | Нижнє кріплення |
| Привідні відсіки | 1x 3.5" HDD, 2x 2.5" SSD (or 2x 3.5" HDD, 1x 2.5" SSD depending on configuration) |
| Слоти розширення | 4 |
| Опора вентилятора (передня) | 2x 120 мм / 140 мм |
| Підтримка вентилятора (зверху) | 2x 120 мм |
| Опора вентилятора (задня) | 1x 120 мм |
| Опора радіатора (передня) | До 240 мм |
| Передні порти вводу-виводу | 1x USB 3.0, 2x USB 2.0, HD Audio (Mic & Headphone) |
10. Гарантія та підтримка
Щоб отримати інформацію про гарантію та технічну підтримку, зверніться до офіційного представника Xigmatek. webсайт або зверніться до місцевого продавця. Зберігайте чек про покупку для гарантійних випадків.


