
1. Вступ
Thank you for choosing the HOFTRONIC Esto 2-Light GU10 Black LED Spotlight. This product is designed for indoor use, providing adjustable lighting with two GU10 LED bulbs. Constructed from high-quality aluminum, this spotlight offers a modern aesthetic and reliable performance. Please read this manual carefully before installation and use to ensure safe and optimal operation.
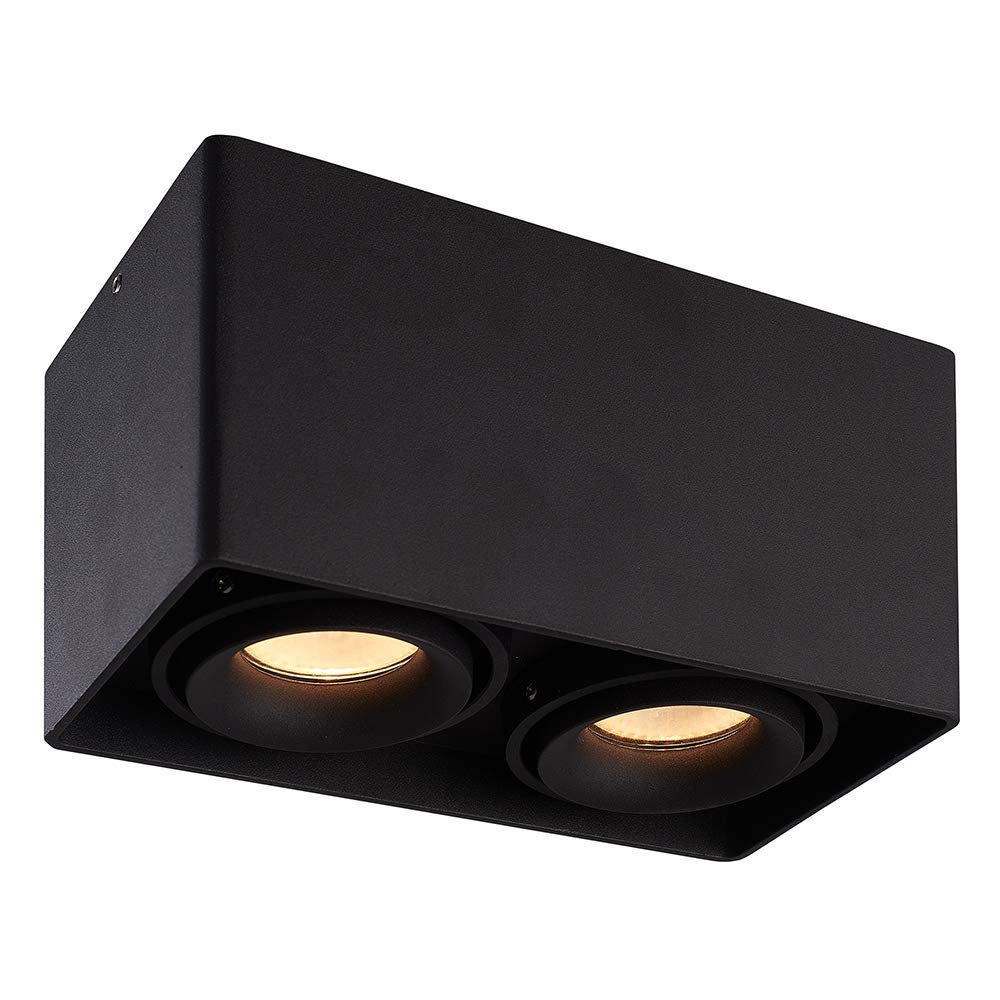
Image: The HOFTRONIC Esto 2-Light GU10 Black LED Spotlight installed on a ceiling, providing illumination in a modern interior setting.
2. Техніка безпеки
- Always disconnect the main power supply before attempting any installation, maintenance, or bulb replacement.
- Installation should be performed by a qualified electrician to ensure compliance with local electrical codes and safety standards.
- This product is rated IP20 and is suitable for використання тільки в приміщенні. Do not expose to moisture or direct water.
- Переконайтеся, що обtage supply matches the product's requirements (230V AC).
- Не перевищуйте максимальну потужністьtage of 35 Watts per GU10 LED bulb.
- Забезпечте належну вентиляцію навколо приладу, щоб запобігти перегріву.
- Do not cover the fixture with insulating material unless specifically designed for it.
3. Зміст коробки
Будь ласка, перевірте наявність та цілісність усіх компонентів, перш ніж продовжувати встановлення.

Image: Contents of the product box, including the spotlight fixture and mounting hardware.
- 1x HOFTRONIC Esto Double Black LED Ceiling Spot Fixture
- 1x шестигранний ключ
- 4 гвинтів
- 4x шайби
- 4 шт
4. Налаштування та встановлення
Follow these steps for safe and correct installation of your LED spotlight.
- Підготовка до встановлення: Переконайтеся, що основне живлення зони встановлення вимкнено автоматичним вимикачем.
- Позначте точки буріння: Position the fixture on the ceiling at the desired location. Use the mounting holes on the base of the fixture to mark the drilling points. Refer to the diagram below for mounting dimensions.
- Свердлити отвори: Drill holes at the marked points. Insert the provided wall plugs into the drilled holes.
- Підключіть проводку: Open the terminal cover on the fixture. Carefully connect the electrical wires from your ceiling to the terminal block inside the fixture. Ensure correct connections: Live (L), Neutral (N), and Earth (⌀). The cable inlet supports a maximum diameter of 12mm.
- Встановити світильник: Align the fixture's mounting holes with the wall plugs. Secure the fixture to the ceiling using the provided screws and washers. Do not overtighten.
- Insert GU10 Bulbs: Insert two GU10 LED bulbs (not included) into the lamp holders. Ensure they are securely twisted into place. Do not exceed 35 Watts per bulb.
- Відновлення живлення: Once installation is complete and all connections are secure, restore the main power supply.

Image: Detailed diagram of the spotlight's base with mounting hole dimensions (69mm x 69mm spacing, 4mm diameter holes, 13mm edge distance, max 12mm cable inlet).
5. Інструкція з експлуатації
The HOFTRONIC Esto spotlight is designed for simple operation.
- Увімкнення/вимкнення живлення: Control the spotlight using your standard wall light switch.
- Налаштувати напрямок світла: The GU10 fittings are tiltable, allowing you to adjust the light direction by up to 30 degrees. Gently pivot the inner lamp holders to direct the light as desired.

Image: Illustration of the adjustable light direction, demonstrating the 30-degree tilt capability of the GU10 fittings.
6. Технічне обслуговування
Regular maintenance will help prolong the life and appearance of your spotlight.
- Прибирання: Ensure the power is off and the fixture is cool before cleaning. Wipe the exterior of the spotlight with a soft, dry, or slightly damp тканиною. Не використовуйте абразивні засоби для чищення, розчинники або агресивні хімікати, оскільки вони можуть пошкодити покриття.
- Заміна лампи:
- Вимкніть живлення світильника.
- Allow the bulb to cool completely if it has been recently in use.
- Gently push the GU10 bulb into its fitting and twist it counter-clockwise to remove.
- Insert a new GU10 LED bulb (max 35W) by pushing it into the fitting and twisting clockwise until secure.
- Відновити живлення.
7. Вирішення проблем
Якщо у вас виникли проблеми з прожектором, зверніться до наступних поширених проблем та рішень:
- Світло не вмикається:
- Перевірте, чи увімкнено основне живлення.
- Ensure the wall switch is in the 'on' position.
- Verify that the GU10 bulbs are correctly inserted and not faulty.
- Inspect wiring connections for looseness or damage (ensure power is off before inspection).
- Мерехтіння світла:
- Ensure GU10 bulbs are fully seated in their sockets.
- Try replacing the bulb to rule out a faulty bulb.
- Перевірте наявність нещільних з'єднань проводів (при вимкненому живленні).
- Fixture feels hot:
- Confirm that the installed GU10 bulbs do not exceed the maximum wattage 35 Вт.
- Ensure there is no obstruction preventing proper heat dissipation.
Якщо проблеми не зникають, зверніться до служби підтримки клієнтів або до кваліфікованого електрика.
8. Технічні характеристики
| Бренд | ГОФТРОНІК |
| Номер моделі | 446496 |
| Колір | чорний |
| матеріал | Алюміній |
| Стиль | Сучасний |
| Особливе використання | Тільки для використання в приміщенні |
| Джерело живлення | 230В змінного струму |
| Тип лампочки | LED |
| томtage | 230 вольт (змінного струму) |
| Макс Ватtagе (на лампочку) | 35 Вт |
| Основа лампи | GU10 |
| Етикетка енергоефективності | A+ |
| Тип монтажу | Стельовий монтаж |
| Вага продукту | 5 грамів |
| Розміри (Д x Ш x В) | 187 мм x 94 мм x 105 мм |
| Рейтинг IP | IP20 |

Image: Overall dimensions of the HOFTRONIC Esto 2-Light GU10 Black LED Spotlight.
9. Гарантія
This HOFTRONIC product comes with a Гарантія 3 рік, reflecting our commitment to quality and durable construction. The robust aluminum enclosure ensures a long lifespan for your ceiling light.

Image: Warranty information, indicating a 3-year warranty and durable build quality.
10. Підтримка
For further assistance, technical support, or warranty claims, please contact your retailer or the HOFTRONIC customer service department. Refer to your purchase documentation for contact details.