вступ
Дякуємо за покупкуasing the MEIKEE 20W LED PIR Motion Sensor Security Floodlight. This manual provides essential information for the safe installation, operation, and maintenance of your new floodlight. Please read these instructions carefully before use and retain them for future reference.
Важливі інструкції з безпеки
- Завжди відключайте живлення перед встановленням або обслуговуванням.
- Встановлення має виконувати кваліфікований електрик або відповідно до місцевих електротехнічних норм.
- Переконайтеся, що блок живлення обtage matches the product specifications (85-265VAC).
- Не дивіться безпосередньо на світлодіодне джерело світла, коли воно увімкнене, оскільки це може пошкодити очі.
- Do not modify the product in any way, as this will void the warranty and may pose safety risks.
- Тримайте пакувальні матеріали подалі від дітей.
Вміст упаковки
Будь ласка, перевірте упаковку на наявність наступних предметів:
- 1x MEIKEE 20W Motion Sensor Floodlight
- 1x Screw Package (Mounting Hardware)
- 1x Посібник користувача (цей документ)
Продукт закінченийview
The MEIKEE 20W LED PIR Motion Sensor Security Floodlight is designed for outdoor use, featuring a sensitive motion sensor and durable, waterproof construction. It provides warm white illumination for enhanced security and convenience.

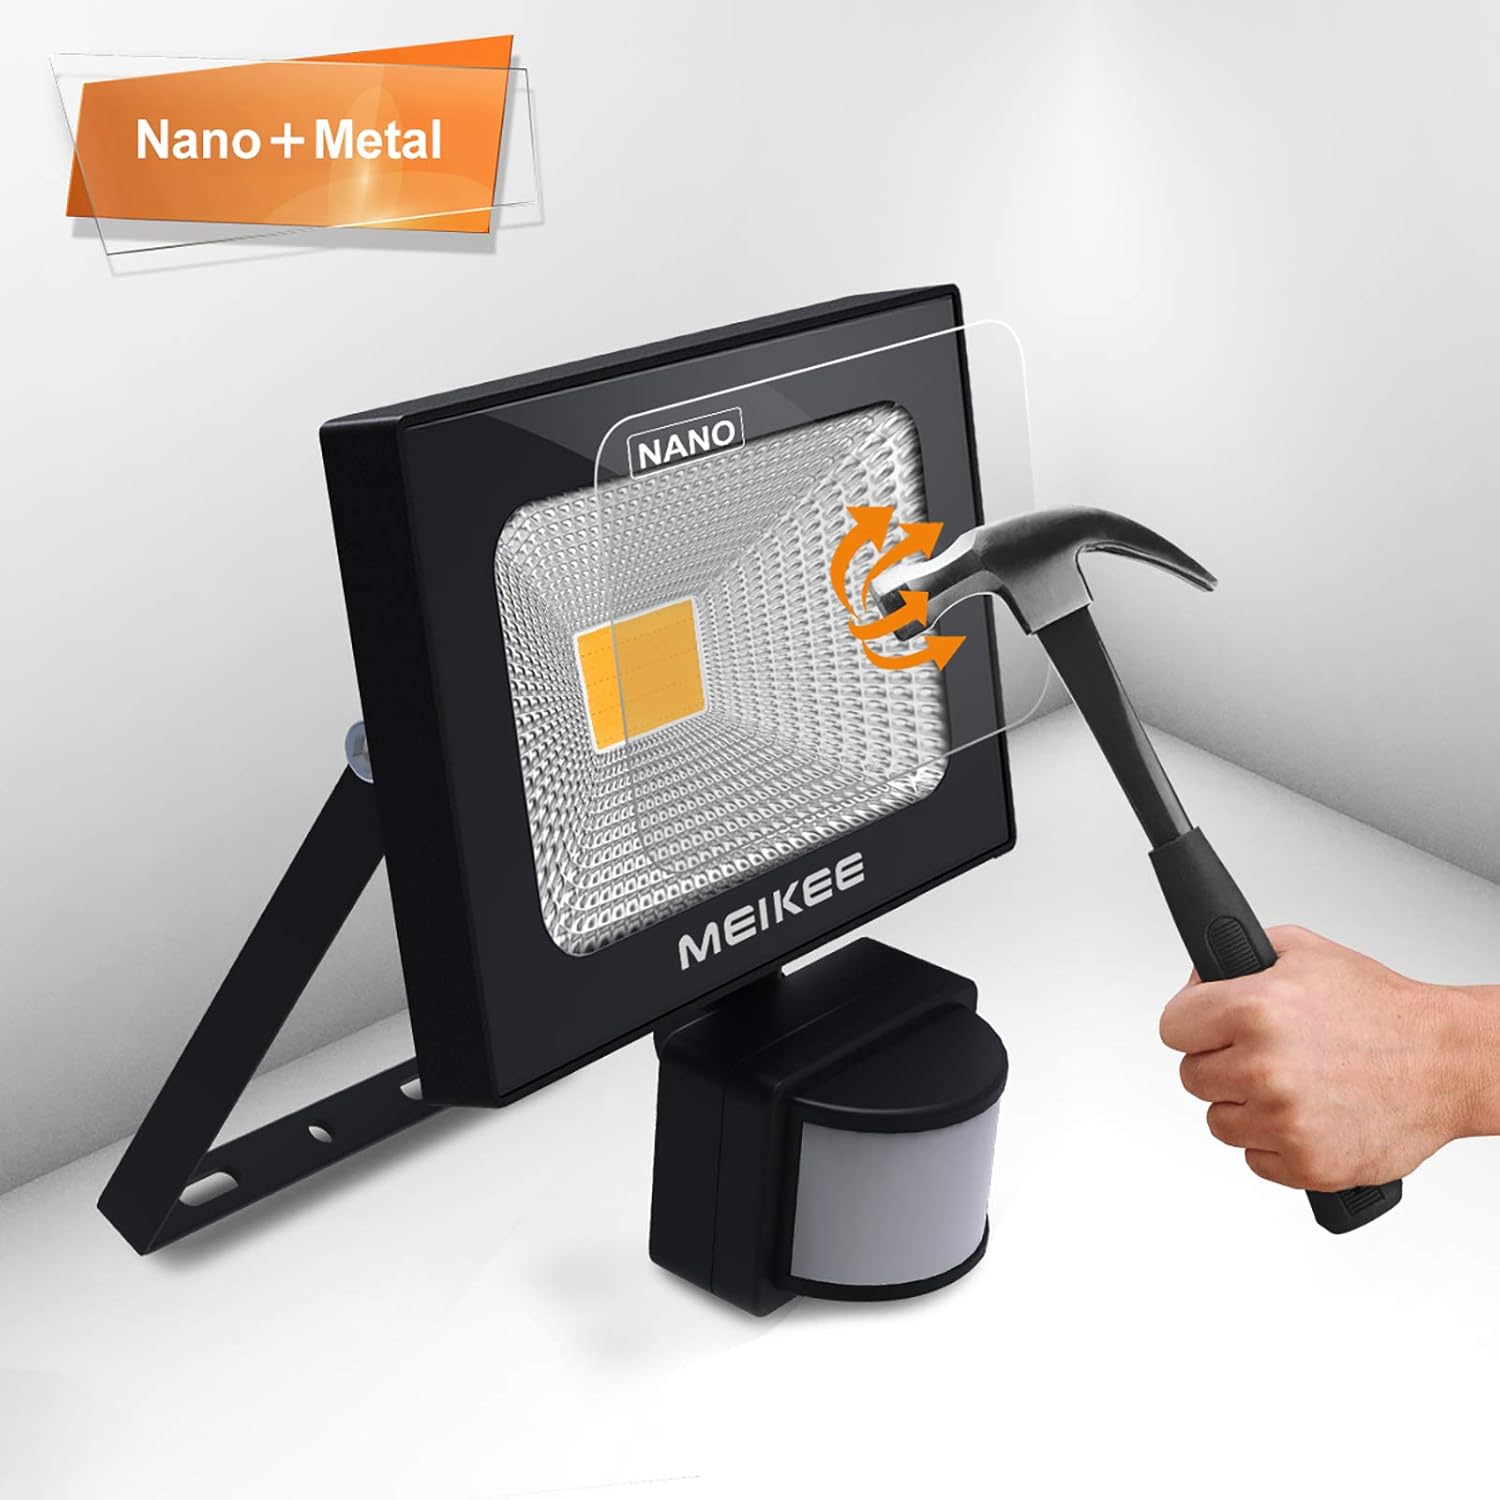
малюнок 1: Фронт view of the MEIKEE 20W LED PIR Motion Sensor Security Floodlight, showing the main light panel, integrated motion sensor, and mounting bracket.
Ключові характеристики:
- Wattage: 20W світлодіод
- Люмен вихід: 1700лм
- Колірна температура: Теплий білий
- Датчик руху: PIR (Passive Infrared) with 180° detection angle and up to 12m detection distance.
- Рейтинг водонепроникності: IP66 for floodlight, IP65 for sensor.
- Регульовані налаштування: Time duration and light sensitivity (LUX).
- Міцна конструкція: Aluminum body, nano-material front cover.
Інструкції з монтажу
Перед встановленням переконайтеся, що живлення вимкнено головним автоматичним вимикачем.
- Виберіть місце монтажу: Select a suitable location for the floodlight, ideally between 9.84ft (3m) and 16.4ft (5m) high for optimal detection range and light coverage. Consider the 120° beam angle and 12m detection distance.

малюнок 2: Illustration of optimal mounting height (9.84ft - 16.4ft) and detection range (max 39ft / 12m) for the floodlight, showing a 120° beam angle.
- Позначте точки буріння: Use the mounting bracket as a template to mark the drilling points on the wall or mounting surface.
- Свердлити отвори: Drill holes at the marked points and insert appropriate wall plugs (if necessary, depending on the surface).
- Закріпіть кронштейн: Прикріпіть монтажний кронштейн до поверхні за допомогою наданих гвинтів.
- Wire the Floodlight: Connect the floodlight's cable to your main power supply. The 1.5m cable includes three wires: Live (Brown), Neutral (Blue), and Earth (Yellow/Green). Ensure correct polarity and secure connections.

малюнок 3: Задня view of the floodlight, illustrating the adjustable mounting bracket and the power cable connection point.
- Налаштування кута датчика: The motion sensor can be rotated 360° horizontally and 270° vertically to cover the desired detection area.

малюнок 4: Close-up of the motion sensor showing the TIME and LUX adjustment dials protected by a waterproof soft rubber cover, and illustrations of the sensor's 360° horizontal and 270° vertical rotation capabilities.
- Відновлення живлення: Після завершення встановлення та надійного встановлення всіх з'єднань відновіть живлення кола.
Операція
The MEIKEE floodlight features two adjustable settings on the motion sensor: TIME and LUX. These settings are located under a waterproof soft rubber cover on the sensor unit.
малюнок 5: Детальний view of the TIME and LUX adjustment dials on the motion sensor.
1. TIME Setting:
This dial controls the duration the light stays on after motion is detected and the sensor is triggered. Rotate the dial to select the desired time:
- 10 с: Світло горить приблизно 10 секунд.
- 45 с: Світло горить приблизно 45 секунд.
- 120 с: Світло горить приблизно 120 секунд (2 хвилини).
- 600 с: Світло горить приблизно 600 секунд (10 хвилини).
2. LUX Setting:
This dial determines the ambient light level at which the sensor will activate the floodlight. Rotate the dial to select the desired mode:
- "SUN" (Daylight Mode): The sensor will work continuously, activating the light both during the day and at night when motion is detected.
- "MOON" (Night Mode): The sensor will only activate the light when motion is detected during low light conditions or at night.
Примітка: The detection range defaults to a maximum of 12 meters (39 feet).
Технічне обслуговування
- Прибирання: Періодично очищуйте прожектор і лінзу датчика м’якою губкоюamp тканиною для забезпечення оптимальної роботи. Не використовуйте абразивні засоби для чищення або розчинники.
- Огляд: Regularly inspect the power cable and housing for any signs of damage. If damage is found, disconnect power and have it repaired by a qualified technician.
- Немає частин, які обслуговуються користувачем: The LED light source and sensor unit are not user-replaceable. Do not attempt to open or repair the unit.
Усунення несправностей
| проблема | Можлива причина | Рішення |
|---|---|---|
| Світло не вмикається. | Немає джерела живлення. LUX setting is too low (Moon mode during day). Датчик заблоковано. Несправний датчик. | Перевірте підключення живлення та автоматичний вимикач. Adjust LUX setting to "SUN" for testing, or wait until night. Усуньте будь-які перешкоди з датчика view. Зверніться в службу підтримки клієнтів. |
| Світло горить постійно. | Continuous motion in detection area. LUX setting is too high (Sun mode at night). Несправний датчик. | Ensure no constant movement is triggering the sensor. Adjust LUX setting to "MOON" for night-only operation. Зверніться в службу підтримки клієнтів. |
| Light turns on for too short/long a period. | Incorrect TIME setting. | Adjust the TIME dial to the desired duration (10s/45s/120s/600s). |
| Reduced detection range or sensitivity. | Лінза датчика забруднена. Кут датчика неправильний. Ambient temperature too high (reduces PIR effectiveness). | Очистіть лінзу датчика. Adjust the sensor angle to cover the desired area. This is normal behavior for PIR sensors in very warm conditions. |
Технічні характеристики
| Номер моделі | FLB020 |
| Wattage | 20 Вт |
| томtage | 85-265 В змінного струму |
| Світловий потік | 1700лм |
| Яскравий колір | Теплий білий |
| Кут променя | 120° |
| Робоча температура | -25°C до 40°C |
| Кут виявлення датчика | 180° |
| Відстань виявлення | До 12м |
| Waterproof Rating (Floodlight) | IP66 |
| Waterproof Rating (Sensor) | IP65 |
| Довжина кабелю | 1.5м |
| матеріал | Aluminum (body), Nano-material (front cover) |
| Розміри (прибл.) | 140mm x 98mm x 60mm (excluding bracket) |
малюнок 6: Diagram showing the approximate dimensions of the floodlight: 140mm (5.51in) width, 98mm (3.82in) height, and 60mm (2.4in) depth (excluding the sensor and bracket).
For detailed product information and energy efficiency, please refer to the official EPREL database: Інформаційний лист продукту EPREL
Гарантія та підтримка
MEIKEE products are designed for durability and performance. For warranty information or technical support, please contact your retailer or visit the official MEIKEE webсайт. Будь ласка, збережіть підтвердження покупки для гарантійних претензій.


