1. Інформація про безпеку
Будь ласка, прочитайте та зрозумійте всю інформацію з техніки безпеки та інструкції з експлуатації перед використанням цього мультиметра. Недотримання цих інструкцій може призвести до ураження електричним струмом, пожежі або пошкодження вимірювача.
- Always ensure the test leads are properly connected and the function switch is set to the correct range before making any measurements.
- Не намагайтеся виміряти обtages or currents exceeding the maximum rated values for this meter.
- Будьте надзвичайно обережні під час роботи з ланцюгами під напругою. Висока напругаtages може бути небезпечним.
- Never open the meter casing unless specifically instructed for battery or fuse replacement. Ensure test leads are disconnected before opening.
- Замініть батарейку, коли з'явиться індикатор низького заряду батареї, щоб забезпечити точність показань.
- Не використовуйте вимірювальний прилад, якщо він виглядає пошкодженим або якщо ізоляція вимірювальних дротів пошкоджена.
малюнок 1: Задня view of the Rebel MIE-RB-830 Multimeter, showing the battery compartment cover and a warning label. The label advises removing test leads before opening the case to avoid electrical shock and to install fuses with correct amp/volt ratings. It also indicates the power supply is a 9V battery, type NEDA 1604 9V 6F22.
2. Продукт закінчивсяview
The Rebel MIE-RB-830 is a compact, battery-operated digital multimeter designed for measuring DC/AC voltage, DC current, resistance, diode, and transistor (hFE) values. It is suitable for general electrical testing and troubleshooting.
2.1. Компоненти
- Digital Multimeter Unit
- Вимірювальні дроти (червоний та чорний)
- Батарейка 9 В (може бути в комплекті або продаватися окремо)
- Посібник користувача (цей документ)

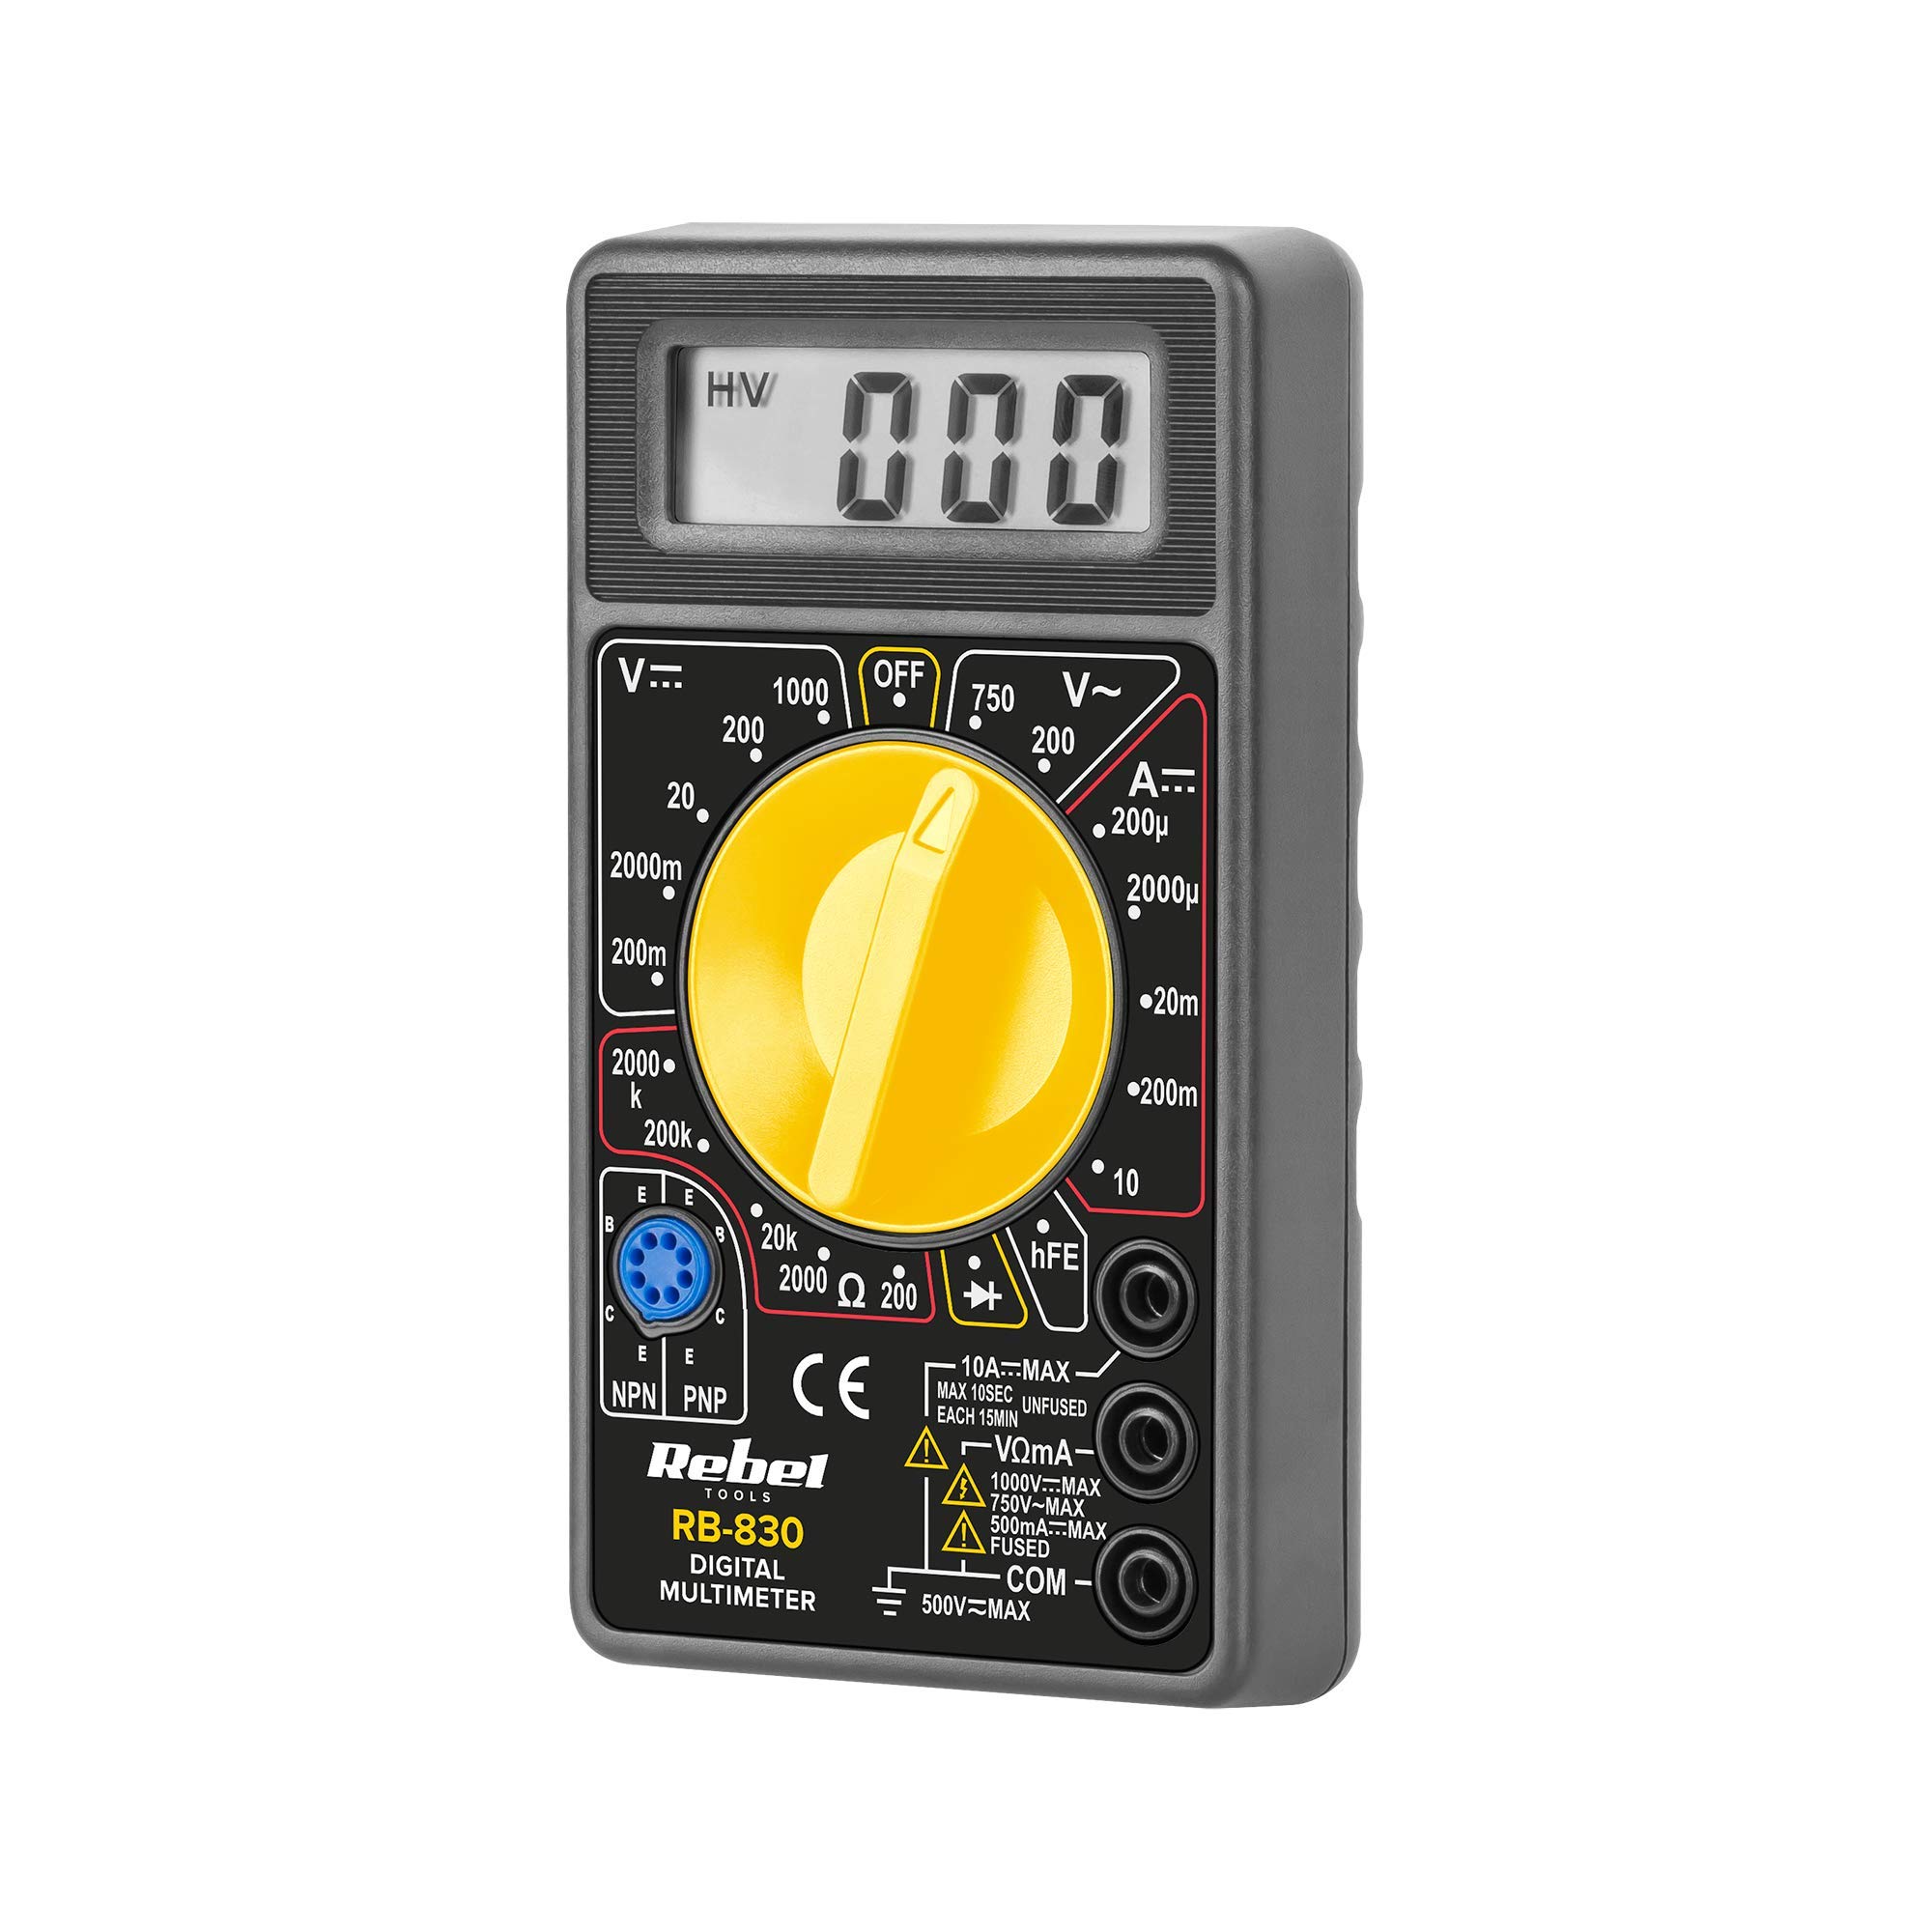
малюнок 2: The Rebel MIE-RB-830 Digital Multimeter shown with its accompanying red and black test leads. The multimeter features a large LCD display and a rotary function switch.

малюнок 3: Крупним планом view of the red and black test leads. These leads are essential for connecting the multimeter to the circuit under test.
3. Налаштування
3.1. Встановлення батареї
- Переконайтеся, що мультиметр вимкнено, а всі вимірювальні дроти від'єднані.
- Знайдіть кришку відсіку для батарейок на задній панелі глюкометра (див. малюнок 1).
- Unscrew the retaining screw(s) and carefully remove the cover.
- Insert a new 9V battery (NEDA 1604 or 6F22 type), observing the correct polarity (+ and -).
- Встановіть кришку відсіку для батарейок та закріпіть її гвинтом(ами).
3.2. Підключення вимірювальних щупів
- Підключіть червоний test lead to the "VΩmA" input jack.
- Підключіть чорний test lead to the "COM" (common) input jack.
- For current measurements exceeding 200mA (up to 10A), connect the red test lead to the "10A" input jack.
4. Інструкція з експлуатації
4.1. Вибір функції
Turn the rotary switch to the desired measurement function and range. Always start with a higher range if the approximate value is unknown to prevent overloading the meter.
4.2. Вимірювання постійного струму Voltage (V–)
- Встановіть поворотний перемикач на потрібний рівень гучності постійного струмуtage (V–) range (e.g., 20V, 200V).
- Підключіть червоний вимірювальний дріт до позитивного (+) полюса кола, а чорний – до негативного (-).
- Прочитайте томtagзначення e на РК-дисплеї.
4.3. Вимірювання AC Voltage (V∼)
- Встановіть поворотний перемикач на потрібний рівень гучності змінного струмуtage (V∼) range (e.g., 200V, 750V).
- Підключіть вимірювальні дроти до клем змінного струму.tagе джерело.
- Прочитайте томtagзначення e на РК-дисплеї.
4.4. Measuring DC Current (A–)
Увага: To measure current, the meter must be connected in series with the circuit. Never connect the meter in parallel with a voltage source when in current mode, as this can damage the meter and the circuit.
- Set the rotary switch to the desired DC Current (A–) range (e.g., 20mA, 200mA, 10A).
- For currents up to 200mA, ensure the red lead is in the "VΩmA" jack. For currents up to 10A, move the red lead to the "10A" jack.
- Розімкнути коло, де потрібно виміряти струм, і з'єднати вимірювач послідовно.
- Прочитайте поточне значення на РК-дисплеї.
4.5. Вимірювання опору (Ом)
Увага: Перед вимірюванням опору переконайтеся, що тестоване коло або компонент знеструмлені.
- Set the rotary switch to the desired Resistance (Ω) range (e.g., 200Ω, 2kΩ, 200kΩ).
- Підключіть вимірювальні щупи до компонента або кола, що підлягає вимірюванню.
- Зчитайте значення опору на РК-дисплеї.
4.6. Diode Test (→|–)
- Set the rotary switch to the Diode Test (→|–) position.
- Connect the red test lead to the anode of the diode and the black test lead to the cathode.
- На дисплеї відобразиться гучність у прямому напрямкуtagпадіння напруги (зазвичай від 0.5 В до 0.8 В для кремнієвих діодів).
- Reverse the leads. The display should show "OL" (Open Loop) for a good diode.
4.7. Transistor (hFE) Test
- Встановіть поворотний перемикач у положення hFE.
- Визначте, чи є транзистор NPN чи PNP.
- Insert the transistor's emitter, base, and collector leads into the corresponding sockets on the hFE test socket.
- Зчитайте значення hFE (коефіцієнт посилення постійного струму) на дисплеї.
5. Технічне обслуговування
5.1. Заміна батареї
When the low battery indicator appears on the display, replace the 9V battery as described in Section 3.1. Using a low battery can lead to inaccurate readings.
5.2. Заміна запобіжника
If the current measurement function stops working, the fuse may need replacement. This operation should only be performed by qualified personnel.
- Переконайтеся, що мультиметр вимкнено, а всі вимірювальні дроти від'єднані.
- Open the back casing of the meter (this may involve more screws than just the battery compartment).
- Locate the blown fuse and replace it with a fuse of the exact same type and rating (e.g., F200mA/250V for mA range, F10A/250V for 10A range). Refer to the internal markings or specifications for precise fuse ratings.
- Carefully reassemble the meter, ensuring all screws are tightened.
5.3. прибирання
Протріть лічильник рекламоюamp cloth and mild detergent. Do not use abrasives or solvents. Keep the meter dry.
6. Вирішення проблем
| проблема | Можлива причина | Рішення |
|---|---|---|
| Немає дисплея або тьмяний дисплей | Низький або розряджений акумулятор | Замініть акумулятор 9 В. |
| Неправильні показання | Low battery; Incorrect range selection; Poor test lead connection | Replace battery; Select appropriate range; Ensure leads are firmly connected. |
| Вимірювання струму не працює | Blown fuse; Incorrect lead connection for current | Replace fuse (see Section 5.2); Ensure red lead is in "VΩmA" or "10A" jack as appropriate. |
| Відображається "OL" (перевантаження) | Measured value exceeds selected range; Open circuit (for resistance/continuity) | Виберіть вищий діапазон; перевірте ланцюг на наявність розривів. |
7. Технічні характеристики
| Функція вимірювання | Діапазон | Точність |
|---|---|---|
| DC Voltage (V–) | 200 мВ, 2 В, 20 В, 200 В, 1000 В | ±(0.5% + 2 цифр) |
| AC Voltage (V∼) | 200В, 750В | ±(1.2% + 10 цифр) |
| DC Current (A–) | 200 мкА, 2 мА, 20 мА, 200 мА, 10 А | ±(1.0% + 2 цифр) |
| Опір (Ω) | 200 Ом, 2 кОм, 20 кОм, 200 кОм, 2 МОм | ±(0.8% + 2 цифр) |
| Діодний тест | так | Вперед обtage крапля |
| Тест транзистора (hFE) | так | hFE value |
| Джерело живлення | 9V Battery (NEDA 1604 or 6F22) | |
| Дисплей | 3½ Digit LCD, Max. 1999 | |
| Розміри | Прибл. 13.5 x 10 x 4 см | |
| вага | Approx. 107 grams (without battery) | |
| Робоча температура | 0°C до 40°C (32°F до 104°F) | |
| Температура зберігання | -10°C до 50°C (14°F до 122°F) | |
| Стандарти безпеки | CE, RoHS |
8. Гарантія та підтримка
This Rebel MIE-RB-830 Digital Multimeter is covered by a standard manufacturer's warranty against defects in materials and workmanship. Please refer to the warranty card included with your purchase or contact your retailer for specific warranty terms and conditions.
For technical support or service inquiries, please contact the point of purchase or visit the official Rebel webсайт для контактної інформації.


