вступ
The Vetroo V5 CPU Air Cooler is designed to provide efficient and quiet cooling for your processor. Featuring 5 heat pipes, a 120mm FDB PWM fan, and Addressable RGB (ARGB) lighting, it offers excellent thermal performance and customizable aesthetics for a wide range of Intel and AMD platforms.
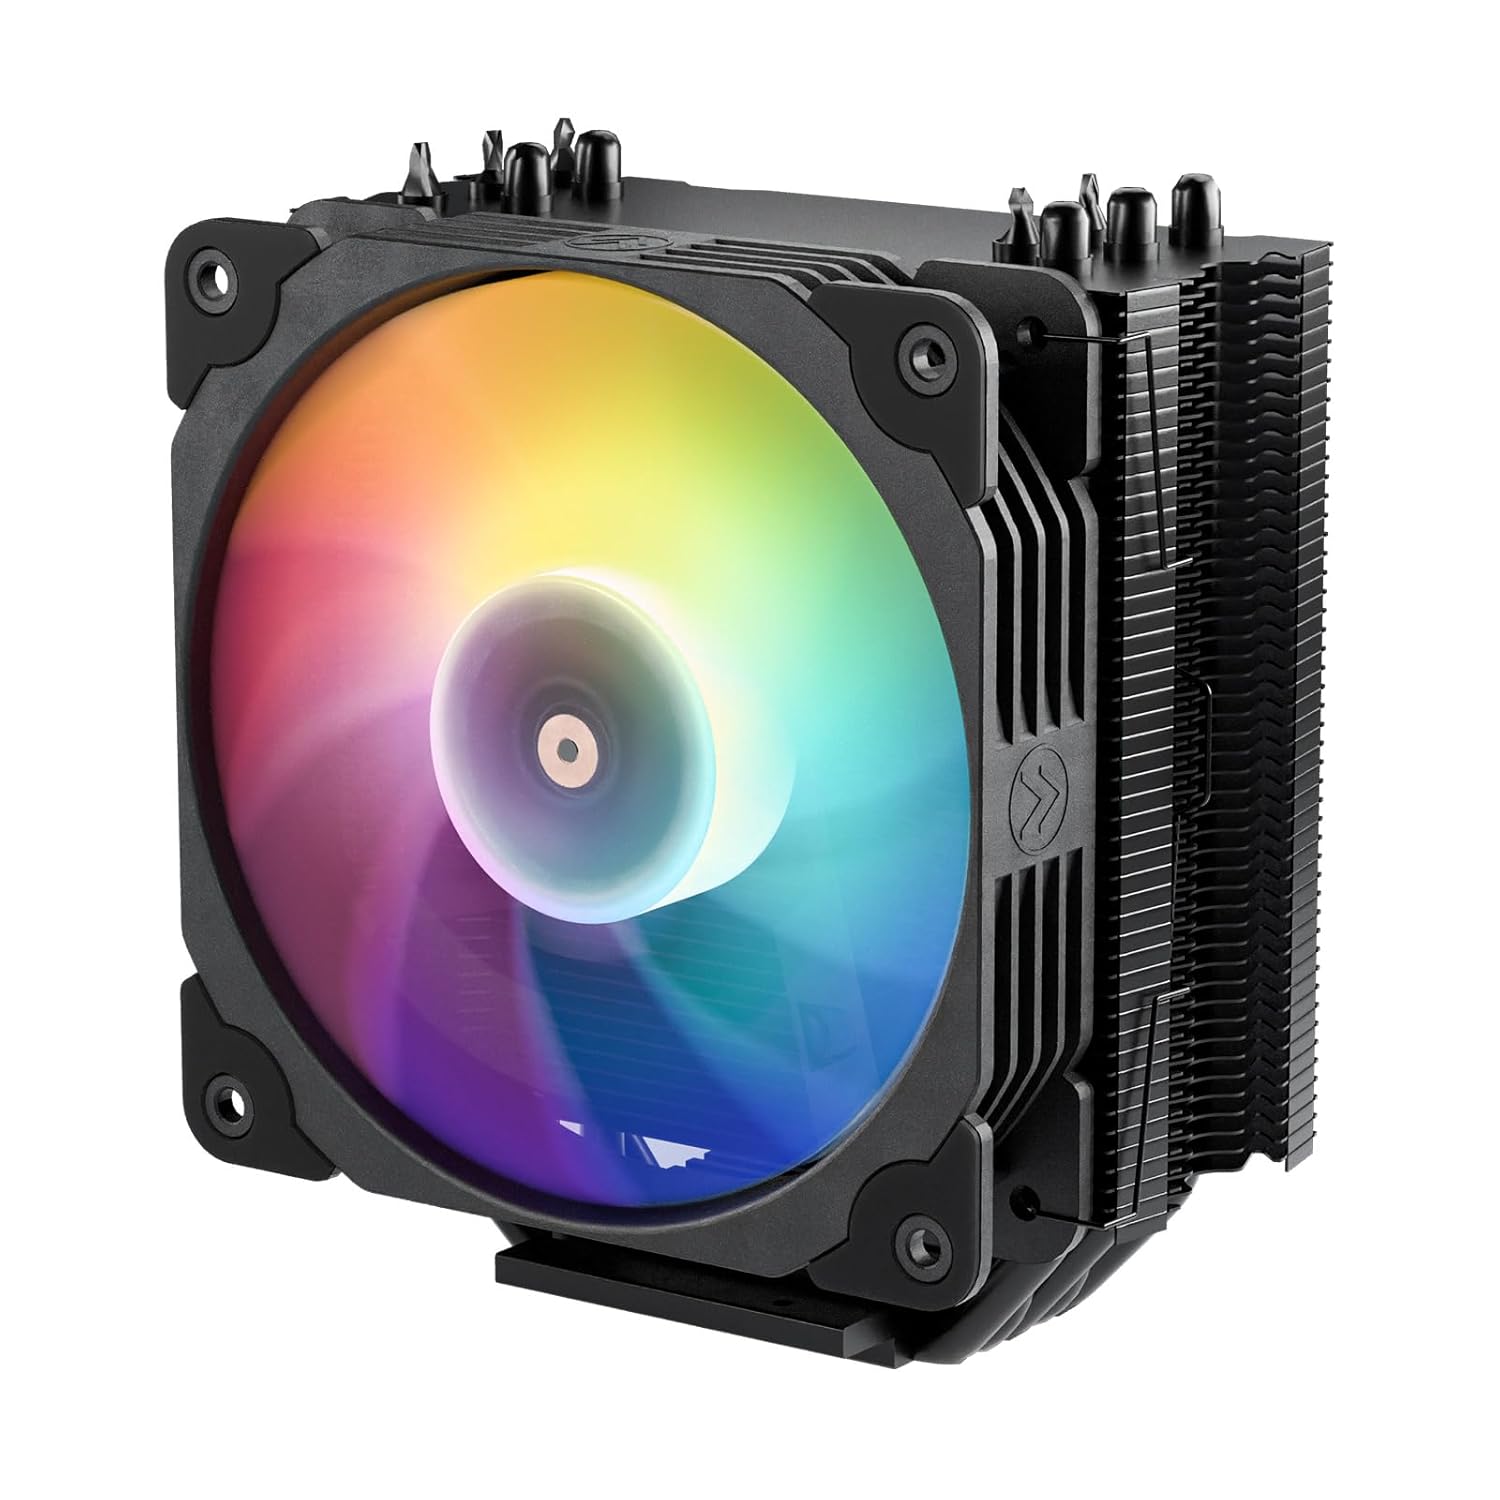
Figure 1: Vetroo V5 CPU Air Cooler
Ключові характеристики
- Синхронізація освітлення ARGB: Customizable RGB lighting that syncs with your motherboard via a 5V 3-Pin port.
- PWM Smart Control: The 4-Pin PWM fan allows for dynamic speed adjustment between 800-1700 RPM, balancing noise levels and airflow.
- Enhanced Thermal Conductivity: Equipped with five direct-contact heat pipes, high-density aluminum fins, and a larger copper base for superior heat dissipation.
- Низький рівень шуму: Nine fan blades and eight vibration-dampening rubber pads ensure quiet performance while maintaining excellent airflow.
- Широка сумісність: Supports a wide range of Intel (LGA 1851/1700/1200/115X) and AMD (AM5/AM4) sockets.
Вміст упаковки
Будь ласка, перевірте наявність усіх компонентів перед початком встановлення:
- Vetroo V5 CPU Air Cooler (Heatsink with pre-attached fan)
- Монтажні кронштейни Intel
- Монтажні кронштейни AMD
- Universal Backplate
- Mounting Screws and Spacers
- Термопаста
- Fan Clips (extra set for optional second fan)
- Посібник користувача (цей документ)

Figure 2: Included components of the Vetroo V5 CPU Cooler.
Сумісність
The Vetroo V5 CPU Air Cooler is compatible with the following CPU sockets:
- Intel: LGA 1851, LGA 1700, LGA 1200, LGA 1150, LGA 1151, LGA 1155, LGA 1156
- AMD: AM5, AM4
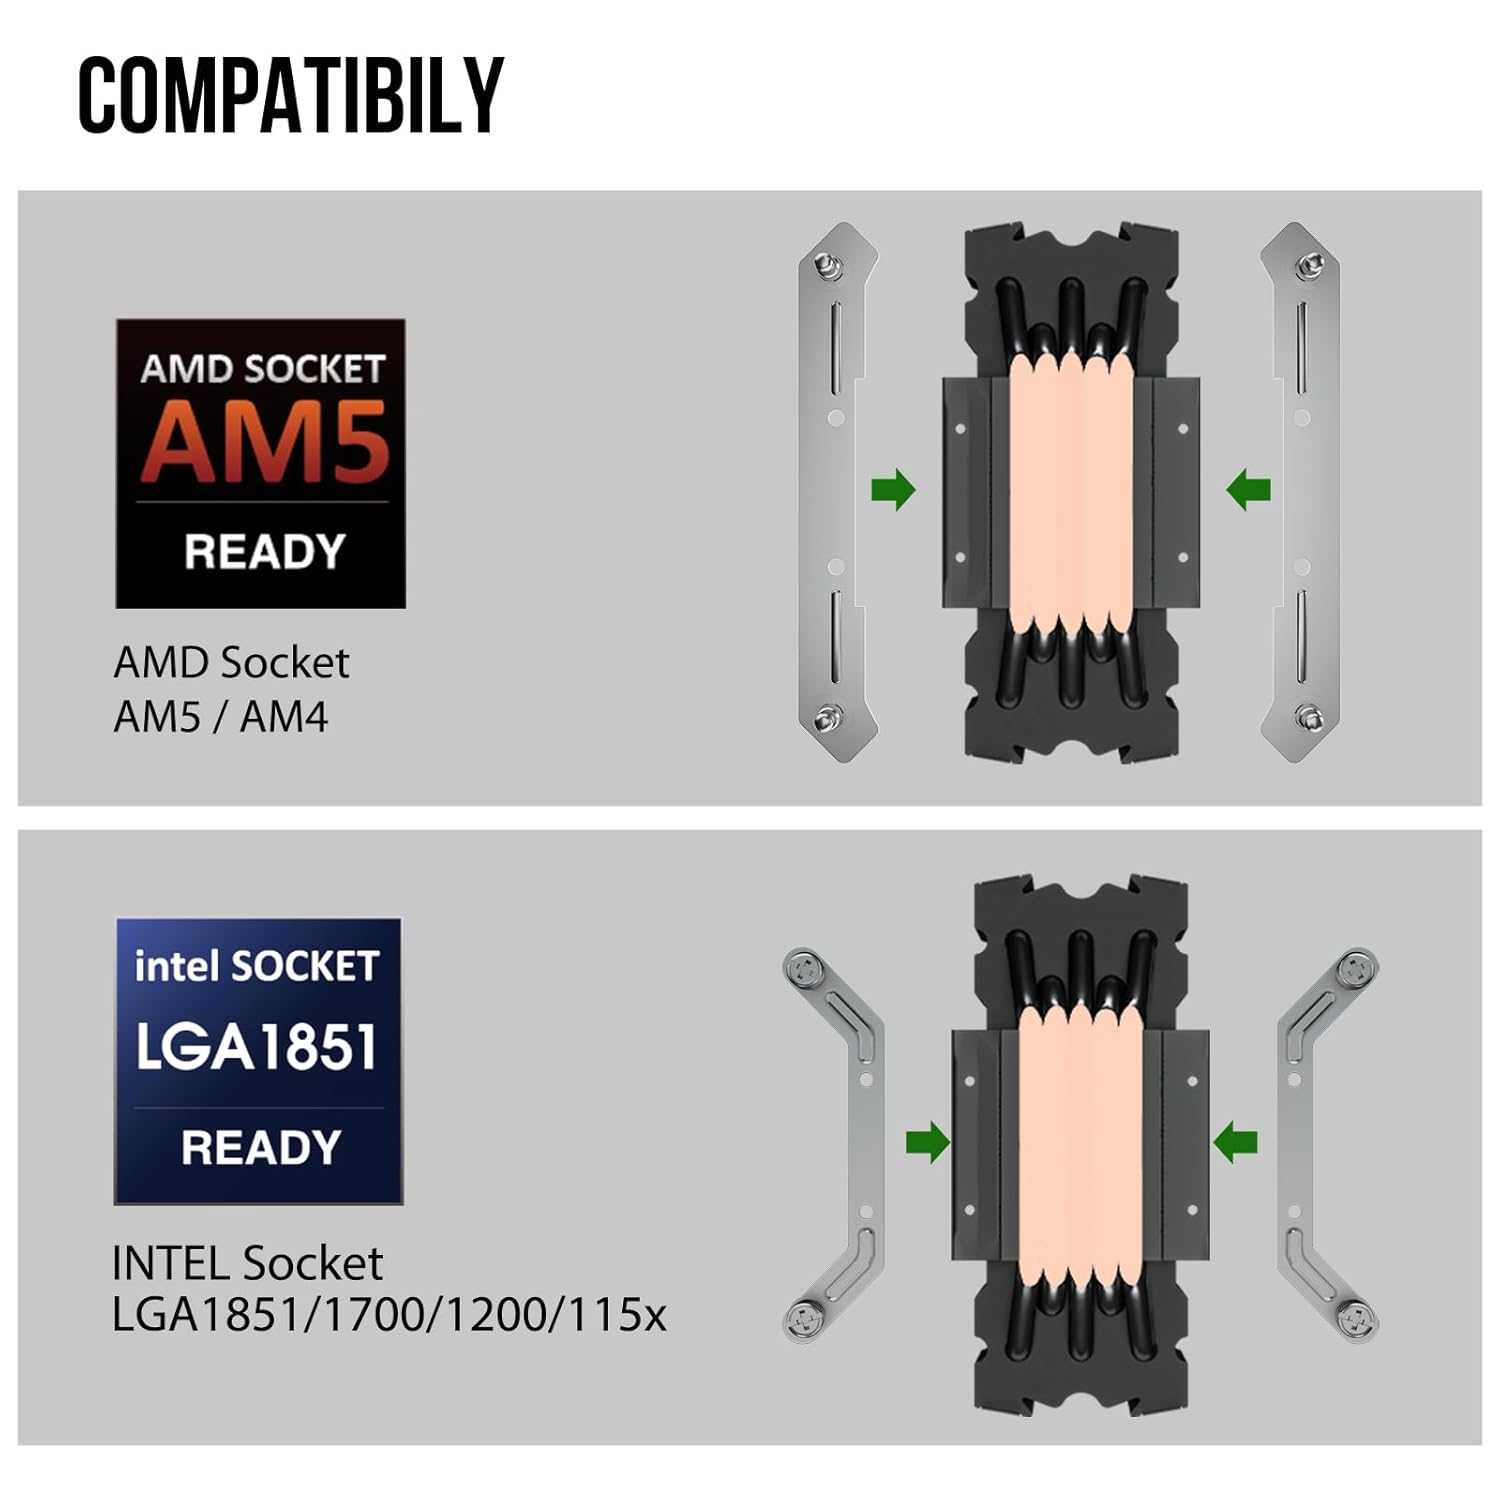
Figure 3: Supported CPU sockets for Vetroo V5.
Налаштування та встановлення
Follow these steps carefully to install your Vetroo V5 CPU Air Cooler. It is recommended to perform a "dry run" assembly before installing on your motherboard.
1. Підготуйте материнську плату
- Переконайтеся, що вашу систему вимкнено та від’єднано від мережі.
- Remove your existing CPU cooler. Clean any old thermal paste from the CPU surface using isopropyl alcohol.
- Attach the universal backplate to the rear of your motherboard, aligning it with the CPU socket holes.
2. Встановіть кріпильні кронштейни
- Select the appropriate mounting brackets for your CPU socket (Intel or AMD).
- Secure the brackets to the motherboard using the provided screws and spacers. For AMD AM4/AM5 sockets, ensure the brackets are angled inward as shown in Figure 4.

Figure 4: Correct orientation for AMD mounting brackets (angled inward).
3. Нанесіть термопасту
- Apply a small amount of thermal paste (pea-sized dot or thin line) to the center of your CPU's integrated heat spreader (IHS). Do not spread it manually; the pressure from the cooler will distribute it.
4. Mount the Heatsink
- Carefully place the heatsink onto the CPU, aligning the mounting holes on the heatsink base with the screws on the mounting brackets.
- Закріпіть радіатор, затягуючи гвинти по діагоналі (наприклад, зверху ліворуч, знизу праворуч, зверху праворуч, знизу ліворуч) до щільного прилягання. Не перетягуйте.
- Важливо: The fan must be removed from the heatsink before mounting the heatsink to the motherboard.
5. Reattach and Connect the Fan
- Reattach the 120mm fan to the heatsink using the provided fan clips. Ensure the fan is oriented to blow air through the heatsink fins towards the rear or top of your case.
- Connect the 4-Pin PWM fan cable to the CPU_FAN header on your motherboard.
- If using ARGB lighting, connect the 5V 3-Pin ARGB cable to a compatible 5V ARGB header on your motherboard. Do not connect to a 12V RGB header, as this will damage the LEDs.

Figure 5: 5V 3-Pin ARGB connector for motherboard synchronization.
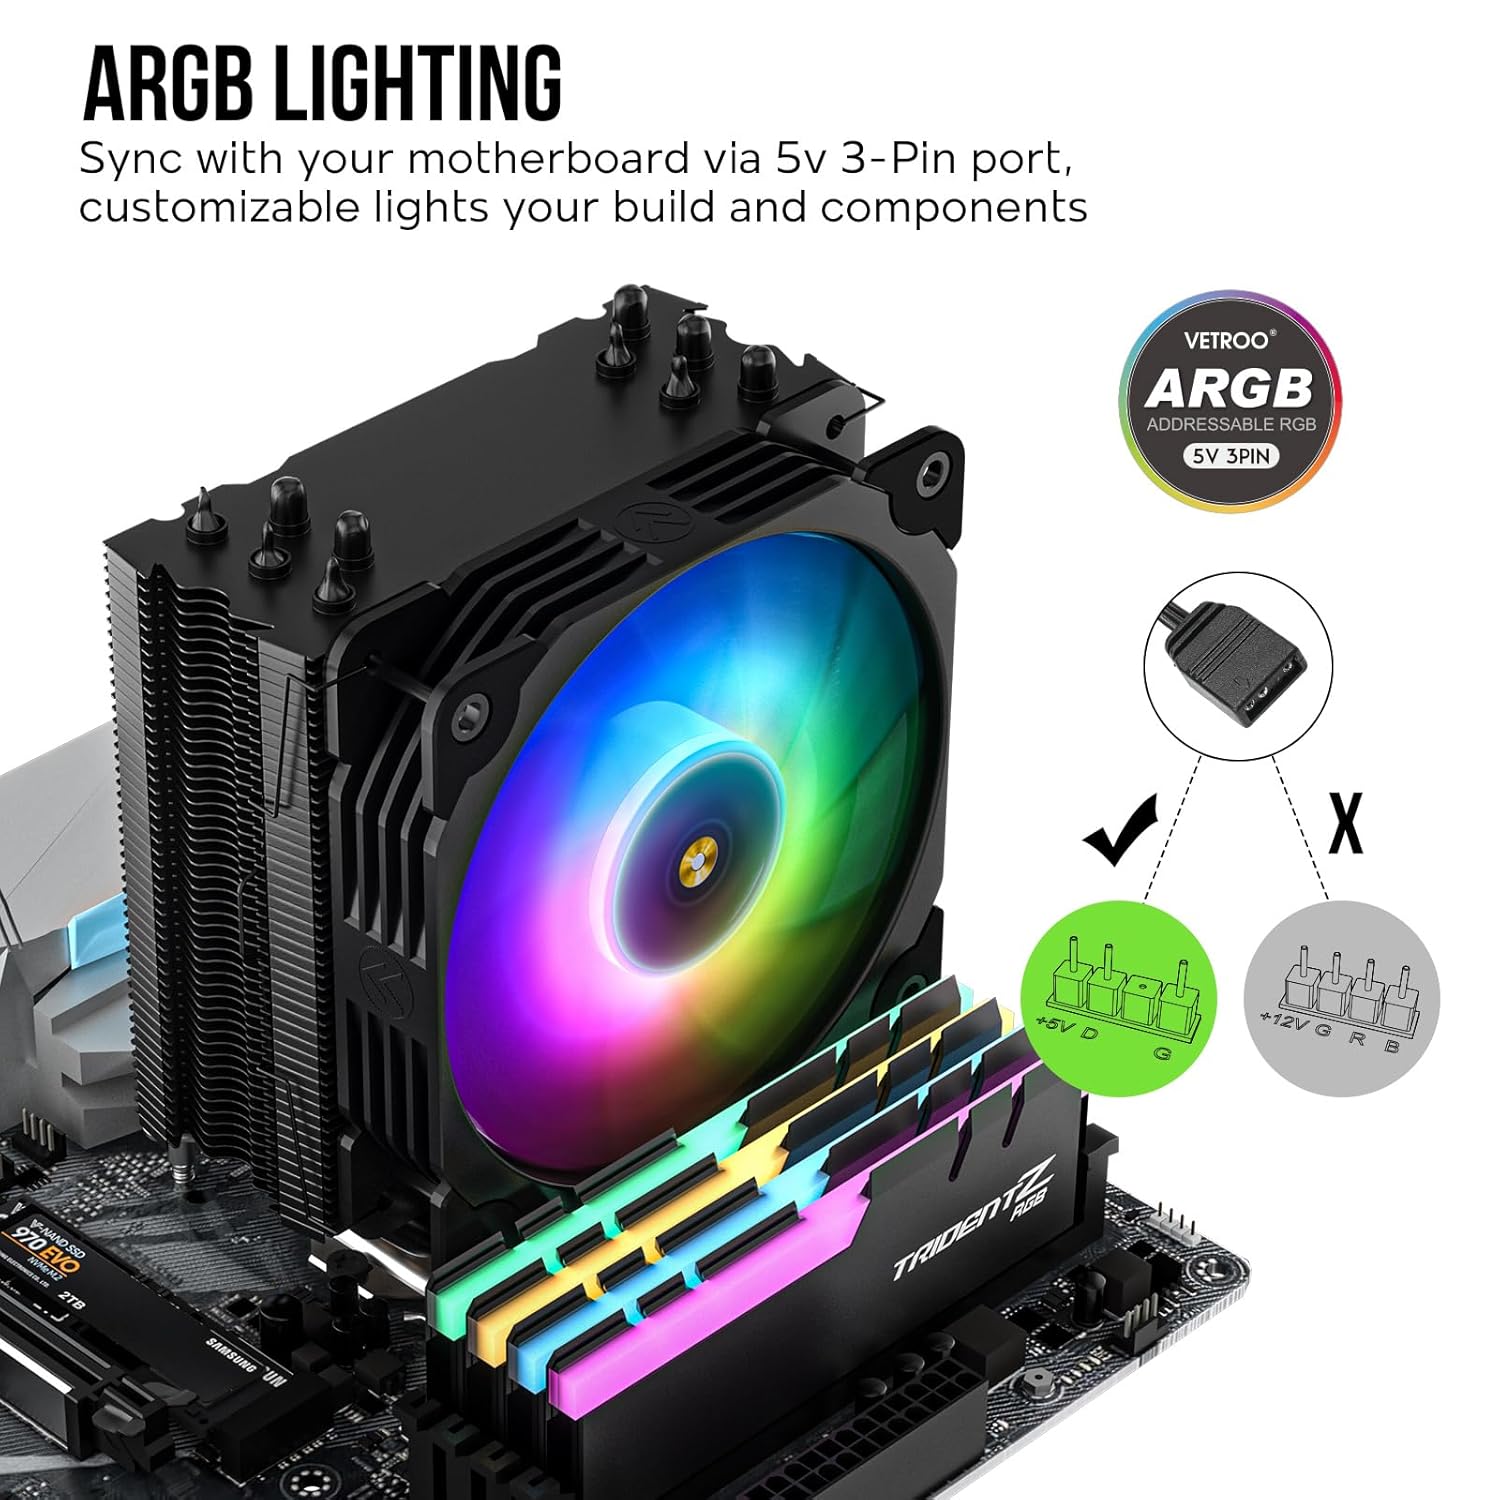
Figure 6: ARGB lighting sync with motherboard.
The fan can be adjusted vertically on the heatsink to provide clearance for tall RAM modules. See Figure 7.

Figure 7: Fan height adjustment for RAM clearance.
Інструкція з експлуатації
ШІМ-керування вентилятором
The 4-Pin PWM fan automatically adjusts its speed based on CPU temperature, as controlled by your motherboard's BIOS/UEFI settings. You can typically configure fan curves in your motherboard's software or BIOS to optimize for quiet operation or maximum cooling performance.

Figure 8: PWM fan control and Fluid Dynamic Bearing (FDB) for quiet operation.
Керування освітленням ARGB
The Addressable RGB (ARGB) lighting can be controlled via your motherboard's RGB software (e.g., ASUS Aura Sync, MSI Mystic Light Sync, Gigabyte RGB Fusion, ASRock Polychrome Sync). Ensure the 5V 3-Pin ARGB cable is correctly connected to the motherboard's ARGB header. This allows for synchronization of lighting effects across compatible components.
Технічне обслуговування
- Видалення пилу: Periodically clean the heatsink fins and fan blades to prevent dust buildup, which can impede airflow and cooling performance. Use compressed air or a soft brush. Ensure the fan is not spinning rapidly when cleaning with compressed air to prevent damage to the bearings.
- Термопаста: While not frequently required, if you remove the cooler for any reason, it is recommended to clean off the old thermal paste from both the CPU and cooler base and apply new thermal paste before reinstallation.
Усунення несправностей
| проблема | Можлива причина | Рішення |
|---|---|---|
| Вентилятор не обертається або обертається повільно. | Fan cable not connected or incorrectly connected to motherboard. Insufficient power. BIOS fan settings. | Ensure 4-Pin PWM cable is securely connected to the CPU_FAN header. Check BIOS/UEFI settings for fan speed control. |
| ARGB lighting not working. | ARGB cable not connected or connected to a 12V RGB header. Motherboard software issue. | Verify 5V 3-Pin ARGB cable is connected to a 5V ARGB header. Check motherboard's RGB software for control. Restart system. |
| Висока температура процесора. | Improper thermal paste application. Loose heatsink mounting. Insufficient airflow in case. Fan not spinning optimally. | Reapply thermal paste. Ensure heatsink is securely mounted. Check case airflow and fan orientation. Adjust fan curve in BIOS. |
| Cooler does not fit motherboard. | Incorrect mounting bracket orientation (especially AMD). RAM clearance issues. | Double-check mounting bracket orientation (refer to Figure 4). Adjust fan height for RAM clearance (refer to Figure 7). |
Технічні характеристики
| Особливість | Деталь |
|---|---|
| Номер моделі | V5 |
| Розміри (Д x Ш x В) | 148 мм x 128 мм x 75 мм (5.83 дюйма x 5.04 дюйма x 2.95 дюйма) |
| вага | 1.68 фунта |
| Теплові труби | 5 Direct Contact Copper Heat Pipes |
| Розмір вентилятора | 120 мм |
| Швидкість вентилятора | 800-1700 RPM (PWM Controlled) |
| Рівень шуму | 30.8 дБ (макс.) |
| Роз'єм живлення | 4-Pin PWM (Fan), 3-Pin 5V ARGB (Lighting) |
| Номінальний випtage | 12 В |
| TDP (розрахункова теплова потужність) | 150 Вт |
| матеріал | Aluminum (Fins), Copper (Heat Pipes & Base) |
| Тип підшипника | Гідродинамічний підшипник (FDB) |

Figure 9: Vetroo V5 cooler dimensions.
Гарантія та підтримка
Vetroo products come with a limited warranty. For specific warranty terms and conditions, please refer to the warranty information provided with your purchase or visit the official Vetroo website. If you encounter any issues or require technical assistance, please contact Vetroo customer support through their official channels or the retailer where the product was purchased.
Ви можете знайти більше інформації та підтримки на Vetroo Amazon Store.


