1. Вступ
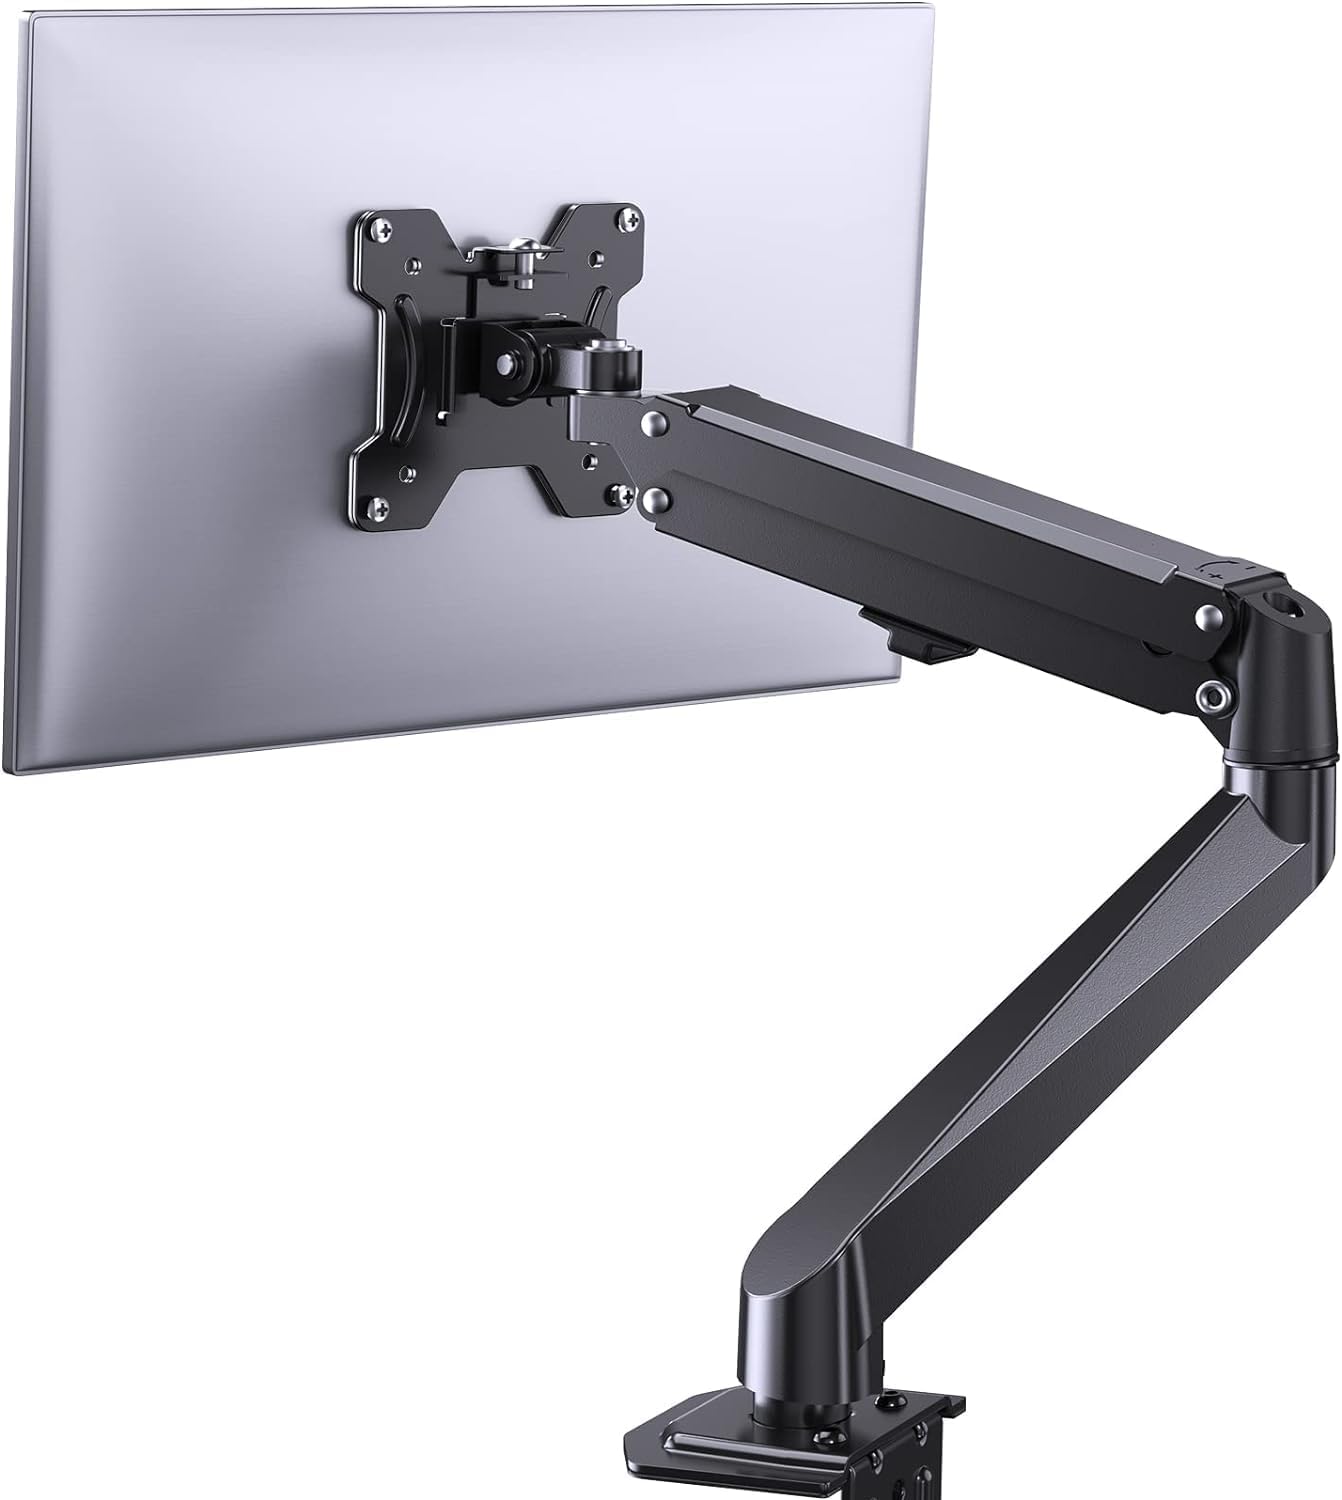
This manual provides comprehensive instructions for the installation, operation, and maintenance of your ErGear Single Monitor Mount, Model EGSS7. This monitor arm is designed to enhance your workspace ergonomics by providing adjustable positioning for a single monitor. Please read this manual thoroughly before installation and retain it for future reference.

Image 1.1: The ErGear Single Monitor Arm (Model EGSS7) in a typical office setup.
2. Інформація про безпеку
Будь ласка, дотримуйтесь наступних запобіжних заходів, щоб запобігти травмуванню або пошкодженню вашого обладнання:
- Не перевищуйте максимальну вантажопідйомність 6.5 кг (14.3 фунтів).
- Ensure your monitor is between 17 and 27 inches in size.
- Verify that your monitor is VESA compatible (75x75mm or 100x100mm).
- Install the mount on a sturdy desk surface that can support the combined weight of the mount and your monitor.
- Follow all installation steps carefully. Improper installation may result in equipment damage or personal injury.
- Тримайте дрібні деталі подалі від дітей.
3. Вміст упаковки
Before proceeding with installation, please ensure all components are present and undamaged. Refer to the included parts list for detailed identification.
Зображення 3.1: закінченоview of the ErGear Single Monitor Mount components.
4. Технічні характеристики
| Особливість | Специфікація |
|---|---|
| Бренд | Ergear |
| Модель | EGSS7 |
| Сумісний розмір монітора | 17 - 27 дюймів |
| Вага | До 14.3 фунтів (6.5 кг) |
| Сумісність VESA | 75х75 мм, 100х100 мм |
| Тип монтажу | C-clamp або люверс |
| матеріал | легована сталь |
| Колір | чорний |
| Діапазон нахилу | від -35° до +50° |
| Поворотний діапазон | від -90° до +90° |
| Обертання | 360° |
| Розміри продукту | 41.2 х 30.4 х 10 см |

Image 4.1: Monitor size and weight capacity details.
5. Інструкції з налаштування
The ErGear Single Monitor Mount offers two installation options: C-clamp or Grommet mounting. Choose the option best suited for your desk.

Image 5.1: C-clamp and Grommet mounting options with desk thickness ranges.
5.1 C-Clamp монтаж
- Приєднайте C-clamp to the base of the monitor arm.
- Розташуйте C-clamp on the edge of your desk. Ensure the desk thickness is between 0.4 and 3.3 inches.
- Затягніть клamp securely using the provided knob until the mount is stable.
5.2 Встановлення люверсів
- If your desk has a grommet hole, insert the grommet bolt through the base of the monitor arm and the desk hole. Ensure the desk thickness is between 0.4 and 3.1 inches.
- Secure the mount from underneath the desk using the provided plate and nut.
5.3 Підключення монітора
- Carefully attach your VESA-compatible monitor to the VESA plate on the arm using the appropriate screws.
- Ensure the screws are tightened firmly but do not overtighten.
5.4 Регулювання натягу
The gas spring arm requires tension adjustment to properly support your monitor's weight. Use the included Allen key to adjust the tension screw located on the arm. Turn clockwise to increase tension for heavier monitors, and counter-clockwise to decrease tension for lighter monitors. Adjust until the monitor stays in position when moved.

Зображення 5.2: Внутрішній view of the flexible gas spring arm.
6. Інструкція з експлуатації
Once installed, your ErGear monitor mount allows for flexible positioning of your monitor.
6.1 Регулювання положення монітора
- Регулювання висоти: Gently push or pull the monitor to the desired height. The gas spring mechanism will hold it in place.
- Нахил: The monitor can be tilted from -35° to +50° to reduce glare and optimize viewкути.
- Поворотний: Swivel the monitor from -90° to +90° for collaborative work or to view content from different angles.
- Обертання: Поверніть монітор на 360°, щоб перемикатися між альбомною та портретною орієнтаціями.

Image 6.1: Monitor height adjustment.

Image 6.2: Full motion range capabilities of the monitor arm.
6.2 Організація кабелів
The monitor arm features an integrated cable management system to keep your workspace tidy. Route your monitor cables through the designated channels on the arm to conceal them.

Зображення 6.3: Інтегрована система управління кабелями.
7. Технічне обслуговування
Регулярне технічне обслуговування забезпечує довговічність та оптимальну роботу вашого кріплення для монітора.
- Періодично перевіряйте всі гвинти та з'єднання, щоб переконатися, що вони міцно затягнуті.
- Clean the surface of the mount with a soft, damp тканина. Уникайте абразивних очищувачів.
- Re-adjust the gas spring tension if your monitor feels too loose or too stiff when moving.
8. Вирішення проблем
| проблема | Можлива причина | Рішення |
|---|---|---|
| Монітор провисає або не тримається на місці. | Gas spring tension is too low. | Increase gas spring tension using the Allen key (clockwise). |
| Monitor is difficult to move. | Gas spring tension is too high. | Decrease gas spring tension using the Allen key (counter-clockwise). |
| Маунт відчувається нестабільним. | C-clamp or grommet connection is loose. | Затягніть C-clamp knob or grommet nut. |
| Monitor does not fit the VESA plate. | Incorrect VESA pattern. | Ensure your monitor has a 75x75mm or 100x100mm VESA pattern. |
9. Гарантія та підтримка
For warranty information or technical support, please refer to the contact details provided with your purchase or visit the official ErGear website. Please have your model number (EGSS7) and purchase date available when contacting support.


