
1. Вступ
The Next Cine800S GoogleTV Projector is designed to provide a versatile and immersive home entertainment experience. This manual offers essential information for the safe and efficient setup, operation, and maintenance of your projector. Please read this manual thoroughly before using the device.
2. Інформація про безпеку
- Джерело живлення: Use only the specified power adapter. Ensure the power cord is not damaged or pinched.
- Вентиляція: Do not block ventilation openings. Maintain adequate space around the projector for proper airflow to prevent overheating.
- Розміщення: Розмістіть проектор на стійкій, рівній поверхні. Уникайте його розміщення під прямими сонячними променями, поблизу джерел тепла або в середовищах з високою вологістю чи пилом.
- Прибирання: Від’єднайте живлення перед чищенням. Використовуйте м’яку суху тканину. Не використовуйте рідкі або аерозольні засоби для чищення.
- Догляд за лінзами: Avoid touching the projector lens directly. Use a soft, lint-free cloth specifically designed for optical lenses if cleaning is necessary.
- Обслуговування: Не намагайтеся ремонтувати проектор самостійно. Звертайтеся до кваліфікованого персоналу для проведення будь-яких робіт з обслуговування.
3. Продукт закінчивсяview
The Next Cine800S is a Full HD LED projector featuring Google TV. Below are key components and features.

Малюнок 3.1: Спереду view of the Next Cine800S GoogleTV Projector, highlighting its design and key features like 800 ANSI Lumens and Google TV integration.
3.1. Ключові характеристики
- Роздільна здатність дисплея: Full HD 1920x1080, supporting screen sizes from 40 to 200 inches.
- Яскравість: 800 ANSI люмен.
- Обробка відео: Supports 4Kx2K @ 60fps encode/decode.
- Focus & Keystone: Automatic or Manual Focus, Automatic Keystone Correction.
- Операційна система: Google TV with Android 14.
- Сервіси потокового передавання: Netflix L1, Prime Video, YouTube, Disney+ with L1 DRM Certification.
- Бездротове підключення: Wi-Fi 802.11 a/b/g/n/ac (2.4G & 5G) and Bluetooth 5.0.
- Пам'ять: 2GB LPDDR4 RAM / 8GB eMMC Storage.
- Аудіо: Integrated 12W (4W) Speaker.
- Оптична система: Dust-Sealed Optical Mechanism.
- Відображення екрана: Air Screen and Google Cast for iOS & Android devices.
3.2. Порти та з'єднання
Identify the various input and output ports on your projector.
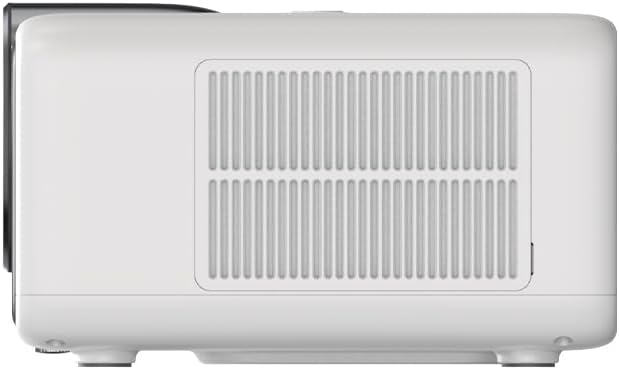
Figure 3.2: Rear panel of the projector, displaying available ports. Note: Actual ports may vary slightly by region or production batch. This model typically includes HDMI, USB, and a 2.5mm Audio Jack.
- HDMI: Connect to external video sources such as Blu-ray players, gaming consoles, or computers.
- USB: Для підключення USB-накопичувачів для відтворення медіафайлів files.
- 2.5 мм аудіороз’єм: Для підключення зовнішніх аудіопристроїв, таких як навушники або динаміки.
4. Налаштування
4.1. Розпакування та первинний огляд
- Обережно вийміть проектор та всі аксесуари з упаковки.
- Check for any signs of damage during transit. If damage is found, contact your retailer immediately.
- Ensure all listed accessories are present.
4.2. Розміщення проектора
Optimal placement is crucial for the best viewнабутий досвід.

Малюнок 4.1: Впрample of projector placement and adjustable screen sizes (40" to 200").
- Відстань: Position the projector at a suitable distance from the screen or wall to achieve your desired screen size (40 to 200 inches).
- Висота: Place the projector on a stable surface or mount it to project the image at the desired height.
- Монтаж: The projector includes a mounting point on its base. Ensure any tripod or mount used is compatible with the projector's screw size and weight. Note that some standard tripod screws may not fit.
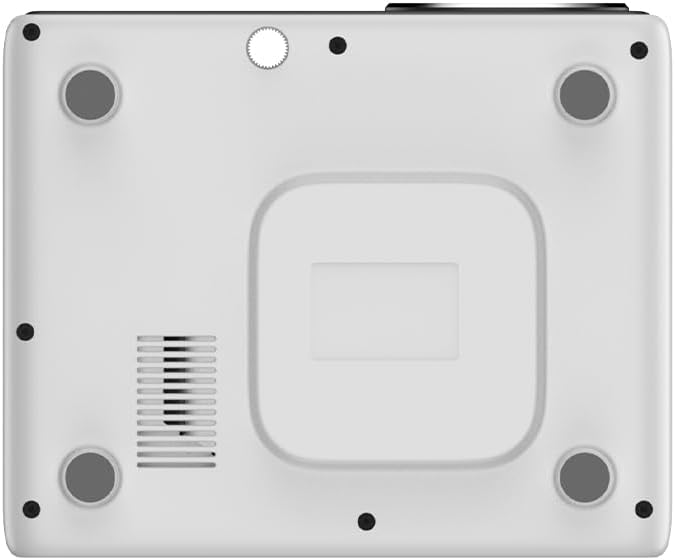
Малюнок 4.2: Нижня частина view of the projector, indicating the mounting point and ventilation grilles.
4.3. Підключення живлення
- Підключіть адаптер живлення до вхідного порту живлення проектора.
- Підключіть адаптер живлення до відповідної електричної розетки.
- Натисніть кнопку живлення на проекторі або пульті дистанційного керування, щоб увімкнути його.
4.4. Початкове налаштування та підключення до мережі
- Upon first power-on, the projector will guide you through the initial Google TV setup process.
- Follow the on-screen instructions to select your language, connect to a Wi-Fi network (2.4G or 5G), and log in with your Google account.
- The projector features automatic focus and keystone correction. If the image is not perfectly clear or rectangular, you can access manual adjustment options in the settings menu.
5. Інструкція з експлуатації
5.1. Навігація в Google TV
The projector runs on Google TV, providing a user-friendly interface for accessing content.

Figure 5.1: The Google TV interface on the Next Cine800S Projector, showing recommended content and installed applications.
- Use the remote control to navigate through menus, select apps, and control playback.
- The home screen provides personalized recommendations and quick access to your favorite streaming services.
5.2. Програми для потокового передавання
Access popular streaming platforms directly from your projector.

Figure 5.2: Supported streaming applications and Google Play Store access.
- Pre-installed apps include Netflix, Prime Video, YouTube, and Disney+.
- Download additional applications from the Google Play Store.
- Ensure you are logged into your respective service accounts to access content.
5.3. Підключення зовнішніх пристроїв
- HDMI: Connect your device to an HDMI port. The projector will automatically detect the input or you can manually select it from the input source menu.
- USB: Insert a USB drive into the USB port. The media player application will typically launch automatically, allowing you to browse and play supported media files (JPG, PNG, BMP, JPEG, MP3, M4A, MP2, WAV, FLAC, MP4, MOV, TS, DAT, F4V, 3GP).
5.4. Віддзеркалення екрана
The projector supports Air Screen and Google Cast for mirroring content from your iOS or Android devices.
- Переконайтеся, що ваш мобільний пристрій і проектор підключені до однієї мережі Wi-Fi.
- On your mobile device, open the screen mirroring function (e.g., 'Screen Cast', 'Smart View', 'AirPlay').
- Виберіть проектор зі списку доступних пристроїв.
6. Технічне обслуговування
Регулярне технічне обслуговування забезпечує оптимальну продуктивність та подовжує термін служби вашого проектора.
6.1. Очищення об'єктива

Figure 6.1: Close-up of the projector lens, which requires careful cleaning.
- Use a soft, lint-free cloth or a lens cleaning brush to gently remove dust from the lens surface.
- For stubborn smudges, use a specialized lens cleaning solution applied to a microfiber cloth, not directly to the lens.
- Avoid abrasive materials or excessive force, which can scratch the lens.
6.2. Cleaning Ventilation Ports
- Periodically check the ventilation grilles for dust accumulation.
- Use a soft brush or a vacuum cleaner with a brush attachment to gently clean the grilles.
- Не вставляйте жодних предметів у вентиляційні отвори.
6.3. Оновлення програмного забезпечення
- Ensure your projector is connected to the internet.
- Navigate to the system settings to check for and install available software updates. Updates can improve performance and add new features.
7. Вирішення проблем
У цьому розділі розглядаються поширені проблеми, з якими ви можете зіткнутися під час використання проектора.
| проблема | Можлива причина | Рішення |
|---|---|---|
| Немає живлення | Шнур живлення відключено, проблема з розеткою | Перевірте підключення шнура живлення. Спробуйте іншу розетку. |
| Немає зображення | Input source not selected, device not connected, lens cap on | Ensure input source is correctly selected. Check HDMI/USB connections. Remove lens cap. |
| Зображення розмите | Фокус не налаштовано | Adjust focus manually using the projector's focus ring or through the settings menu if automatic focus is not sufficient. |
| Зображення спотворене/трапецієподібне | Keystone not adjusted, projector not perpendicular to screen | The projector has automatic keystone correction. If the image is still distorted, access the manual keystone correction settings to fine-tune the image. |
| Немає звуку або погана якість звуку | Volume too low, external audio device not connected, speaker issue | Increase volume. Check external audio connections if used. If internal speaker sound is distorted at low volumes, consider connecting external speakers via the 2.5mm audio jack or Bluetooth. |
| Проблеми з підключенням Wi-Fi | Неправильний пароль, проблеми з маршрутизатором, перешкоди сигналу | Verify Wi-Fi password. Restart router. Ensure projector is within Wi-Fi range. |
| Пульт не працює | Batteries low/dead, IR sensor blocked | Замініть батарейки. Переконайтеся, що між пультом дистанційного керування та ІЧ-датчиком проектора немає перешкод. |
8. Технічні характеристики
Detailed technical specifications for the Next Cine800S GoogleTV Projector.
| Особливість | Специфікація |
|---|---|
| Модель | Cine800S |
| Технологія дисплея | Світлодіодний проектор |
| Рідна роздільна здатність | Повний HD 1920x1080 |
| Яскравість | 800 ANSI Lumens |
| Розмір проекції | 40" — 200" |
| Декодування відео | 4Kx2K @ 60fps |
| Фокус | Автоматичний або ручний |
| Корекція коректури | Автоматичний |
| Операційна система | Google TV, Android 14 |
| DRM Certification | Netflix L1, Prime Video, YouTube, Disney+ L1 |
| Wi-Fi | 802.11 a/b/g/n/ac (2.4G & 5G) |
| Bluetooth | 5.0 |
| ОЗУ | 2 ГБ LPDDR4 |
| Внутрішня пам'ять | 8 ГБ eMMC |
| Вихід на динамік | 12 Вт (4 Вт) |
| Порти | HDMI, 2.5mm Audio Jack, USB |
| Підтримувані медіаформати | JPG, PNG, BMP, JPEG, MP3, M4A, MP2, WAV, FLAC, MP4, MOV, TS, DAT, F4V, 3GP, FAT, NTFS |
| Оптичний механізм | Dust-Sealed System |
| Віддзеркалення екрана | Air Screen, Google Cast (iOS & Android) |
9. Гарантія та підтримка
For warranty information, please refer to the documentation provided with your purchase or visit the official Next website. For technical support, product inquiries, or service requests, please contact Next customer service through their official channels.
Зберігайте чек про покупку та серійний номер продукту під рукою, коли звертатиметесь до служби підтримки.