
1. Вступ
This instruction manual provides comprehensive guidance for the safe and effective use of your Elna eXplore 130 Mechanical Sewing Machine. Please read this manual thoroughly before operating the machine to ensure proper setup, operation, and maintenance. Retain this manual for future reference.
2. Важливі інструкції з техніки безпеки
Користуючись електричним приладом, слід завжди дотримуватись основних заходів безпеки, зокрема таких:
- Прочитайте всі інструкції перед використанням цієї швейної машини.
- Тримайте пальці подалі від усіх рухомих частин. Потрібна особлива обережність навколо голки швейної машини.
- Завжди використовуйте правильну голкову пластину. Неправильна пластина може спричинити поломку голки.
- Не використовуйте зігнуті голки.
- Вимикайте швейну машину під час будь-яких налаштувань у зоні голки, таких як заправка нитки в голку, зміна голки, заправка нитки в шпульку або зміна притискної лапки.
- Завжди від’єднуйте швейну машину від електричної розетки, коли знімаєте чохли, змащуєте або виконуєте будь-які інші налаштування, зазначені в інструкції з експлуатації.
- Ніколи не кидайте та не вставляйте предмети в будь-які отвори.
- Не використовуйте на вулиці.
- Не працюйте там, де використовуються аерозолі (розпилювачі) або де подається кисень.
- Щоб від’єднати пристрій, переведіть усі елементи керування у вимкнене положення, а потім вийміть вилку з розетки.
- Не виймайте вилку, тягнучи за шнур. Щоб відключити, візьміться за вилку, а не за шнур.
3. Продукт закінчивсяview
The Elna eXplore 130 is a mechanical sewing machine designed for various sewing tasks, offering a selection of utility, stretch, and decorative stitches. It features a lightweight and portable design.
Ключові характеристики:
- 23 Built-in utility, stretch, and decorative stitches.
- One four-step buttonhole.
- Front Loading Vertical Oscillating Bobbin system.
- Free-arm sewing capability by removing the front accessory tray.
- Maximum stitch width: 5mm.
- Maximum stitch length: 4mm.
- Maximum sewing speed: 800 stitches per minute (SPM).
- LED lighting for improved visibility.
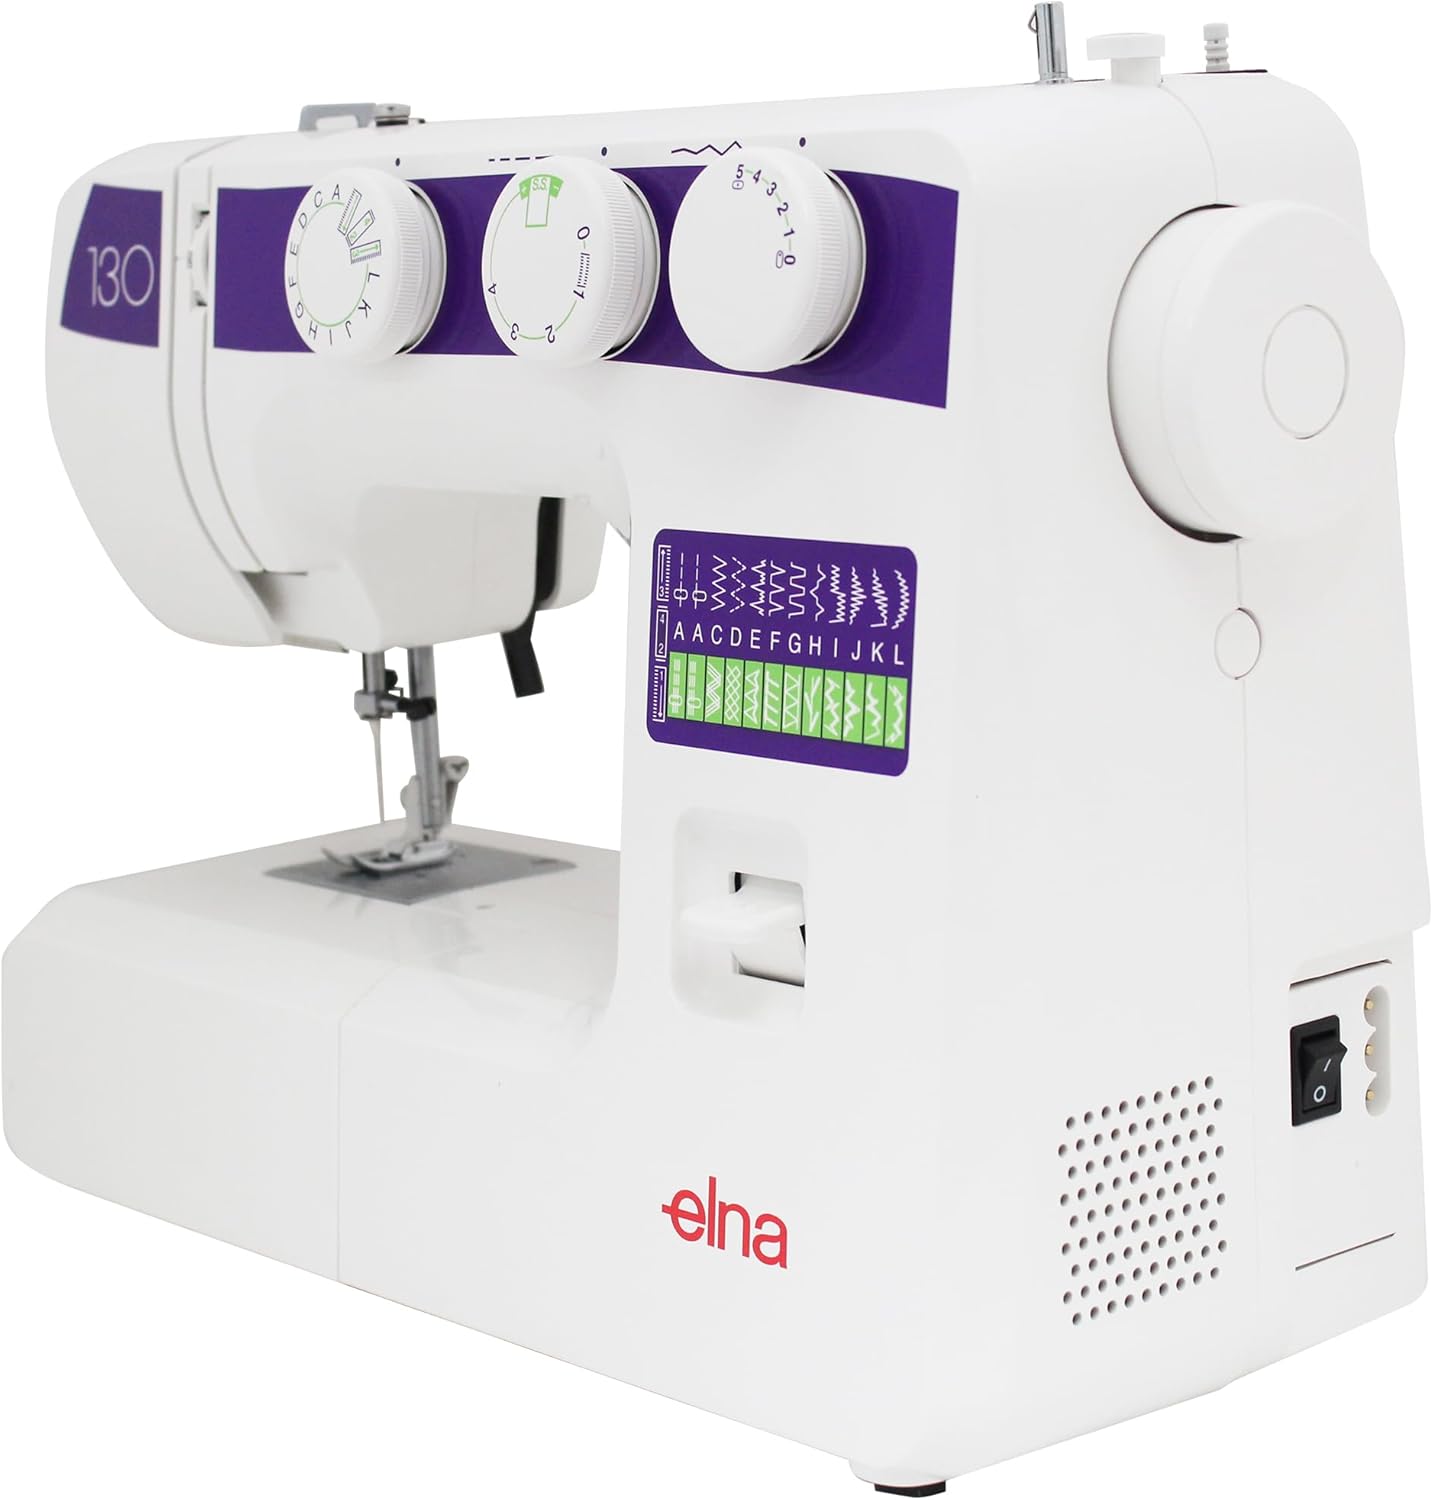
- Convenient dial system for stitch pattern, length, and width selection.
Включені компоненти:
The following accessories are included with your Elna eXplore 130 sewing machine:
- Presser Feet: Standard Foot A, Zipper Foot E, Blind Hem Foot G, Buttonhole Foot.
- Darning plate.
- Bobbins (x3).
- Seam Ripper.
- Needle Set.
- Викрутка.
- Felt.
- Foot Controller.
- Інструкція з експлуатації (цей документ).
машина Views:




4. Налаштування
4.1 Розпакування та розміщення
- Обережно вийміть машину з упаковки.
- Поставте машину на стійку рівну поверхню.
- Забезпечте достатнє освітлення та простір для комфортної роботи.
4.2 Підключення живлення
- Підключіть штекер ножного контролера до розетки живлення машини.
- Вставте вилку шнура живлення у відповідну електричну розетку.
- Ensure the power switch on the machine is in the "OFF" position before connecting.
4.3 Намотування шпульки
- Помістіть порожню шпульку на шпиндель намотувача шпульки.
- Guide the thread from the spool pin through the upper thread guide and around the bobbin winding tension disc.
- Оберніть нитку кілька разів навколо шпульки.
- Посуньте шпиндель пристрою намотування шпульки вправо.
- Обережно натисніть на ножну педаль, щоб розпочати намотування. Зупиніть, коли шпулька заповниться.
- Обріжте нитку та посуньте шпиндель намотувача шпульки назад ліворуч.
4.4 Встановлення шпульки
- Open the bobbin cover plate located on the free arm.
- Вставте намотану шпульку в шпульний ковпачок, переконавшись, що нитка розмотується в правильному напрямку (зазвичай проти годинникової стрілки).
- Протягніть нитку через пружину натягу та вставте її у гніздо шпульного ковпачка.
- Закрийте кришку шпульки.
4.5 Заправка верхньої нитки
- Підніміть підйомник лапки.
- Покладіть котушку з ниткою на шпильку котушки.
- Проведіть нитку через верхній нитенаправитель.
- Слідкуйте за пронумерованим шляхом заправки нитки вниз через диски натягу та вгору до важеля нітки.
- Протягніть важіль нітки справа наліво.
- Continue guiding the thread down through the remaining guides to the needle.
- Проведіть нитку в голку спереду назад.
- Протягніть приблизно 6 дюймів нитки через вушко голки.
5. Інструкція з експлуатації
5.1 Вибір стібка
- Поверніть Stitch Pattern Dial (leftmost dial) to select the desired stitch. Refer to the stitch pattern guide on the machine for available options.
- Відрегулюйте Циферблат довжини стібка (middle dial) to set the desired stitch length (0-4mm). For stretch stitches, use the preset length indicated by the green mark.
- Відрегулюйте Диск ширини стібка (rightmost dial) to set the desired stitch width (0-5mm).
5.2 Основи шиття
- Покладіть тканину під лапку.
- Опустіть притискну лапку.
- Turn the handwheel towards you to bring the needle down into the fabric, then up again, pulling the bobbin thread through the needle plate hole.
- Pull both upper and bobbin threads to the back under the presser foot.
- Обережно натисніть на ножну педаль, щоб розпочати шиття. Плавно просувайте тканину.
- To secure a seam, press the reverse lever for a few stitches at the beginning and end of your seam.
- When finished, raise the needle to its highest position, lift the presser foot, and pull the fabric away from the machine. Cut the threads using the thread cutter.
5.3 Використання вільної руки
To use the free arm for sewing tubular items like sleeves, cuffs, or trouser hems, simply slide off the accessory storage tray located at the front of the machine. This exposes the narrow free arm.
5.4 Four-Step Buttonhole
The Elna eXplore 130 features a four-step buttonhole function.
- Attach the Buttonhole Foot.
- Позначте положення петлі для ґудзиків на тканині.
- Set the Stitch Pattern Dial to the first buttonhole step (indicated by a square symbol).
- Sew the first side of the buttonhole.
- Adjust the Stitch Pattern Dial to the second step for the bar tack.
- Adjust to the third step for the second side, and the fourth step for the final bar tack.
- Carefully cut open the buttonhole using a seam ripper.
6. Технічне обслуговування
Регулярне технічне обслуговування забезпечує довговічність та оптимальну роботу вашої швейної машини.
6.1 Очищення машини
- Завжди відключайте машину від мережі перед чищенням.
- Зніміть голку, притискну лапку та голкову пластину.
- Use the provided brush to remove lint and dust from the bobbin case area and feed dogs.
- Протріть зовнішню частину пристрою м’якою сухою тканиною. Не використовуйте рідкі засоби для чищення.
6.2 Заміна голки
- Підніміть голку в найвище положення.
- Послабте голку клamp гвинт.
- Вийміть стару голку.
- Insert a new needle with the flat side facing the back, pushing it up as far as it will go.
- Затягніть голку клamp надійно закрутити.
- Change needles regularly (after 8-10 hours of sewing) or if it becomes bent or dull.
7. Вирішення проблем
У цьому розділі розглядаються поширені проблеми, з якими ви можете зіткнутися. Якщо у вас проблеми, не перелічені тут, зверніться до служби підтримки клієнтів.
| проблема | Можлива причина | Рішення |
|---|---|---|
| Пропущені шви | Incorrect needle size/type, bent needle, improper threading. | Change needle, re-thread machine, ensure correct needle for fabric. |
| Thread Breaking (Upper) | Incorrect upper tension, improperly threaded, poor quality thread, bent needle. | Adjust tension, re-thread, use quality thread, change needle. |
| Thread Breaking (Bobbin) | Неправильно намотана шпулька, неправильне вставлення шпульки, ворс у шпульному ковпачку. | Rewind bobbin, re-insert bobbin correctly, clean bobbin case. |
| Тканина не подається | Притискна лапка не опущена, транспортувальні зубчасті механізми опущені, ворс під голковою пластиною. | Lower presser foot, raise feed dogs, clean under needle plate. |
| Машина не запускається | Шнур живлення не підключений, вимикач живлення вимкнений, проблема з ножним контролером. | Check power connections, turn on switch, inspect foot controller. |
8. Технічні характеристики
| Особливість | Деталь |
|---|---|
| Бренд | Ельна |
| Номер моделі | EL130 |
| Тип | Механічна швейна машина |
| Підрахунок стібків | 23 вбудованих стібків |
| Тип петлі для ґудзиків | Чотириступінчастий |
| Тип котушки | Front Loading Vertical Oscillating |
| Максимальна ширина стібка | 5 мм |
| Максимальна довжина стібка | 4 мм |
| Максимальна швидкість шиття | 800 SPM |
| Освітлення | LED |
| Джерело живлення | Електричний |
| Розміри продукту (Д x Ш x В) | 6" Г x 15.3" Ш x 11.6" В |
| Вага товару | 13 фунта |
| матеріал | Метал, пластик |
| UPC | 732212411939 |
9. Гарантія та підтримка
For information regarding your product's warranty, please refer to the warranty card included with your purchase or visit the official Elna webсайт.
If you require technical assistance, have questions about operation, or need to order replacement parts, please contact Elna customer support.
- Elna Official Webсайт: www.elna.com
- Elna USA Store on Amazon: Visit the Elna Store