
MICTUNING P4-N-4
MICTUNING P4-NEON 4 Gang Switch Panel Instruction Manual
Model: P4-N-4 | Brand: MICTUNING
вступ
This manual provides comprehensive instructions for the installation, operation, and maintenance of your MICTUNING P4-NEON 4 Gang Switch Panel. Please read this manual thoroughly before use to ensure proper functionality and safety.

Figure 1: MICTUNING P4-NEON 4 Gang Switch Panel and included components.
Вміст упаковки
Перевірте наявність усіх елементів в упаковці:

Figure 2: All components included in the MICTUNING P4-NEON 4 Gang Switch Panel package.
- Концентратор живлення
- Панель комутації
- Джгут проводів
- Дріт ACC
- Монтажні кронштейни
- 140pcs Switch Labels
- Кран запобіжника
- Wires (Power and Ground)
- Посібник користувача
- Застібки-блискавки
- Кріплення
- MICTUNING Stickers
- Пакувальна коробка
- Запасні запобіжники
- Автоматичний вимикач (60A)
Налаштування та встановлення
The MICTUNING P4-NEON switch panel is designed for flexible installation and simplified wiring. The power hub centralizes connections, reducing cable clutter and enhancing safety.
1. Power Hub Installation
Install the power hub in a secure, dry location, typically under the hood, ensuring it is protected from direct elements. Connect the main power and ground wires from the vehicle's battery to the power hub. The included 60A circuit breaker should be installed inline with the main power connection for protection.

Малюнок 3: Впрample of a clean and safe wiring setup using the power hub.

Figure 4: Wiring diagram for the power hub, showing connections for different circuits.
2. Switch Panel Mounting
The slim design of the switch panel allows for versatile mounting options. It can be installed horizontally or vertically on surfaces such as the dashboard, A-pillar, or overhead console using the provided mounting brackets and fasteners.

Figure 5: Flexible mounting options for the switch panel, including vertical and horizontal orientations.

Figure 6: The compact design allows for installation in diverse vehicle interior spaces.
3. Connecting the Switch Panel
Connect the switch panel to the power hub using the provided wire harness. Ensure all connections are secure. Apply the appropriate switch labels to the silicone buttons for easy identification of controlled accessories.
Інструкція з експлуатації
The P4-NEON switch panel features color-coded backlit silicone buttons for intuitive operation and four distinct control modes.
1. Turning On/Off the Switch Panel
Press any button to turn on the switch panel. The buttons will illuminate according to their current mode. To turn off the backlight, press and hold the power button (rightmost button) for a few seconds. Press any button again to turn the backlight back on.

Figure 7: Turning the backlight off for night driving by pressing the power button.
2. Understanding Control Modes
Each button's backlight color indicates its control mode:
- Червоний: Toggle Mode (On/Off)
- Синій: Momentary Mode (Active while pressed)
- фіолетовий: Flash Mode (Flashes continuously)
- Зелений: Strobe Mode (Strobes continuously)
- Білий: Standby Mode (Backlight off, but ready for activation)

Figure 8: The four distinct control modes indicated by button color.
3. Setting Control Modes
To change a button's control mode:
- Press any button to turn on the switch panel.
- Press and hold the "M" (Mode) button. When the red backlight flashes, the panel is in Control Mode Setting state.
- Select the desired switch button you wish to configure. Each press will cycle through the four control modes (Toggle, Momentary, Flash, Strobe), indicated by the button's backlight color.
- Once the desired mode is set, press the "M" (Mode) button again to save the settings and exit the Control Mode Setting state.
Video 1: Detailed instructions on how to set the control modes for each switch button on the MICTUNING P4-NEON panel.
4. Відновлення до заводських налаштувань
To restore the switch panel to its factory default settings:
- Press any button to turn on the switch panel.
- Press and hold the "M" (Mode) button for 7 seconds.
- The backlight will turn off, indicating that the factory settings have been restored.
5. Switching Power Source (Battery/ACC)
The power source for the switch panel can be configured between direct battery power and ACC (Accessory) power. This setting is controlled via a switch on the power hub.
- When the power indicator on the power hub is on, the system is powered directly by the Акумулятор.
- When the power indicator on the power hub is вимкнено, the system is powered by ACC (Accessory) power, meaning it will turn on/off with the vehicle's ignition.
Adjust the switch on the power hub according to your preferred power source. Refer to the markings on the power hub for the correct switch position.
Технічне обслуговування
The MICTUNING P4-NEON switch panel is built with durable materials and features an IP65 waterproof rating, ensuring reliable performance in various conditions.
- Прибирання: Використовуйте м'який, damp cloth to clean the switch panel and power hub. Avoid abrasive cleaners or solvents.
- Огляд: Periodically check all wiring connections for tightness and signs of wear or corrosion. Ensure the circuit breaker is functioning correctly.
- Запобіжники: The power hub includes various fuses for each circuit. If a connected accessory stops working, check the corresponding fuse on the power hub and replace it with a spare fuse of the same rating if necessary.
Відео 2: Кінецьview of the MICTUNING P4-NEON 4 Gang Switch Panel, highlighting its features and durable construction.
Усунення несправностей
If you encounter issues with your MICTUNING P4-NEON switch panel, refer to the following common troubleshooting steps:
- Панель не вмикається:
- Check the main power connection to the vehicle battery.
- Verify the 60A circuit breaker is not tripped.
- Ensure the power source switch on the power hub is correctly set (Battery or ACC).
- Accessory Not Working:
- Check the specific fuse for that circuit on the power hub and replace if blown.
- Verify the wiring connection from the power hub to the accessory.
- Ensure the switch button is set to the correct control mode for the accessory.
- Проблеми з підсвічуванням:
- If the backlight is off, press any button to reactivate it.
- If specific buttons are not lighting up, check for loose connections or internal damage.
For further assistance, please contact MICTUNING customer support.
Технічні характеристики
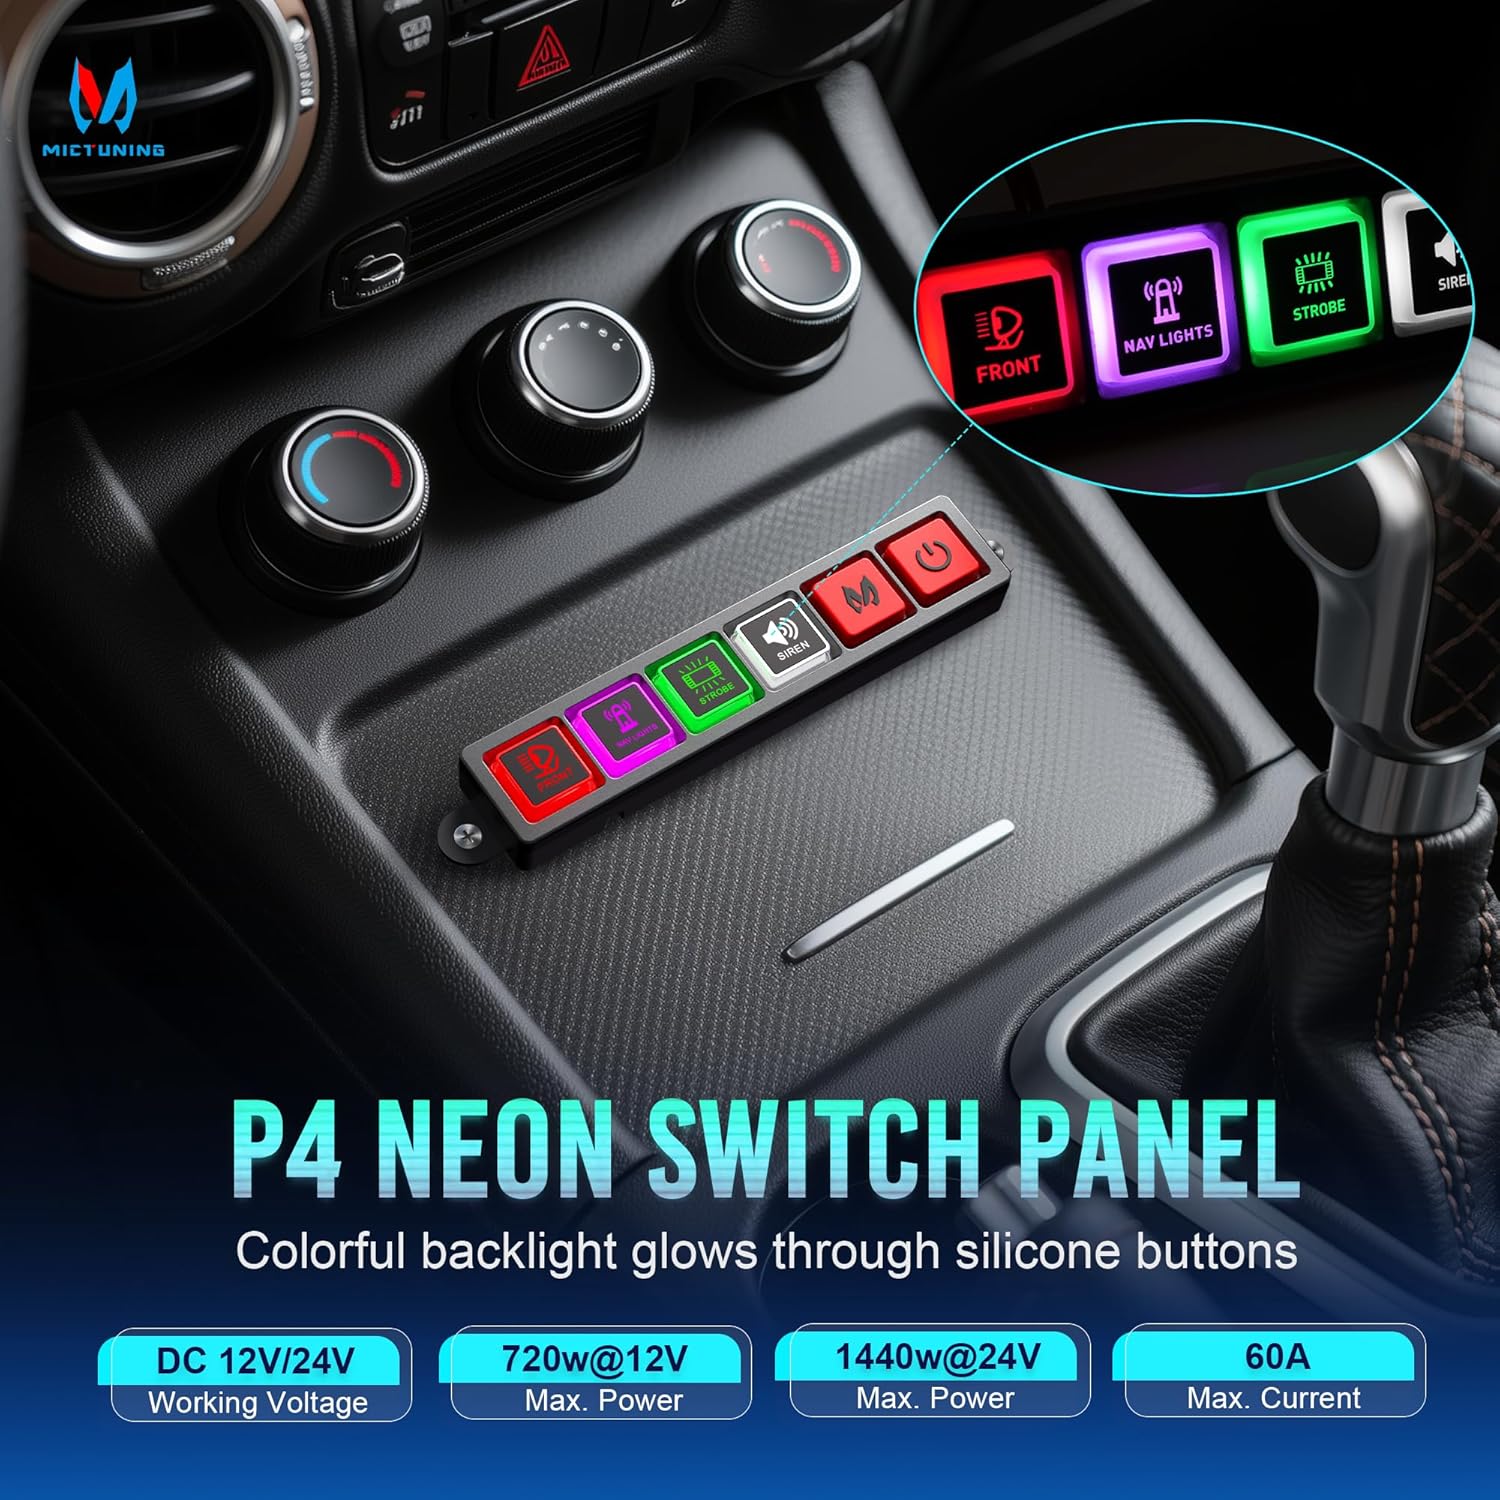
Figure 9: Key technical specifications of the P4-NEON switch panel.
| Особливість | Деталь |
|---|---|
| Номер моделі | P4-N-4 |
| Робочий випtage | 12 В / 24 В постійного струму |
| Максимальна потужність | 720 Вт при 12 В / 1440 Вт при 24 В |
| Максимальний струм | 60 Amps |
| Робоча температура | -40°C до 105°C |
| Рейтинг водонепроникності | IP65 |
| Тип схеми | 4-сторонній |
| Розміри продукту (Д x Ш x В) | 2.68 x 1.77 x 3.74 дюймів |
| Режим роботи | УВІМКНЕНО ВИМКНЕНО |
Гарантія та підтримка клієнтів
MICTUNING is committed to providing high-quality products and excellent customer service. Your P4-NEON switch panel comes with lifetime customer support.
If you require assistance or have any questions, please contact MICTUNING customer support. You can typically reach support within 4 hours for friendly assistance.
To contact the seller via Amazon:
- Увійдіть у свій обліковий запис Amazon.
- Перейдіть до розділу «Ваші замовлення».
- Find the order ID for your MICTUNING P4-NEON switch panel.
- Click "Problem with the order".
- Choose "Other issue".
- Натисніть «Зв’язатися з продавцем».
Ask a question about this manual
Ask about setup, troubleshooting, compatibility, parts, safety, or missing instructions. Manuals+ will review the question and use this page’s manual context to help answer it.