
HOCO QS2
Hoco QS2 Portable Smart Air Pump & Emergency Start-Up Power Bank User Manual
Модель: QS2
1. Вступ
Thank you for choosing the Hoco QS2 Portable Smart Air Pump & Emergency Start-Up Power Bank. This device is a multi-functional tool designed to provide reliable assistance in various situations, including jump-starting vehicles, inflating tires, and charging electronic devices. Please read this manual thoroughly before use to ensure proper operation and to maximize the lifespan of your device.
2. Заходи безпеки
Always observe the following safety guidelines to prevent injury or damage to the device and property.
- Не піддавайте пристрій впливу екстремальних температур, прямих сонячних променів або вогню.
- Зберігати в недоступному для дітей місці.
- Не розбирайте, не модифікуйте та не намагайтеся самостійно ремонтувати пристрій. Зверніться до кваліфікованого сервісного персоналу.
- Ensure proper ventilation during operation, especially when using the air pump or jump start function.
- Уникайте короткого замикання вихідних клем.
- Не використовуйте стартер, якщо акумулятор розрядженийamps або кабелі пошкоджені.
- When jump-starting, ensure the vehicle's ignition is off and all accessories are unplugged.
- Do not over-inflate tires. Always refer to the recommended tire pressure for your vehicle.
- If the device becomes excessively hot during use, discontinue operation immediately.
3. Вміст упаковки
Будь ласка, поставте позначку у відповідному полі для наступних пунктів:
- 1 x Hoco QS2 8000 mAh Portable Smart Air Pump Emergency Start-Up Power Bank
- 1 x Jump Start Cables (Red and Black Clamps)
- 1 x Air Hose with Valve Connector
- Various Nozzle Adapters (e.g., for bicycles, balls)
- 1 x USB кабель зарядки типу C

Figure 1: Hoco QS2 and its complete set of accessories.
4. Компоненти продукту
Familiarize yourself with the different parts of your Hoco QS2 device.
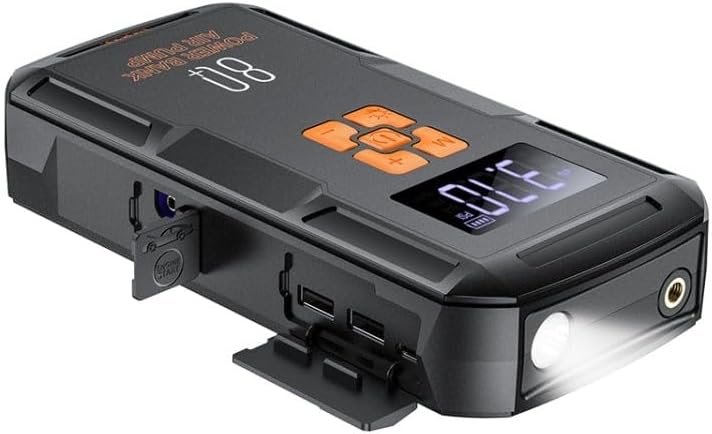
Малюнок 2: Закінченоview of the Hoco QS2 device.
- Цифровий дисплей: Shows current pressure, battery level, and selected mode.
- Кнопки управління: Потужність, вибір режиму, збільшення/зменшення тиску.
- Порт повітряного шланга: Connects the inflation hose.
- Порт пуску: Connects the jump start cables.
- Вихідні порти USB (2x): For charging external devices (5V/2.4A).
- Вхідний порт Type-C: For charging the Hoco QS2 itself (5V/2.4A).
- Світлодіодний ліхтарик: Забезпечує освітлення.
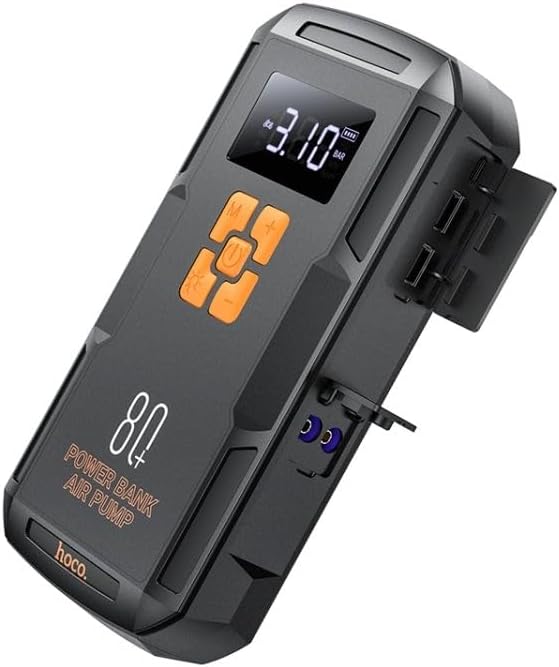
Малюнок 3: Сторона view of the Hoco QS2 with ports visible.
5. Налаштування та зарядка
5.1 Charging the Hoco QS2
Before first use, fully charge the Hoco QS2. It is recommended to keep the device charged above 50% for optimal performance, especially for jump-starting.
- Connect the provided USB Type-C charging cable to the Type-C input port on the Hoco QS2.
- Connect the other end of the USB cable to a 5V/2.4A USB wall adapter (not included) or a compatible USB port.
- The digital display will indicate the charging status and battery level.
- Час заряджання може відрізнятися залежно від джерела живлення.
6. Інструкція з експлуатації
6.1 Jump Start Function
The Hoco QS2 can jump-start vehicles with up to 4.0L gasoline or 2.0L diesel engines.
- Ensure the Hoco QS2 is sufficiently charged (at least 75% battery recommended).
- Вимкніть запалювання автомобіля та все електричне обладнання.
- Підключіть червоний (+) клamp of the jump start cable to the positive (+) terminal of the vehicle's battery.
- Підключіть чорний (-) клamp to the negative (-) terminal of the vehicle's battery or a solid, unpainted metal part of the engine block (ground point).
- Insert the blue connector of the jump start cable into the jump start port on the Hoco QS2.
- Once connected, the Hoco QS2 will automatically enter jump start mode.
- Заведіть двигун автомобіля. Якщо він не запуститься одразу, зачекайте 30 секунд, перш ніж спробувати знову. Не крутіть стартер більше 3 секунд за спробу.
- Once the vehicle starts, immediately disconnect the jump start cable from the Hoco QS2, then remove the black (-) clamp, а потім червоний (+) clamp від акумулятора автомобіля.
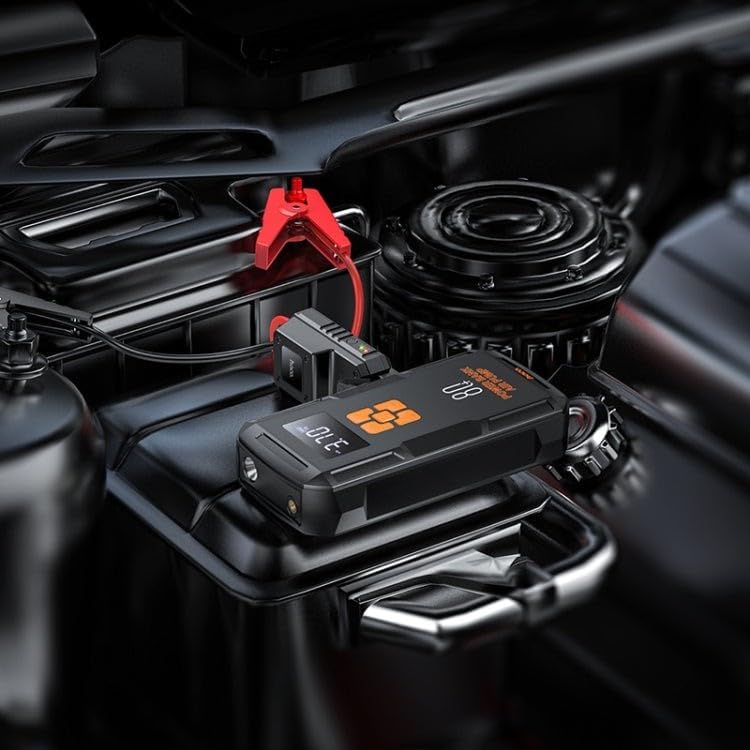
Figure 4: Using the Hoco QS2 for jump-starting a vehicle.
6.2 Tire Inflation Function (Air Pump)
The Hoco QS2 can inflate tires up to 10.3 bar (150 PSI) and features multiple inflation modes.
- Connect the air hose to the air hose port on the Hoco QS2.
- Attach the other end of the air hose to the tire valve. Ensure a secure connection to prevent air leakage. Use appropriate nozzle adapters for other inflatables (e.g., bicycle tires, sports balls).
- Press the Power button to turn on the device. The display will show the current tire pressure.
- Press the 'M' (Mode) button to cycle through the inflation modes: Car, Motorcycle, Bicycle, Basketball. Each mode has a default pressure setting, which can be adjusted.
- Use the '+' and '-' buttons to set your desired target pressure.
- Press the Power button again to start inflation. The pump will automatically stop once the target pressure is reached.
- Disconnect the air hose from the tire valve and the device.

Figure 5: Inflating a car tire with the Hoco QS2.
6.3 Функція зовнішнього зарядного пристрою
The Hoco QS2 can charge your electronic devices via its dual USB output ports.
- Connect your device's USB charging cable to one of the USB output ports on the Hoco QS2.
- Connect the other end of the cable to your electronic device (e.g., smartphone, tablet).
- The Hoco QS2 will automatically begin charging your device.
- Цифровий дисплей показуватиме залишковий рівень заряду акумулятора портативного акумулятора.
6.4 LED Flashlight Function
The integrated LED flashlight provides illumination for various situations.
- To turn on the flashlight, press and hold the 'Light' button (usually indicated by a light bulb icon).
- Press the 'Light' button again to cycle through different light modes (e.g., steady on, SOS signal, strobe).
- Press and hold the 'Light' button again to turn off the flashlight.
7. Обслуговування та зберігання
- Протирайте пристрій м’якою сухою тканиною. Не використовуйте агресивні хімікати або абразивні засоби для чищення.
- Store the Hoco QS2 in a cool, dry place, away from direct sunlight and moisture.
- For long-term storage, charge the device every 3-6 months to maintain battery health.
- Ensure all ports are covered when not in use to prevent dust and debris from entering.
8. Вирішення проблем
| проблема | Можлива причина | Рішення |
|---|---|---|
| Пристрій не вмикається. | Низький заряд батареї. | Повністю зарядіть пристрій. |
| Транспортний засіб не запускається від носового приводу. | Incorrect cable connection; Device battery too low; Vehicle battery severely discharged. | Ensure correct polarity (+ to +, - to -). Charge the Hoco QS2. Allow more time for the vehicle battery to receive a charge, or seek professional assistance if the battery is completely dead. |
| Air pump not inflating or inflating slowly. | Air hose not securely connected; Nozzle adapter not suitable; Device battery low. | Check all connections for leaks. Use the correct adapter. Charge the device. |
| Зарядка через USB не працює. | Device battery low; Cable faulty; Device not compatible. | Charge the Hoco QS2. Try a different USB cable. Ensure your device is compatible with 5V/2.4A charging. |
9. Технічні характеристики
| Особливість | Специфікація |
|---|---|
| Номер моделі | QS2 |
| Ємність акумулятора | 8000 мАг (29.6 Вт·год) |
| Вхід Type-C | 5 В / 2.4 А |
| USB Output 1/2 | 5 В / 2.4 А |
| Загальний вихід USB | 5 В / 2.4 А |
| Початковий вихід | 12V (for vehicle emergency start) |
| Максимальний тиск повітря | 10.3 бар / 150 PSI |
| Розміри | Прибл. 12 x 10 x 8 см |
| вага | прибл. 800 грам |
| Робоча температура | Зверніться до упаковки продукту для отримання інформації про конкретний асортимент. |
10. Гарантія та підтримка
HOCO products are designed and manufactured to the highest quality standards. For warranty information and customer support, please refer to the warranty card included with your purchase or visit the official HOCO webсайт. Зберігайте чек про покупку як підтвердження покупки для будь-яких гарантійних претензій.
Ask a question about this manual
Ask about setup, troubleshooting, compatibility, parts, safety, or missing instructions. Manuals+ will review the question and use this page’s manual context to help answer it.