
CREWORKS 9" x 24"
CREWORKS Mini Metal Lathe 9" x 24" Instruction Manual
Model: 9" x 24" | Brand: CREWORKS
1. Вступ
Thank you for choosing the CREWORKS 9" x 24" Mini Metal Lathe. This manual provides essential information for the safe operation, maintenance, and troubleshooting of your new machine. Please read this manual thoroughly before operating the lathe to ensure proper use and to prevent injury or damage.
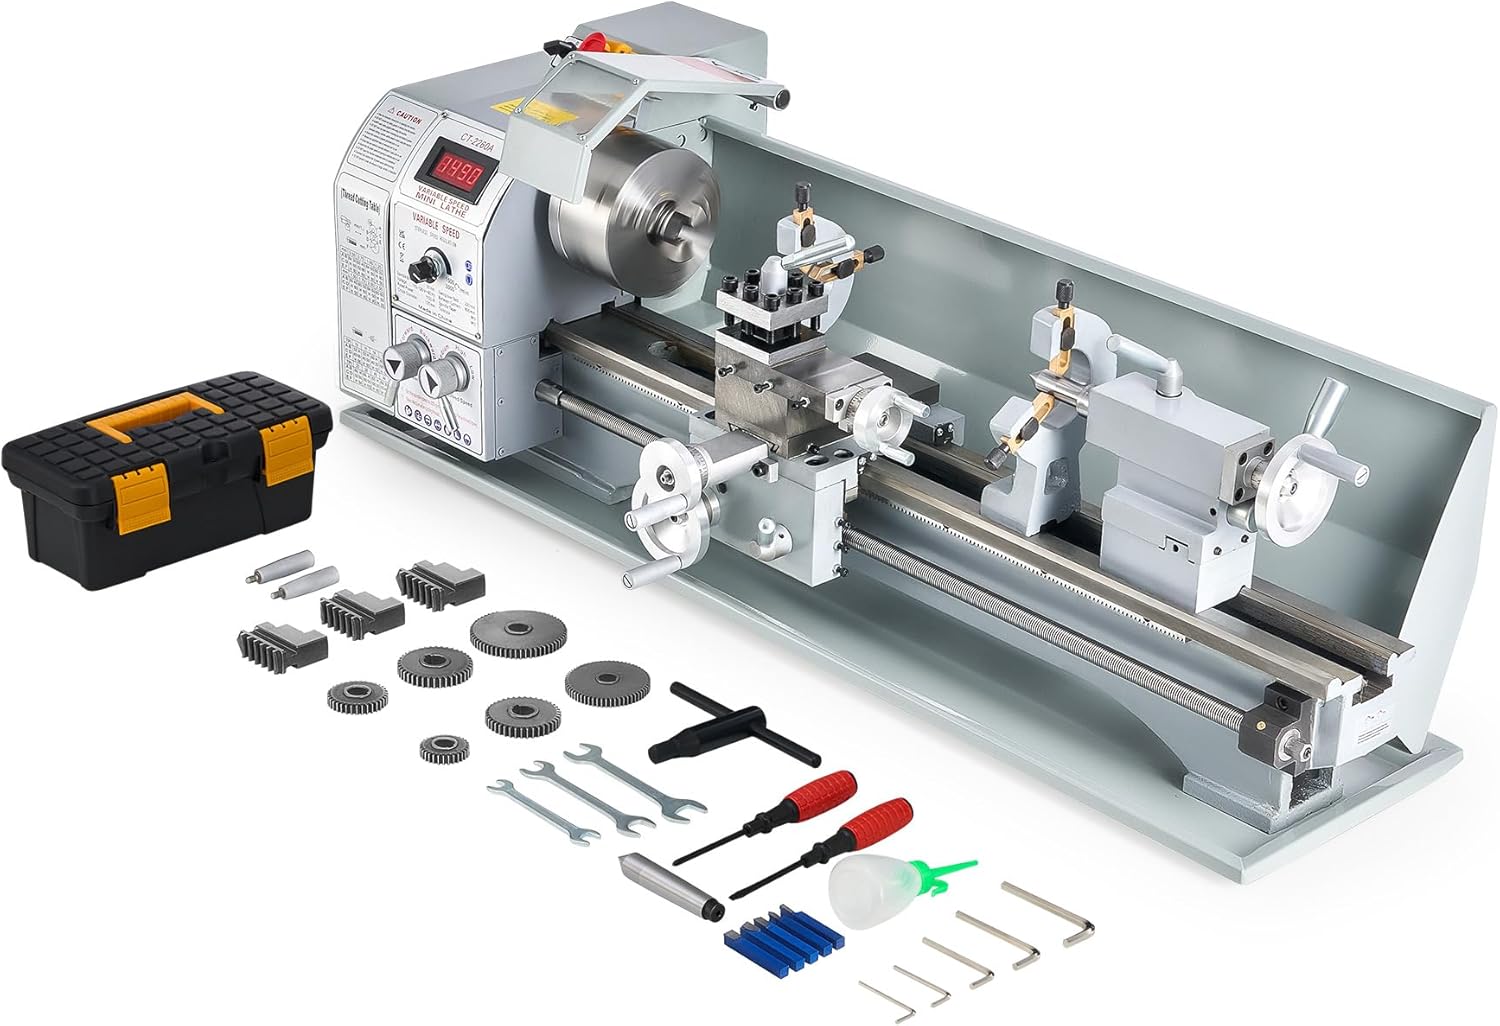
Figure 1.1: CREWORKS 9" x 24" Mini Metal Lathe with included accessories.
2. Техніка безпеки
Always prioritize safety when operating machinery. Failure to follow these instructions may result in serious injury or death.
- Прочитайте інструкцію: Перед початком роботи ознайомтеся з усіма інструкціями та попередженнями.
- Засоби індивідуального захисту (ЗІЗ): Always wear safety glasses or a face shield. Use hearing protection. Do not wear loose clothing, gloves, ties, or jewelry that can get caught in moving parts. Tie back long hair.
- Робоча зона: Keep the work area clean, well-lit, and free from clutter. Ensure adequate space around the machine.
- Стан машини: Inspect the lathe for damage or loose parts before each use. Do not operate if damaged.
- Підключення живлення: Ensure the machine is properly grounded. Disconnect power before making adjustments, changing tools, or performing maintenance.
- Безпека заготовки: Завжди переконайтеся, що заготовка надійно закріпленаamped in the chuck or collet.
- Видалення чіпа: Never remove chips by hand while the machine is running. Use a brush or hook.
- Аварійна зупинка: Ознайомтеся з розташуванням та принципом роботи кнопки аварійної зупинки.
- Нагляд: Ніколи не залишайте машину без нагляду, коли вона працює.

Малюнок 2.1: Закінченоview of the lathe components, including the emergency stop button.
3. Компоненти та елементи керування
Understanding the various parts of your lathe is crucial for effective and safe operation.
3.1 Основні компоненти
- Головна бабка: Houses the main spindle, motor, and gear train.
- Чак: Holds the workpiece securely. The CREWORKS lathe features a 3-jaw chuck.
- Перевезення: Рухається вздовж станини, несучи поперечні салазки та штангу для інструментів.
- Перехресне слайдування: Moves perpendicular to the bed, allowing for facing operations.
- Складений відпочинок: Rotates and slides to allow for angled cuts and fine adjustments.
- Пост інструменту: Утримує ріжучі інструменти.
- Задня бабка: Supports the end of long workpieces or holds drilling/reaming tools.
- ліжко: The main frame of the lathe, providing precision guide rails for the carriage and tailstock.
- Ходовий гвинт: Used for automatic feeding and threading operations.
3.2 Елементи керування
- Power and Emergency Stop: Main power switch and immediate shutdown button.
- Перемикач вперед/назад: Controls spindle rotation direction.
- Ручка регулювання швидкості: Varies the spindle speed.
- Цифровий дисплей швидкості: Shows the current spindle RPM.
- Carriage Handwheel: Manual movement of the carriage along the bed.
- Cross Slide Handwheel: Manual movement of the cross slide.
- Compound Control Wheel: Manual movement of the compound rest.
- Tail Feed Handwheel: Advances the tailstock quill.
- Half Nut Lever: Engages the lead screw for threading.
Figure 3.1: Detailed diagram showing the main components and controls of the lathe.
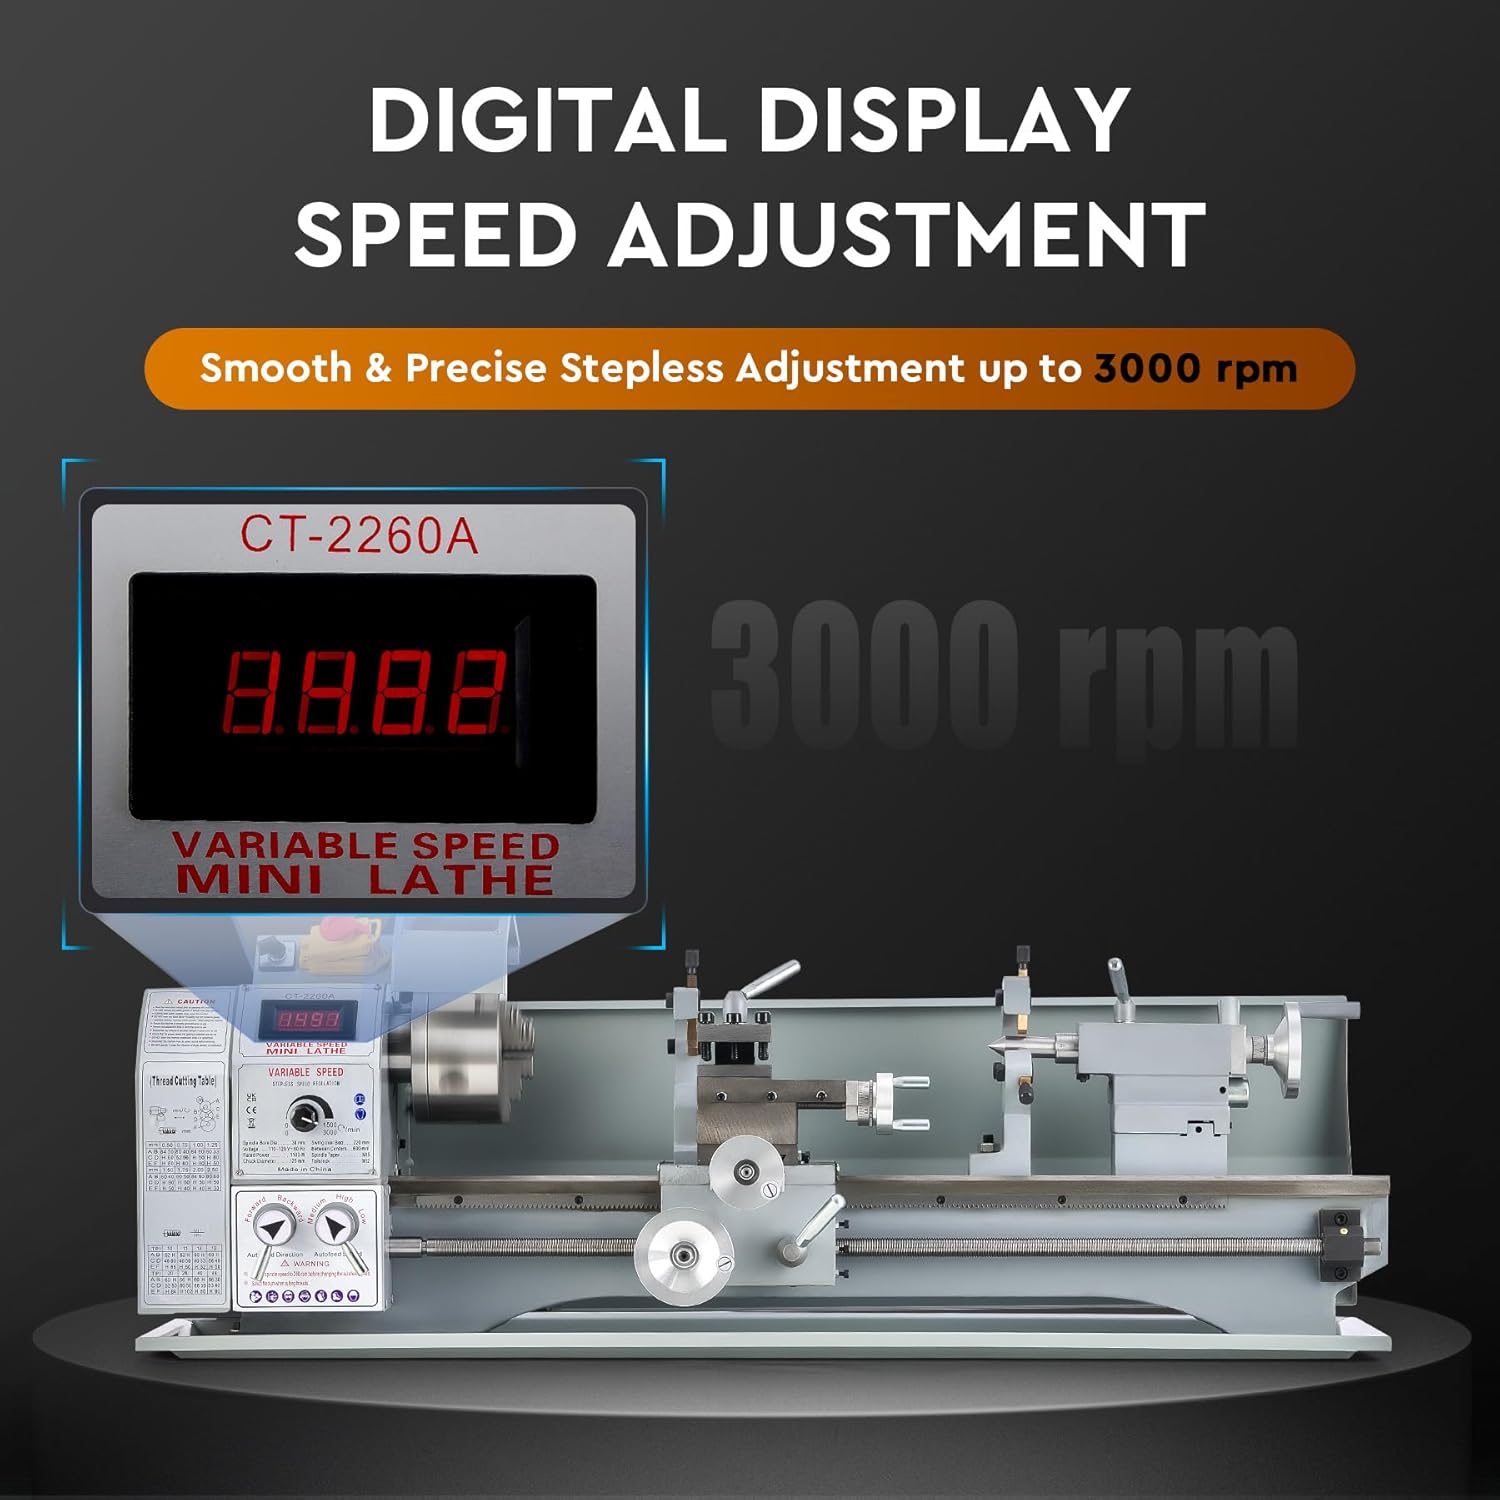
Figure 3.2: The digital display provides real-time spindle speed readings.
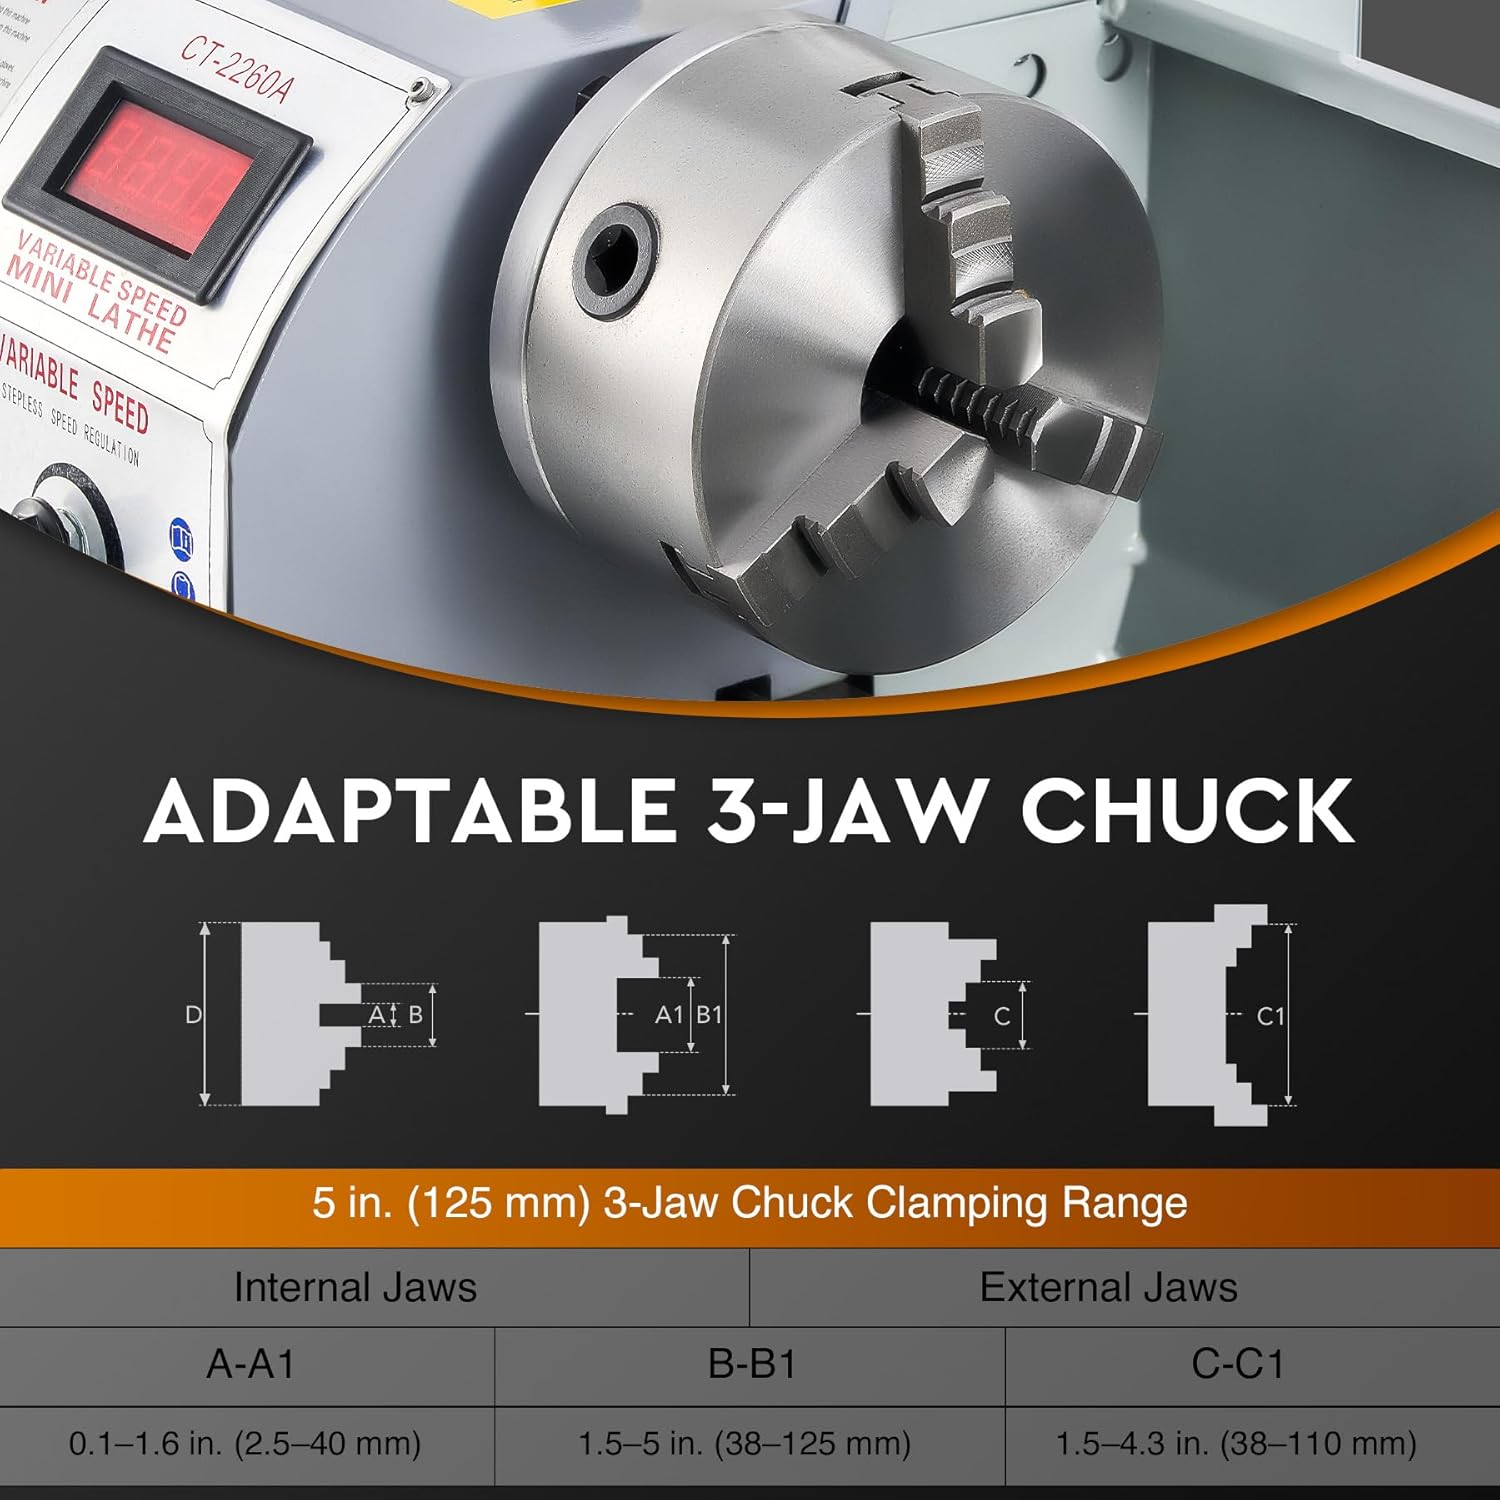
Figure 3.3: The 5-inch 3-jaw chuck is adaptable for various workpiece sizes.
4. Налаштування
4.1 Розпакування та розміщення
- Обережно вийміть токарний верстат та все приладдя з упаковки. Зберігайте упаковку для подальшого транспортування або зберігання.
- Clean off any protective grease or oil from the machine surfaces using a suitable degreaser.
- Place the lathe on a sturdy, level workbench capable of supporting its weight (approximately 159 lbs / 72 kg). Ensure the workbench is stable and does not wobble.
- Secure the lathe to the workbench using appropriate fasteners through the mounting holes in the base.
4.2 Початкові перевірки
- Verify all moving parts move freely without excessive play or binding.
- Перевірте, чи всі кріплення затягнуті.
- Ensure the chuck guard is properly installed and functions correctly.
- Підключіть шнур живлення до заземленої електричної розетки.
5. Операція
5.1 Основна операція
- Увімкнення: Turn on the main power switch. The digital display should illuminate.
- Кріплення заготовки: Open the chuck jaws using the chuck key. Insert the workpiece, ensuring it is securely centered and clamped. Remove the chuck key before starting the machine.
- Інсталяція інструменту: Loosen the tool post locking screw. Insert the cutting tool, ensuring it is at the correct height relative to the workpiece center. Tighten the locking screw.
- Регулювання швидкості: Use the speed adjustment knob to set the desired spindle RPM. The digital display will show the current speed. The lathe supports speeds from 0 to 3000 rpm.
- Spindle Direction: Select forward or reverse rotation using the direction switch.
- Engage Feed: For manual operation, use the carriage, cross slide, and compound handwheels. For automatic feed or threading, engage the half-nut lever (refer to threading charts for gear setup).
- Різання: Slowly advance the cutting tool into the workpiece. Monitor the cut and adjust feed rate as needed.
- Вимкнення живлення: After completing the operation, turn off the spindle, then the main power switch.
5.2 Додатки
This mini metal lathe is versatile and can perform various operations on materials such as wood, plastics, brass, and aluminum.
- Точіння: Зменшення діаметра заготовки.
- Облицювання: Creating a flat surface on the end of a workpiece.
- Буріння: Creating holes along the center axis using the tailstock.
- різьблення: Cutting external or internal threads.
- Різання: Parting off sections of material.

Figure 5.1: The lathe is suitable for a wide range of metalworking and other material applications.
6. Технічне обслуговування
Regular maintenance ensures the longevity and precision of your CREWORKS Mini Metal Lathe.
6.1 Очищення
- After each use, clean all chips and debris from the machine, especially from the bedways, lead screw, and chuck. Use a brush or shop vacuum.
- Wipe down all surfaces with a clean cloth.
6.2 Змащення
- Regularly apply a thin coat of machine oil to the bedways, lead screw, and other sliding surfaces to prevent rust and ensure smooth operation.
- Consult the lubrication points diagram (if available in a more detailed manual) for specific oiling requirements.
6.3 Adjustments and Inspections
- Periodically check the tension of the drive belts.
- Перевірте кулачки патрона на наявність зносу або пошкоджень.
- Ensure the tailstock is aligned correctly.
- Check the condition of the metal gear set for any signs of wear or damage.
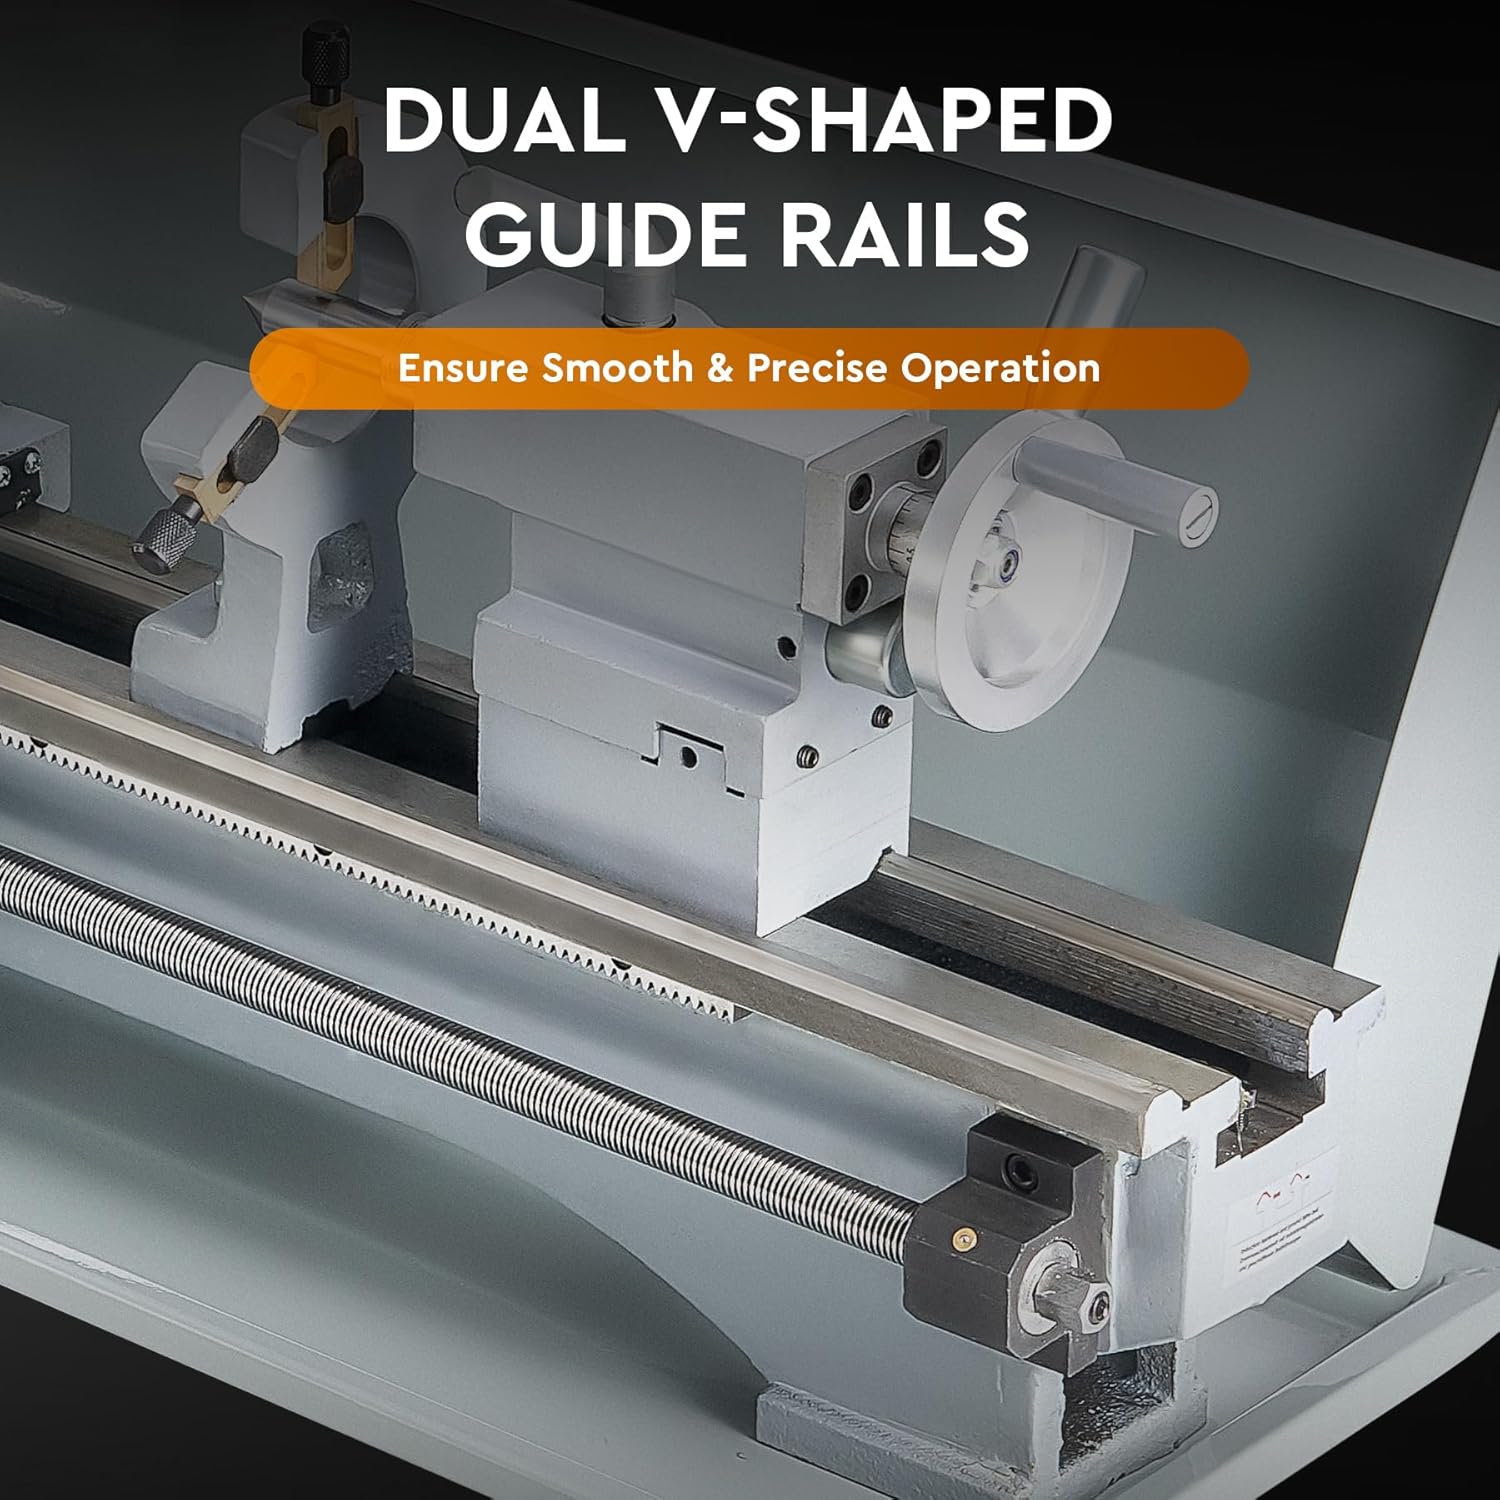
Figure 6.1: The dual V-shaped guide rails require regular cleaning and lubrication for smooth and precise operation.

Figure 6.2: The metal gear set ensures strong and efficient power transmission and should be inspected periodically.
7. Вирішення проблем
У цьому розділі розглядаються поширені проблеми, з якими ви можете зіткнутися під час роботи з вашим токарним верстатом.
| проблема | Можлива причина | Рішення |
|---|---|---|
| Lathe does not power on. | No power supply; Emergency stop engaged; Loose wiring. | Check power cord and outlet; Disengage emergency stop; Inspect wiring (if qualified). |
| Spindle does not rotate. | Speed knob set to zero; Direction switch not engaged; Motor fault. | Increase speed; Select forward/reverse; Contact support if motor fault suspected. |
| Надмірна вібрація або шум. | Unbalanced workpiece; Loose components; Worn bearings; Insufficient lubrication. | Ensure workpiece is balanced and secure; Tighten all fasteners; Lubricate moving parts; Contact support for bearing issues. |
| Погана якість обробки поверхні заготовки. | Dull cutting tool; Incorrect speed/feed rate; Workpiece not rigid; Lathe not level. | Sharpen/replace tool; Adjust speed/feed; Ensure workpiece is secure; Level the lathe. |
8. Технічні характеристики
Technical specifications for the CREWORKS 9" x 24" Mini Metal Lathe.
| Особливість | Специфікація |
|---|---|
| Модель | 9 дюймів x 24 дюйма |
| Номінальна потужність | 1.5 HP (1100W) |
| Гойдалка над ліжком | 8.7 дюймів (220 мм) |
| Відстань між центрами | 23.6 дюймів (600 мм) |
| Отвір шпинделя | 1.5 дюймів (38 мм) |
| Діаметр патрона | 5 дюймів (125 мм) |
| Макс. швидкість шпинделя | 3000 об/хв |
| Конус задньої бабки | MT#2 |
| Шпиндельний конус | MT#5 |
| Metric Thread Range | 0.3–3 мм |
| Inch Thread Range | 8–44 tpi |
| Розміри продукту (Д x Ш x В) | 39.57 x 13.78 x 16.93 дюймів |
| Вага нетто | 158.7 фунти (72 кг) |
| матеріал | Cast Iron, Stainless Steel, ABS |

Figure 8.1: Visual representation of key specifications and dimensions.
9. Гарантія та підтримка
For warranty information or technical support, please refer to the contact details provided at the point of purchase or visit the official CREWORKS webсайт.
- Підтримка клієнтів: For assistance with product issues, setup, or operation, please contact CREWORKS customer service.
- Повернення: Зазвичай цей продукт має 30-денну політику легкого повернення. Будь ласка, перевірте деталі покупки, щоб дізнатися про конкретні умови.
Примітка: Any unauthorized modifications or repairs to the machine may void the warranty.
Ask a question about this manual
Ask about setup, troubleshooting, compatibility, parts, safety, or missing instructions. Manuals+ will review the question and use this page’s manual context to help answer it.