Makerbase MKS Robin Nano V1.2
Makerbase MKS Robin Nano V1.2 32-Bit 3D Printer Control Board and TFT35 Touch Screen User Manual
Model: MKS Robin Nano V1.2, MKS Robin TFT35 V1.0
вступ
This manual provides comprehensive instructions for the installation, operation, and maintenance of the Makerbase MKS Robin Nano V1.2 32-bit 3D printer control board and the MKS Robin TFT35 V1.0 touch screen. This system is designed to enhance the control capabilities of your 3D printer, offering fast processing speed and support for Marlin2.0 firmware.
Вміст упаковки
The MKS Robin Nano V1.2 control board and TFT35 touch screen are available in various configurations. Please verify your package contents against the list below:
- Control Board Only: 1x MKS Robin Nano V1.2
- Basic Driver Package: 1x MKS Robin Nano V1.2 + 5x A4988 stepper drivers
- Advanced Driver Package: 1x MKS Robin Nano V1.2 + 5x TMC2209 stepper drivers
- Screen Package: 1x MKS Robin Nano V1.2 + 1x TFT35 touch screen
- Screen & Basic Driver Package: 1x MKS Robin Nano V1.2 + 1x TFT35 touch screen + 5x A4988 stepper drivers
- Screen & Advanced Driver Package: 1x MKS Robin Nano V1.2 + 1x TFT35 touch screen + 5x TMC2209 stepper drivers
- Screen & WiFi Package: 1x MKS Robin Nano V1.2 + 1x TFT35 touch screen + 1x WiFi Module
- Screen, Basic Driver & WiFi Package: 1x MKS Robin Nano V1.2 + 1x TFT35 touch screen + 5x A4988 stepper drivers + 1x WiFi Module
- Screen, Advanced Driver & WiFi Package: 1x MKS Robin Nano V1.2 + 1x TFT35 touch screen + 5x TMC2209 stepper drivers + 1x WiFi Module

Image: MKS Robin Nano V1.2 control board, MKS Robin TFT35 V1.0 touch screen, and five A4988 stepper drivers with blue heatsinks. This image illustrates a common package configuration.
Налаштування
1. Встановлення обладнання
The MKS Robin Nano V1.2 board is designed for easy integration into 3D printers. Ensure all power is disconnected before proceeding with any hardware installation.
- Mounting the Control Board: Secure the MKS Robin Nano V1.2 board within your printer's electronics enclosure using appropriate standoffs and screws.
- Connecting Stepper Drivers: Insert the stepper drivers (e.g., A4988, TMC2209) into their designated sockets on the MKS Robin Nano V1.2 board. Pay close attention to the orientation of each driver to prevent damage. Ensure heatsinks are properly attached to the drivers if included.
- Connecting Motors: Connect your stepper motors to the corresponding motor ports (X, Y, Z, E0, E1) on the control board.
- Підключення кінцевих обмежувачів: Connect your endstop switches to the designated endstop pins.
- Connecting Heaters and Thermistors: Connect the hotend and heated bed heaters, along with their respective thermistors, to the appropriate terminals.
- Connecting Fans: Connect cooling fans to the fan headers.
- Connecting TFT35 Touch Screen: Connect the TFT35 touch screen to the dedicated TFT port on the MKS Robin Nano V1.2 board using the provided cable.
- Джерело живлення: Connect your 12V/24V power supply to the main power input terminals of the MKS Robin Nano V1.2 board. Double-check polarity before applying power.

Зображення: Детальний view of the MKS Robin Nano V1.2 control board, highlighting the various connection points for motors, endstops, heaters, and the TFT screen.
2. Firmware Configuration and Update
The MKS Robin Nano V1.2 supports Marlin2.0 firmware. It is crucial to configure and flash the correct firmware for your specific 3D printer setup.
- Завантажити прошивку: Obtain the latest Marlin2.0 firmware for MKS Robin Nano from the official Makerbase GitHub repository.
- Конфігурація: Змінити
Configuration.hіConfiguration_adv.hfiles within the Marlin firmware to match your printer's kinematics, thermistors, endstops, and other settings. - Flashing Firmware:
- Compile the modified Marlin firmware using a suitable IDE (e.g., PlatformIO in VS Code).
- Copy the compiled firmware file (наприклад,
firmware.bin) to the root directory of a FAT32 formatted SD card. - Insert the SD card into the MKS Robin Nano V1.2 board's SD card slot.
- Power on the board. The firmware will automatically update. The screen may show a progress indicator.
- Once updated, remove the SD card and delete the
firmware.binfile to prevent re-flashing on subsequent power-ups.
For detailed instructions and open-source files, please refer to the official Makerbase GitHub repository: https://github.com/makerbase-mks/MKS-Robin-Nano
A video demonstrating the latest firmware V2.0.0 for Robin Nano is available here: https://www.youtube.com/watch?v=Nv3Zgs8XUt4
Інструкція з експлуатації
1. Power On and Initial Boot
After successfully installing the hardware and flashing the firmware, connect the power supply and turn on your 3D printer. The TFT35 touch screen should power on and display the Marlin interface.
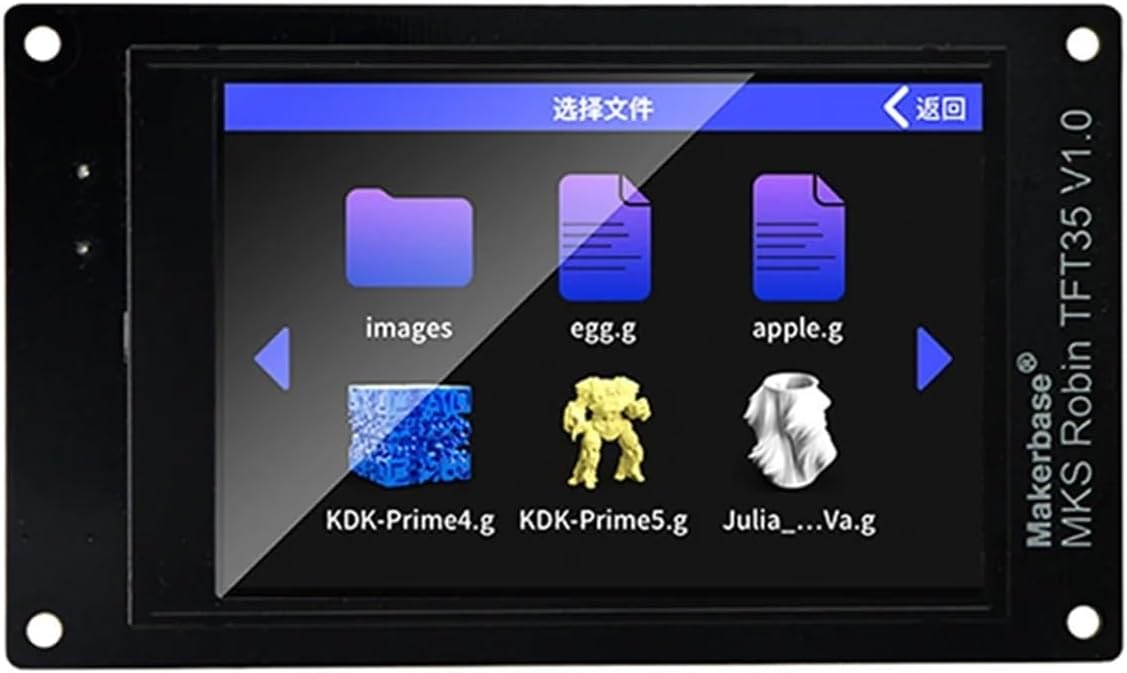
Image: The MKS Robin TFT35 V1.0 touch screen interface, showing options to select files for printing. This demonstrates the user interface for interacting with the control board.
2. Navigating the TFT35 Touch Screen
The TFT35 touch screen provides an intuitive interface for controlling your 3D printer. Common functions include:
- Головне меню: Access various printer functions such as Print, Move, Temperature, Settings, and more.
- Print from SD Card: Insert an SD card with G-code files into the TFT35 screen's slot or the MKS Robin Nano board's slot. Navigate to the "Print" menu and select your desired file.
- Ручне управління: Use the "Move" menu to manually control the X, Y, Z axes and extruders.
- Контроль температури: Adjust hotend and heated bed temperatures from the "Temperature" menu.
- Налаштування: Configure various printer parameters, display settings, and network options (if WiFi module is installed).
3. Using Marlin2.0 Features
With Marlin2.0 firmware, the MKS Robin Nano V1.2 board supports advanced features. Refer to the Marlin documentation for detailed usage of specific functionalities enabled by your firmware configuration.
Технічне обслуговування
Proper maintenance ensures the longevity and reliable operation of your MKS Robin Nano V1.2 control board and TFT35 touch screen.
- Тримати в чистоті: Regularly clean the board and screen with a soft, dry brush or compressed air to remove dust and debris. Avoid using liquids.
- Перевірте підключення: Періодично перевіряйте всі кабельні з'єднання, щоб переконатися в їх надійності та відсутності корозії.
- Оновлення прошивки: Stay updated with the latest firmware releases from Makerbase to benefit from bug fixes and new features.
- Умови навколишнього середовища: Operate the board within recommended temperature and humidity ranges to prevent damage.
Усунення несправностей
If you encounter issues with your MKS Robin Nano V1.2 board or TFT35 touch screen, consider the following troubleshooting steps:
- Немає живлення:
- Verify the power supply is connected correctly and providing the correct voltage (12 В/24 В).
- Check for any blown fuses on the control board.
- Screen Not Responding/Blank:
- Ensure the ribbon cable connecting the TFT35 screen to the MKS Robin Nano board is securely seated at both ends.
- Re-flash the TFT firmware if necessary (separate from mainboard firmware).
- Motors Not Moving/Incorrect Movement:
- Check motor wiring for correct polarity and secure connections.
- Verify stepper driver installation and orientation.
- Confirm stepper driver current settings are appropriate for your motors.
- Review firmware configuration for correct motor directions and steps per millimeter.
- Temperature Reading Errors:
- Check thermistor wiring and ensure they are securely connected.
- Verify thermistor type in firmware configuration.
- Проблеми з друком:
- Забезпечити G-код files are correctly sliced and compatible with Marlin2.0.
- Check SD card for corruption or formatting issues (FAT32 recommended).
For further assistance, consult the Makerbase GitHub repository or relevant online communities for Marlin firmware and MKS Robin Nano boards.
Технічні характеристики
| Особливість | Деталь |
|---|---|
| Model Number (Board) | MKS Robin Nano V1.2 |
| Процесор | 32-bit ARM Cortex-M3 |
| Підтримка прошивки | Marlin2.0 |
| Підтримка драйверів крокових двигунів | A4988, TMC2209, etc. (depending on package) |
| Підтримка дисплея | MKS Robin TFT35 V1.0 Touch Screen |
| Вхідний об'ємtage | 12 В / 24 В постійного струму |
| Підключення | USB, SD Card, WiFi (with optional module) |
| Вага товару | Approximately 1.76 ounces (50 grams) for the board |
| Розміри упаковки | 1.18 x 0.79 x 0.39 inches (approximate for a single component) |
| Номер моделі виробника | 9875 |
Підтримка та ресурси
For additional information, technical support, and the latest firmware, please refer to the following resources:
- Official Makerbase GitHub Repository: https://github.com/makerbase-mks/MKS-Robin-Nano (Contains open-source files, instructions, and firmware.)
- Marlin Firmware Documentation: Refer to the official Marlin firmware website for detailed information on configuration and features.
- Форуми спільноти: Engage with the 3D printing community for peer support and shared knowledge regarding MKS Robin Nano boards and Marlin firmware.
Пов'язані документи - MKS Robin Nano V1.2
 |
Інструкція з використання сенсорного екрана MKS TFT35 - 3.5-дюймовий дисплей Makerbase для 3D-принтерів Вичерпний посібник користувача для сенсорного екрана Makerbase MKS TFT35, детальний опис функцій, встановлення, оновлення прошивки, налаштування та технічної підтримки 3D-принтерів. |
 |
Інструкція з експлуатації материнської плати MKS ROBIN - Makerbase Вичерпний посібник з материнської плати MKS ROBIN, що містить детальний опис функцій, параметрів, інструкцій щодо портів, оновлень прошивки та схем системних підключень для виробників 3D-принтерів. |
 |
Makerbase Product Manual: XRIVE, MKS ESP32, MKS Gen_L, and More Find installation instructions and setup files for Makerbase electronic components including XRIVE, MKS ESP32 FOC V1/V2, MKS Gen_L, MKS CANable, MKS VESC, and MKS SERVO42C via provided links. |
 |
Посібник користувача MKS DLC32 - Makerbase Вичерпний посібник користувача для плати контролера Makerbase MKS DLC32, що охоплює апаратний інтерфейс, оновлення прошивки та режими керування 3D-принтерами та верстатами з ЧПК. |
 |
Сенсорний РК-дисплей MKS TFT32 для 3D-принтерів - Makerbase Ознайомтеся з MKS TFT32, універсальним 32-дюймовим кольоровим сенсорним РК-екраном від Makerbase, розробленим для 3D-принтерів. Дізнайтеся про його функції, підключення, оновлення прошивки тощо.tagелектронне виявлення та можливості Wi-Fi. |
 |
Сенсорний РК-дисплей 3D-принтера Makerbase MKS-TFT28: характеристики, підключення та посібник з налаштування Вичерпний посібник із кольорового сенсорного РК-дисплея Makerbase MKS-TFT28 з діагоналлю 2.8 дюйма для 3D-принтерів. У цьому документі детально описано його функції, сумісність з різними материнськими платами, інструкції з підключення, налаштування живлення, оновлення прошивки тощо.tagможливості електронної економії, інтеграція модуля виявлення, налаштування фотографій та підключення до Wi-Fi, включаючи опції дистанційного керування через додаток, Printrun та Repetier-Host. |
Ask a question about this manual
Ask about setup, troubleshooting, compatibility, parts, safety, or missing instructions. Manuals+ will review the question and use this page’s manual context to help answer it.