
1. Вступ
This manual provides detailed instructions for the installation, operation, and maintenance of your OLONETO 100A Solar Charge Controller. This device is designed to manage power flow from your solar panel to your battery bank and DC loads, ensuring efficient charging and protection for your battery system. It supports 12V, 24V, 36V, and 48V battery systems with automatic voltage ідентифікація.
Note: This controller utilizes a combination of MPPT and PWM charging technologies. It is not a 100% true MPPT controller.
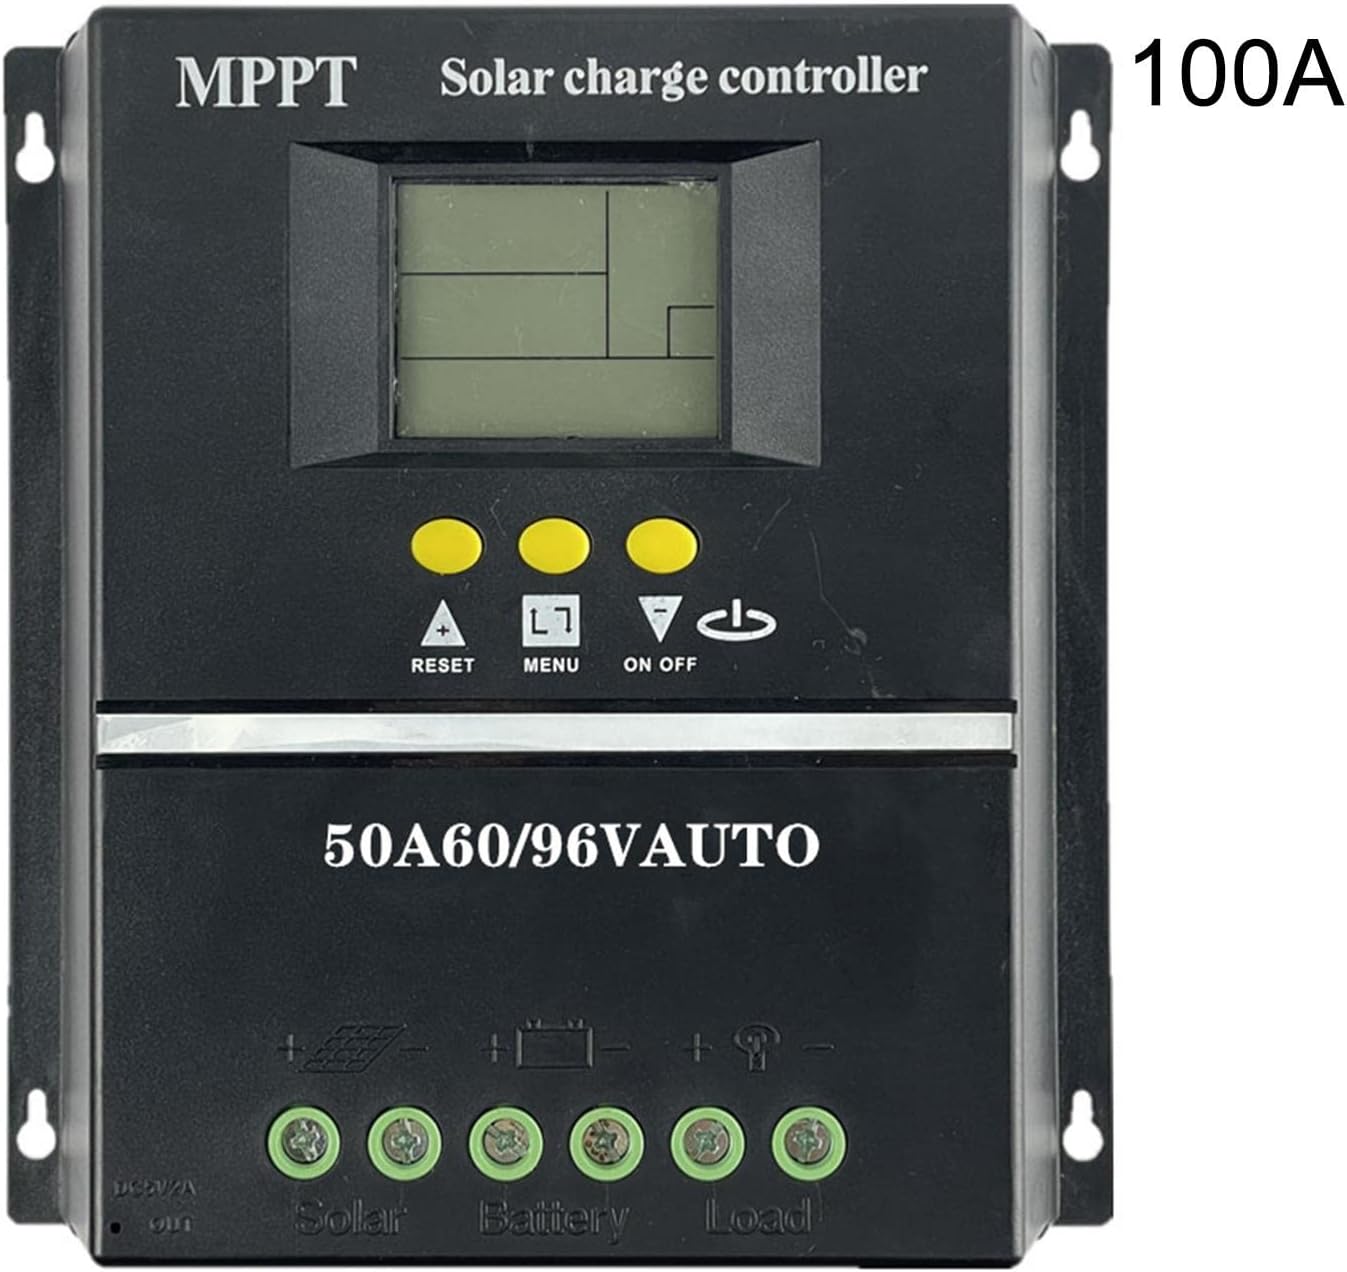
Малюнок 1: Спереду view of the OLONETO 100A Solar Charge Controller, showing the LCD display, control buttons, and connection terminals. The "100A" rating is visible on the top right.
2. Техніка безпеки
- Ensure all connections are tight and correct to prevent damage to the controller or other components.
- Завжди підключайте акумулятор до контролера перший, and then connect the solar panel. Disconnect in the reverse order: solar panel first, then battery. Failure to follow this sequence may damage the controller.
- Переконайтеся, що об’єм акумулятораtage is sufficient for the controller to recognize the system voltage (e.g., >10V for 12V battery, >20V for 24V battery, >30V for 36V battery, >40V for 48V battery).
- Встановіть контролер у добре провітрюваному приміщенні, подалі від прямих сонячних променів, високих температур та вологи.
- Не намагайтеся самостійно ремонтувати або модифікувати контролер. Зверніться до кваліфікованого персоналу для обслуговування.
3. Особливості продукту
The OLONETO Solar Charge Controller offers several key features for efficient solar power management:
- Автоматичний випtage Ідентифікація: Automatically detects 12V, 24V, 36V, or 48V battery systems.
- РК-дисплей: Provides real-time information on battery status, charging parameters, and load status.
- Подвійний вихід USB: Convenient 5V output for charging mobile phones and other USB devices.
- Регульовані параметри: Allows users to customize charging and discharge settings.
- Smart Charge Management: Optimizes battery charging to prolong battery life.
- Захист навколишнього середовища: Designed with green environmental protection principles.
- Automatic Focusing MPPT Tracking: High charging efficiency with non-stop detection during charging and bidirectional focusing tracking.

Figure 2: Diagram illustrating key features of the solar charge controller, including LCD display for battery power supply voltage, smart charge capabilities, 5V USB output, adjustable parameters, and green environmental protection.

Figure 3: Image highlighting the automatic focusing MPPT tracking feature, which ensures high charging efficiency and continuous detection during the charging process.
4. Налаштування та встановлення
4.1 Послідовність підключення
- Підключіть батарею: Підключіть акумулятор до клем контролера. Переконайтеся в правильній полярності (+ до + та - до -). Контролер автоматично визначить рівень заряду акумулятора.tage.
- Підключіть сонячну панель: Connect the solar panel to the controller's solar panel terminals. Ensure correct polarity.
- Підключення навантаження постійного струму (необов'язково): Підключіть навантаження постійного струму до клем навантаження контролера. Переконайтеся в правильній полярності.
Important: Always follow this connection order: Battery → Solar Panel → Load. To disconnect, follow the reverse order: Load → Solar Panel → Battery.
4.2 Recommended Solar Panel Voltage
- для 12 В battery systems: Use a solar panel with approximately 18 В вихід.
- для 24 В battery systems: Use a solar panel with approximately 30-37В вихід.
- для 36 В battery systems: Use a solar panel with approximately 45-55В вихід.
- для 48 В battery systems: Use a solar panel with approximately 60-72В вихід.
4.3 Схеми підключення

Figure 4: Basic wiring diagram showing connections for the solar panel, battery, and DC loads to the controller. Ensure positive (+) and negative (-) terminals are correctly matched.

Figure 5: Detailed wiring diagram illustrating connections for the solar panel, battery, DC load, and the integrated USB output for charging external devices.
5. Інструкція з експлуатації
5.1 Початкове ввімкнення та відображення
Once the battery is connected, the controller's LCD display will power on, showing current system parameters. The controller automatically identifies the battery voltage (12 В, 24 В, 36 В або 48 В).
5.2 Функції кнопок
- ▲ (Up/Reset): Used to increase values during setting, or as a reset function.
- МЕНЮ: Used to navigate through display screens and enter/exit setting modes.
- ▼ (Down/On/Off): Used to decrease values during setting, or to toggle the DC load on/off.
5.3 Зарядка Voltage Налаштування
To adjust charging parameters:
- After connecting the battery, ensure the clock is set and saved (see 5.4 Clock Setting).
- Натисніть і утримуйте кнопку "▲" button for 3-5 seconds. The screen will display "L**V" (floating charging voltagд).
- Використайте "▼" button to adjust the floating charging voltage.
- Briefly press "▲" again. The screen will display "H**V" (boost charging voltagд).
- Використайте "▼" button to adjust the boost charging voltage.
- Briefly press "▲" again. The screen will display "F**V" (low-voltage відсічне випtage for DC load).
- Використайте "▼" button to adjust the low-voltage відсічне випtage.
- After making all desired adjustments, press and hold the "▲" button for 3-5 seconds to save the settings and exit.
5.4 Налаштування годинника
To set the internal clock:
- Переконайтеся, що акумулятор підключено.
- Натисніть кнопку "▲"або"▼" buttons to navigate to the clock setting interface.
- Використайте "▲" і "▼" buttons to adjust the time.
- Briefly press the "MENU" button (represented as "□" in some descriptions) to save the clock setting.
5.5 Load Protection Voltage Посилання
The following are typical battery charging voltages for different system voltages:
- При використанні a 12 В battery, the battery charging voltage is typically 13.7 В.
- При використанні a 24 В battery, the battery charging voltage is typically 27.4 В.
- При використанні a 36 В battery, the battery charging voltage is typically 41.1 В.
- При використанні a 48 В battery, the battery charging voltage is typically 54.8 В.
6. Технічне обслуговування
- Регулярна перевірка: Періодично перевіряйте всі з'єднання проводів на міцність та наявність корозії.
- Чистота: Тримайте контролер чистим та без пилу та сміття. Використовуйте суху тканину для очищення.
- Вентиляція: Забезпечте добру вентиляцію приміщення, де буде встановлено пристрій, щоб запобігти перегріву.
- Здоров'я акумулятора: Слідкуйте за станом та обсягом акумулятораtage regularly to ensure optimal system performance.
7. Вирішення проблем
| проблема | Можлива причина | Рішення |
|---|---|---|
| Дисплей контролера вимкнений. | Акумулятор не підключено або заряд батареї низькийtage занадто низький. | Connect battery or ensure battery voltage is above minimum threshold (e.g., >10V for 12V system). |
| Немає зарядки від сонячної панелі. | Solar panel not connected, incorrect polarity, or insufficient sunlight. | Check solar panel connections and polarity. Ensure adequate sunlight. |
| томtage identification error. | Акумулятор обtage was too low when connected initially. | Переконайтеся, що об’єм акумулятораtage is above the minimum threshold before connecting to the controller. Disconnect and reconnect the battery. |
| DC load not working. | Load is off, incorrect wiring, or battery voltage is below low-voltage відсікання. | Check load connection and polarity. Press the "▼" button to toggle load. Check battery voltage and adjust low-voltage cut-off if necessary. |
8. Технічні характеристики
| Параметр | Значення |
|---|---|
| Модель | 100А |
| Бренд | OLONETO |
| System Voltage | 12В/24В/36В/48В Авто |
| Технологія зарядки | MPPT/PWM Hybrid |
| Вихід USB | Dual USB, 5V |
| Вага товару | 200 грамів |
| Розміри (прибл.) | 190 мм (7.48 дюйма) x 180 мм (7.08 дюйма) |

Figure 6: Physical dimensions of the solar charge controller, showing approximate measurements of 190mm (7.48 inches) in width and 180mm (7.08 inches) in height.
9. Гарантія та підтримка
Щоб отримати інформацію про гарантію та технічну підтримку, зверніться до документації, що додається до вашої покупки, або зверніться до продавця. Зберігайте чек про покупку для будь-яких гарантійних претензій.


