
1. Вступ
The Anykit 360° Articulating Engine Borescope is an advanced industrial inspection camera designed for detailed examination of hard-to-reach areas. Featuring a 0.33-inch steerable snake camera, a 5-inch IPS display, and adjustable LED lighting, this borescope provides clear visuals for mechanics, maintenance technicians, and DIY enthusiasts. Its robust design includes IP67 waterproofing and high-temperature protection, ensuring reliable performance in various demanding environments.

Image: Anykit 360° Articulating Engine Borescope in use, showing the main unit and flexible probe inspecting an engine.
2. Вміст упаковки
Перевірте, чи всі перелічені нижче предмети входять до вашої упаковки:
- Borescope Handle x 1
- Detachable Screen x 1
- Зарядний кабель x 1
- Інструкція з експлуатації x 1
- Футляр х 1

Image: Diagram showing all components included in the Anykit borescope package.
3. Ключові характеристики
- 360° Articulating Probe: The 0.33-inch inspection camera features 4-way joystick articulation, allowing effortless navigation through tight spaces and inspection from various directions.
- Auto Focus Borescope: Equipped with a 2.0MP camera for clear details and 5X zoom. Six high-intensity LED lights offer 3 adjustable brightness levels for different dark situations.
- 5-Inch IPS Monitor: Provides a steady, crystal-clear view without requiring external apps or phone connections. Includes a built-in speaker and microphone for recording audio with videos.
- Waterproof Gooseneck: The articulated snake camera is IP67 waterproof, suitable for rainy and humid environments. The metal gooseneck cord offers sufficient ductility for expanded applications.
- Захист від високої температури: Features an intelligent alarm that activates if the temperature exceeds 158°F (70°C), protecting the device and ensuring safety.
- Тривалий термін служби батареї: A 3000mAh battery provides up to 4 hours of continuous use.
- 32GB Storage: Includes a 32GB memory card, capable of storing up to 5,000 images for future reference.
4. Технічні характеристики
| Особливість | Специфікація |
|---|---|
| Діапазон макрофокусування | 0.8-4 дюймів |
| Роздільна здатність захоплення відео | 1080p |
| Рівень водонепроникності | IP67 Водонепроникний |
| Розмір екрана | 5 дюймів |
| Viewшукач Тип | рідкокристалічний екран |
| Середній термін служби батареї | 4 Hours (3000mAh) |
| Тип масштабування | Digital Zoom (5X) |
| Тип спалаху | Built-In, Adjustable LED Light |
| Тип фокусування | Автофокус |
| Вага товару | 1.12 кілограма |
5. Налаштування
5.1 Зарядка пристрою
Before first use, fully charge the borescope using the provided USB-C charging cable. The charging port is typically located on the side or bottom of the main unit.
5.2 Підключення зонда
Ensure the detachable screen is securely connected to the borescope handle. The probe is permanently attached to the handle.

Image: Connecting the detachable screen to the borescope handle.
5.3 Увімкнення/вимкнення
Натисніть і утримуйте кнопку живлення (зазвичай позначену символом живлення), щоб увімкнути або вимкнути пристрій.
5.4 Installing Accessories (Hook/Magnet)
To install the hook or magnet attachments:
- Rotate and remove the threaded protective ring from the lens tip.
- Align the desired accessory (hook or magnet) with the threads.
- Rotate to securely install the accessory.
Video: This video demonstrates how to install the hook and magnet accessories onto the borescope's camera tip.
6. Інструкція з експлуатації
6.1 Articulating the Camera Probe
Use the joystick control on the handle to articulate the camera tip 360 degrees. This allows for precise navigation and viewing in various directions within confined spaces.

Image: The 4-way articulation probe bending 360 degrees.
Video: This video illustrates the difference between 360-degree and 180-degree articulated borescopes, highlighting the enhanced flexibility of the 360-degree model.
Video: This video demonstrates how to achieve the maximum bend angle with the borescope's articulating probe.
6.2 Adjusting Focus (Auto/Manual)
The borescope defaults to Auto Focus (AF). To switch to Manual Focus (MF), press and hold the "OK" button for 2 seconds. Use the "▲" and "▼" buttons to adjust the focus as needed. To return to Auto Focus, press and hold "OK" for 2 seconds again.
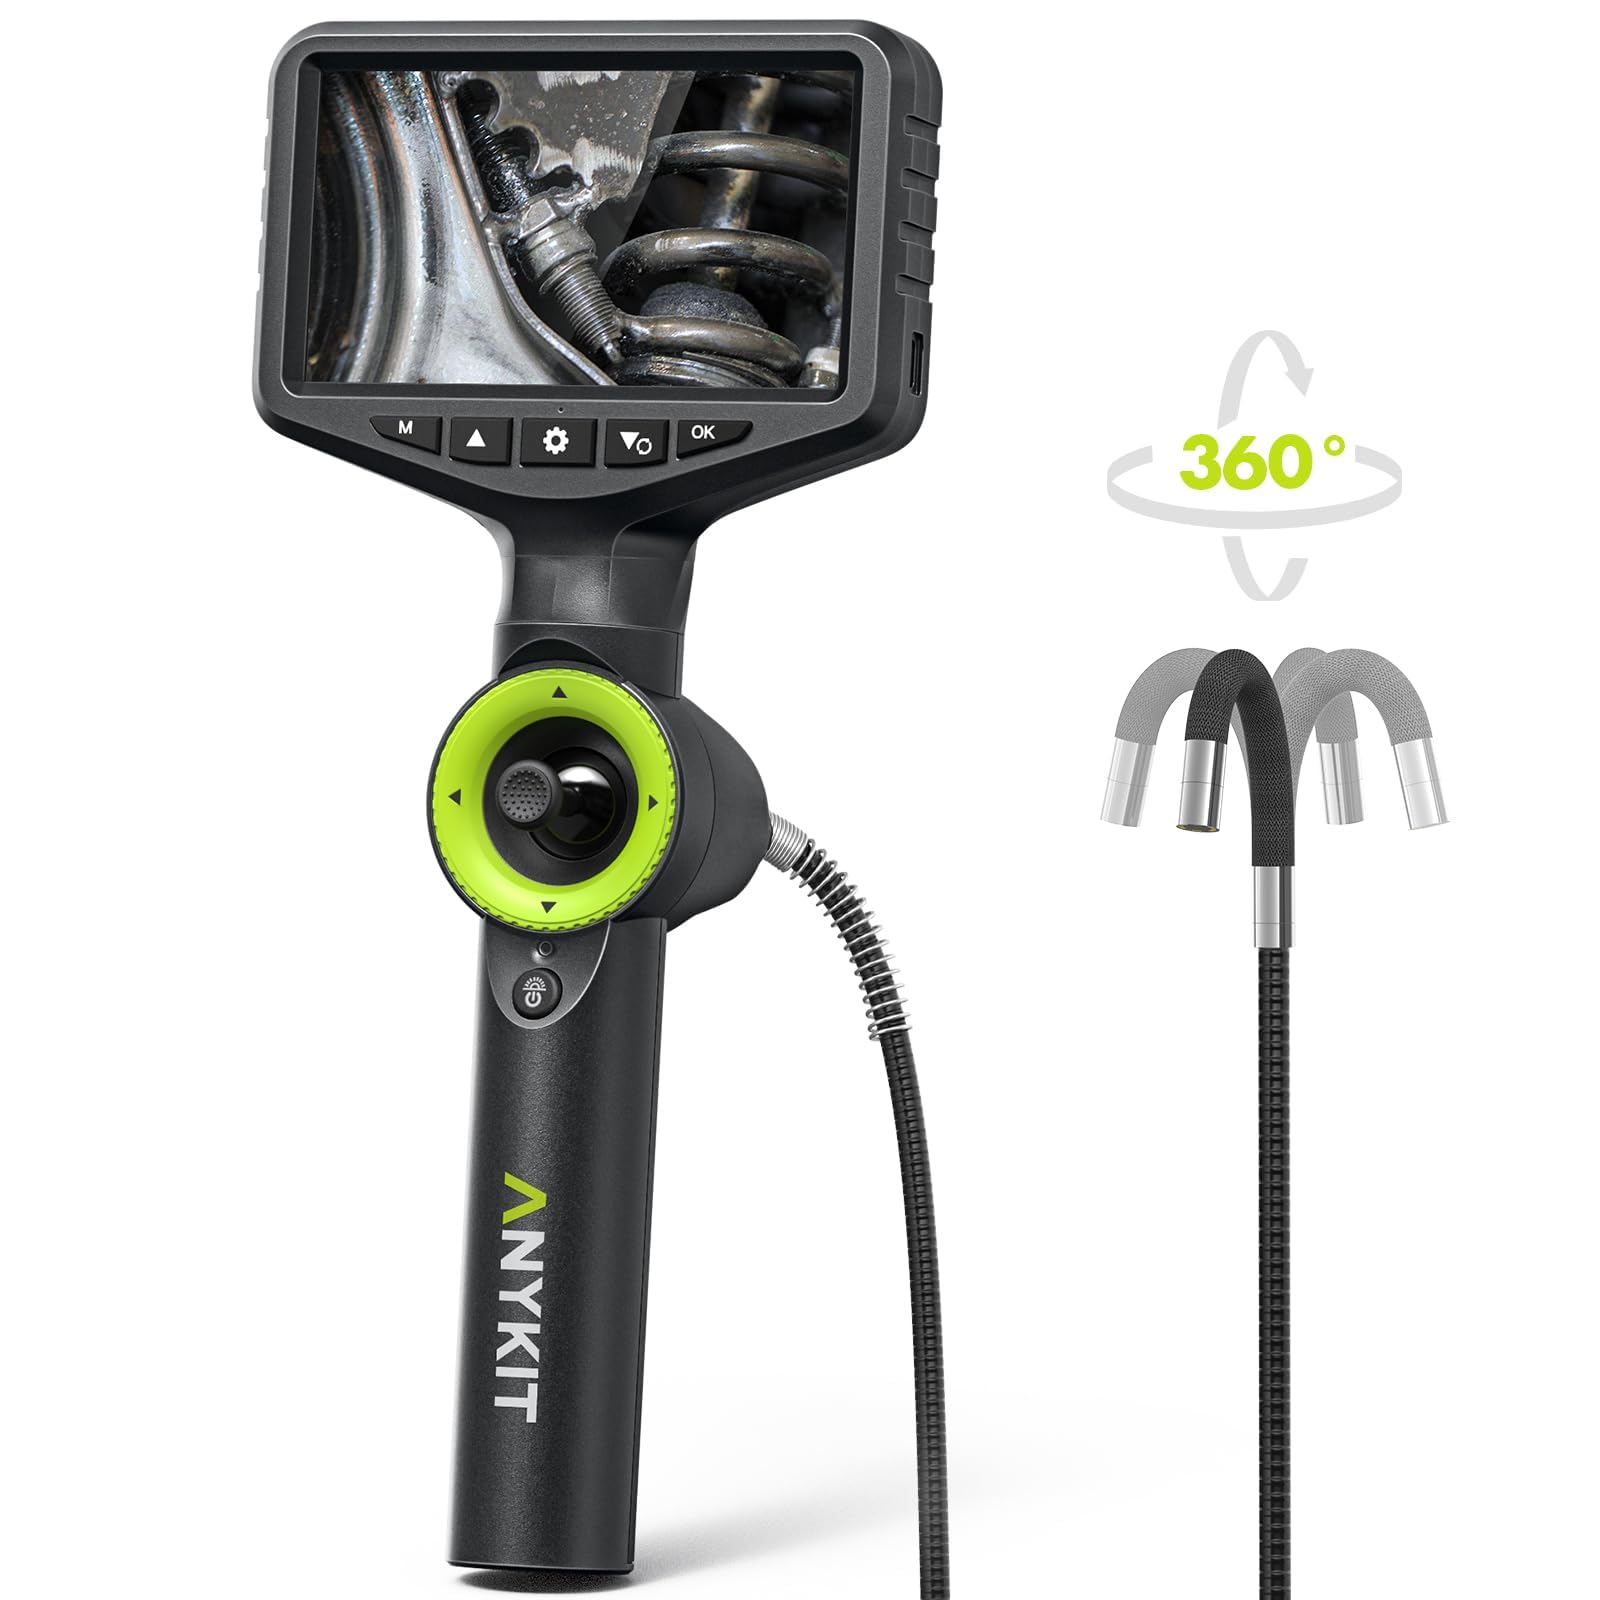
Image: Switching between Auto and Manual Focus Mode.
Video: This video explains how to switch between auto and manual focus on the AN150P borescope.
6.3 Adjusting LED Lighting
The borescope features 6 high-intensity LED lights with 3 adjustable brightness levels. Use the dedicated light adjustment button (often indicated by a light bulb icon) to cycle through brightness settings to suit your inspection environment.

Image: Adjustable LED Lights on the IP67 Waterproof Probe.
6.4 Capturing Images and Recording Videos
Use the dedicated photo/video button (often indicated by a camera or video camera icon) to capture still images or start/stop video recordings. All media is saved to the included 32GB memory card.

Image: Borescope screen indicating video recording and image capture with 32GB memory.
6.5 Використання цифрового масштабування
The borescope supports 5X digital zoom to enhance your perspective and bring distant details closer. Use the zoom controls (refer to the device's buttons, often marked with '+' and '-' or specific zoom icons) to adjust the magnification.

Image: 5X Digital Zoom enhances viewкут.
7. Технічне обслуговування
7.1 Очищення лінзи та зонда
After each use, especially in dirty or oily environments, gently clean the camera lens and probe tip. Use a soft, lint-free cloth or the provided cleaning wipes. For stubborn grime, a small amount of isopropyl alcohol can be used. Ensure the lens is dry before storage.
7.2 Зберігання
Store the borescope in its protective carrying case in a cool, dry place away from direct sunlight and extreme temperatures. Ensure the lens protection cap is in place to prevent damage.
7.3 Догляд за акумулятором
Щоб продовжити термін служби акумулятора, уникайте частого повного розряджання акумулятора. Регулярно заряджайте пристрій, навіть якщо він не використовується протягом тривалого часу.
8. Вирішення проблем
8.1 Немає живлення
- Переконайтеся, що пристрій повністю заряджено.
- Перевірте зарядний кабель та адаптер на наявність пошкоджень.
- Press and hold the power button for at least 3-5 seconds.
8.2 Розмите зображення
- Ретельно очистіть об'єктив камери.
- Adjust the focus using the auto/manual focus feature.
- Ensure adequate lighting by adjusting the LED brightness.
8.3 Зонд не рухається
- Check for any obstructions around the articulating tip.
- Ensure the joystick control is functioning correctly.
- Avoid forcing the probe in tight bends.
8.4 High-Temperature Alarm
- If the high-temperature alarm sounds (above 158°F/70°C), immediately remove the probe from the hot environment.
- Дайте пристрою охолонути, перш ніж відновити роботу.
9. Гарантія та підтримка
For warranty information, technical support, or service inquiries, please refer to the contact details provided in your product packaging or visit the official Anykit webсайт. Зберігайте чек про покупку для гарантійних претензій.