
OOYCYOO P 60A
OOYCYOO MPPT 60A Solar Charge Controller User Manual
Model: P 60A
1. Вступ
This manual provides detailed instructions for the installation, operation, and maintenance of your OOYCYOO MPPT 60A Solar Charge Controller. This device is designed to efficiently manage power flow from your solar panels to your battery bank, ensuring optimal charging and system protection. It supports automatic 12V/24V system voltage identification and is compatible with various battery types.
Key features include a backlit LCD display, a 4-stage battery charging algorithm, and comprehensive protection functions.
2. Техніка безпеки
- Завжди спочатку підключайте акумулятор, потім сонячну панель і, нарешті, навантаження. Від’єднуйте у зворотному порядку.
- Ensure all wiring is correctly polarized to prevent damage.
- Do not connect inverters or inductive loads directly to the controller's load terminals.
- Встановіть контролер у добре провітрюваному приміщенні, подалі від легкозаймистих матеріалів.
- The controller generates heat during operation; ensure adequate airflow. The integrated cooling fan activates when the temperature exceeds 45°C and turns off below 40°C.
- Use appropriate circuit breakers and fuses for all connections.
- This device is for indoor use only. Protect it from water and moisture.
3. Продукт закінчивсяview
The OOYCYOO MPPT 60A Solar Charge Controller is designed for efficient solar power management. It features an LCD display for real-time data, multiple protection functions, and support for various battery types.
3.1 Вміст упаковки
- 1 x OOYCYOO MPPT 60A Solar Charge Controller
- 1 x датчик температури
- 1 x Посібник користувача (англійською мовою)
3.2 Ідентифікація компонентів

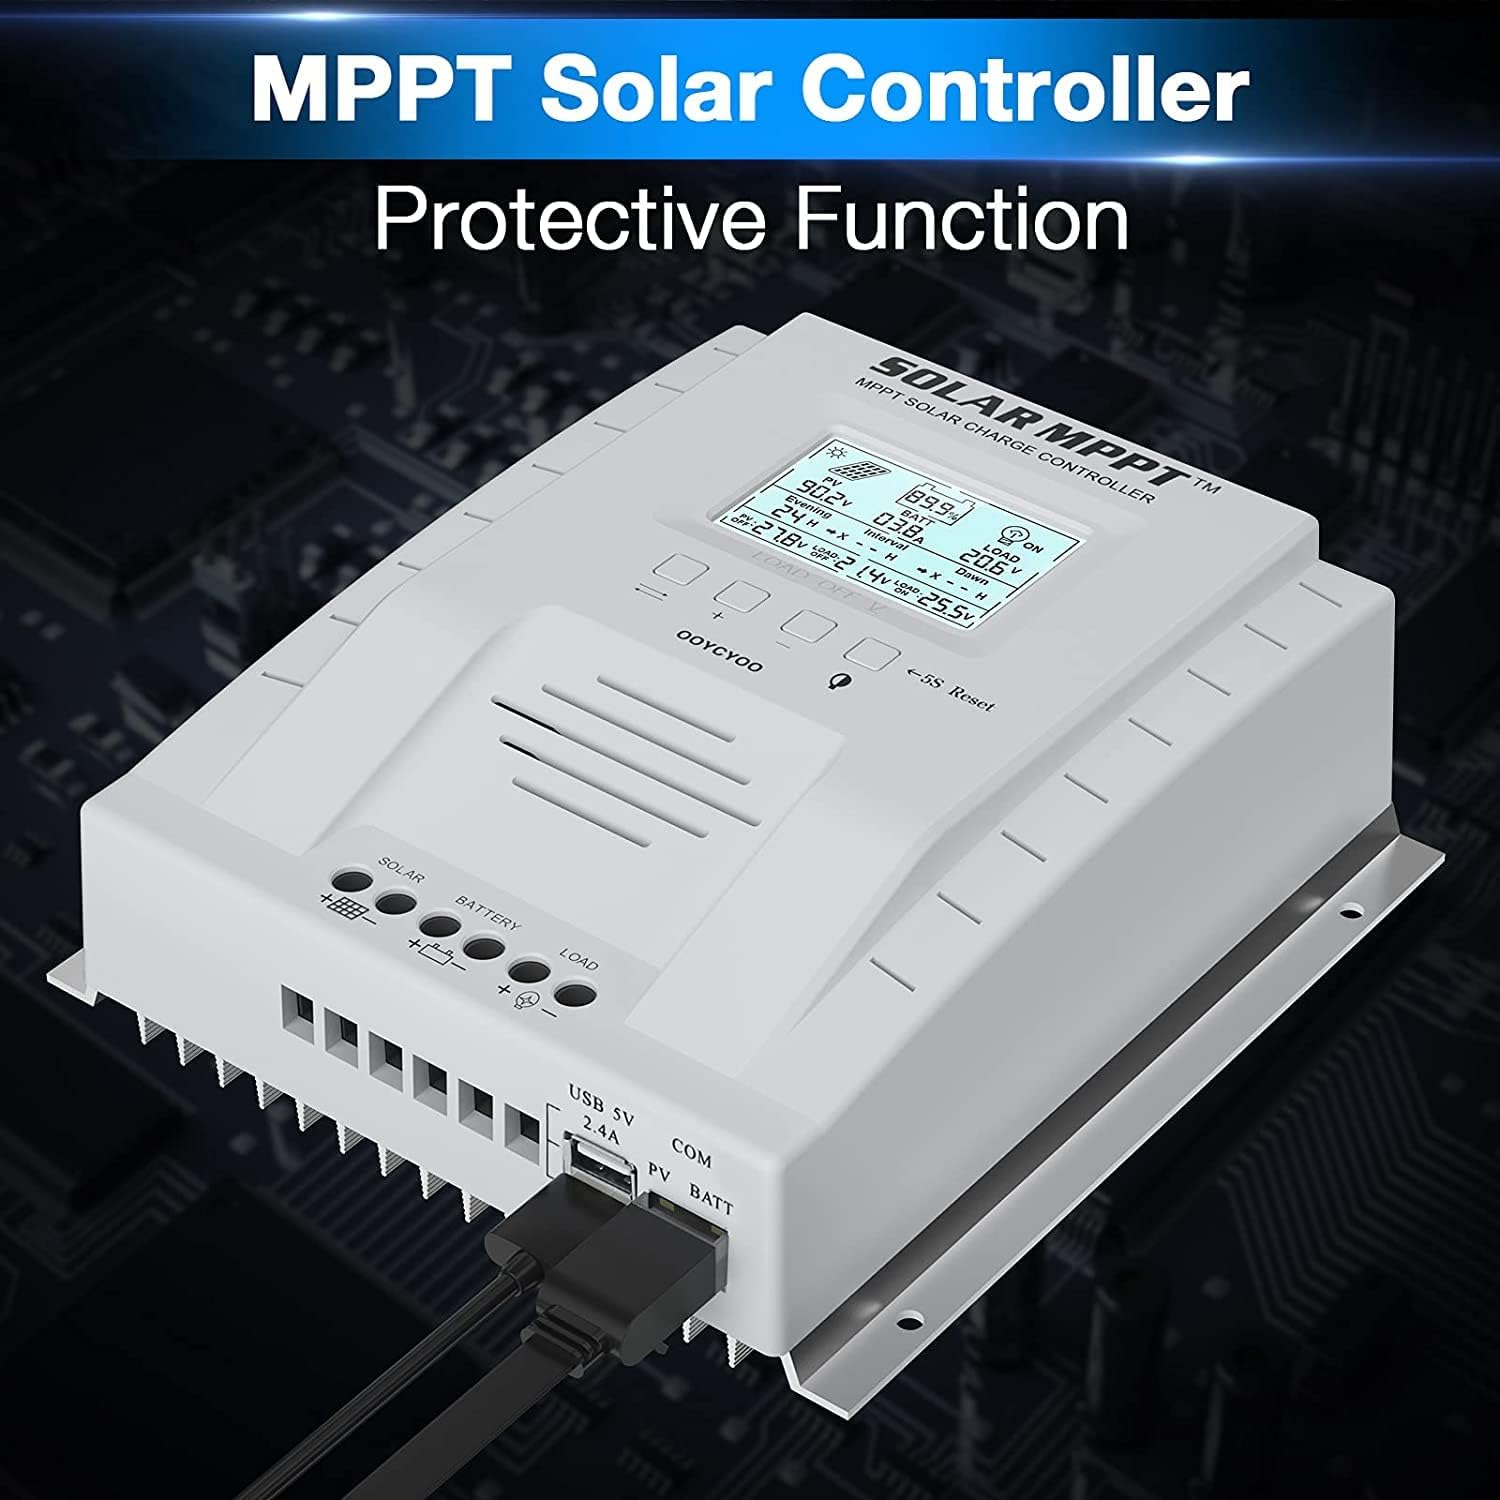
The controller features a clear LCD display on the front for monitoring system status. Below the display are control buttons for navigation and settings. Connection terminals for solar panels, battery, and load are located at the bottom. USB ports and an RS485 communication port are on the side.
4. Налаштування та встановлення
Правильне встановлення є вирішальним для безпечної та ефективної роботи вашого контролера сонячного заряду. Уважно виконайте ці кроки.
4.1 Встановлення контролера
- Виберіть сухе, добре провітрюване місце, захищене від прямих сонячних променів, високих температур та води.
- Ensure there is sufficient space around the controller for heat dissipation.
- Mount the controller vertically on a wall or stable surface using the provided mounting holes.
4.2 Підключення проводів
Follow the connection order precisely to avoid damage to the controller or other components.
- Підключіть батарею: Підключіть позитивний та негативний клеми акумулятора до відповідних клем на контролері. Переконайтеся в правильній полярності. Контролер автоматично визначить рівень напруги системи.tage (12 В або 24 В).
- Підключення сонячних панелей: Connect the positive and negative leads from your solar panel array to the corresponding PV terminals on the controller. Ensure correct polarity. Do not exceed the maximum PV input voltage 100 В постійного струму.
- Підключення навантаження (необов'язково): Connect your DC loads to the load terminals on the controller. Note that the load output is for DC loads only. Do not connect inverters or inductive loads directly to these terminals.
- Connect the Remote Temperature Sensor: Plug the temperature sensor into its dedicated port. This sensor helps the controller optimize charging based on battery temperature.

Важлива примітка: Always connect the battery first and disconnect the solar panel last. Incorrect connection order can damage the controller.
5. Інструкція з експлуатації
Once installed, the controller will begin operation automatically. The LCD display provides real-time system information.
5.1 РК-дисплей та кнопки

The backlit LCD displays critical system parameters such as PV voltage, об’єм батареїtage, charging current, load current, and accumulated energy (KWH). The four buttons below the display are used for navigation and settings adjustment:
- Клавіша перемикання: Used to cycle through display screens or confirm selections.
- '+' (Plus) Key: Збільшує значення або переміщує вперед у меню.
- '-' (Minus) Key: Зменшує значення або переміщується назад у меню.
- Manual Switch Load Key: Toggles the load output on/off manually.
- 5S Reset: Натисніть і утримуйте протягом 5 секунд, щоб відновити заводські налаштування.
5.2 Battery Charging Algorithm
Контролер використовує 4-секунднийtagалгоритм електронної зарядки для оптимізації терміну служби та продуктивності акумулятора:
- Навальна плата: Заряджає акумулятор максимальним струмом до досягнення об'ємуtage досягає об’єму підвищенняtage.
- Збільшити заряд: Заряди при постійному об'єміtage for a set period to ensure full charge.
- Плаваючий заряд: Підтримує низький рівень заряду акумулятораtagе для запобігання саморозряду та перезаряду.
- Equalization (for specific battery types): Періодично перезаряджає акумулятор для балансування об'єму елементівtagта запобігають сульфатації.
5.3 Підтримувані типи акумуляторів
Контролер сумісний з різними типами батарей, зокрема:
- Lead-Acid (Sealed, Gel, Flooded)
- Літій (LFP)
- User-defined parameters for other battery types.
Pre-set charging parameters are available for Sealed, Gel, Flooded, and LI (LFP) batteries. Users can customize parameters for other battery types as needed.
6. Функції захисту
The OOYCYOO MPPT 60A Solar Charge Controller incorporates multiple protection mechanisms to ensure system safety and longevity:
- PV Overcurrent/Overpower Protection
- PV Short Circuit Protection
- Захист від зворотної полярності PV
- Reverse Charging at Night Protection
- Захист від зворотної полярності акумулятора
- Перевантаження батареїtage Захист
- Battery Over-discharge Protection
- Battery Overtemperature Protection
- Controller Overtemperature Protection
- Lithium Battery Low Temperature Protection
- Захист від короткого замикання навантаження
- Захист від перевантаження навантаження
- TVS High Voltage Захист від перехідних процесів
7. Технічне обслуговування
Регулярне технічне обслуговування забезпечує оптимальну продуктивність та подовжує термін служби вашого контролера сонячного заряду.
- Перевірте підключення: Періодично перевіряйте всі з'єднання проводів на міцність та наявність корозії. Затягніть будь-які нещільні з'єднання.
- Очистіть контролер: Keep the controller clean and free of dust. Use a dry cloth to wipe the exterior. Ensure ventilation openings are not obstructed.
- Огляньте на наявність пошкоджень: Check for any signs of physical damage, overheating, or unusual odors.
- Перевірка батареї: Дотримуйтесь інструкцій виробника з обслуговування для вашого конкретного типу акумулятора.
8. Вирішення проблем
У цьому розділі розглядаються поширені проблеми, з якими ви можете зіткнутися під час роботи контролера сонячного заряду.
| проблема | Можлива причина | Рішення |
|---|---|---|
| Контролер не вмикається / РК-дисплей порожній | Акумулятор не підключено або заряд батареї низькийtagЗанадто низьке значення e. Підключення зі зворотною полярністю. | Спочатку переконайтеся, що акумулятор підключено та має достатній рівень зарядуtage. Перевірте полярність батареї. |
| Немає зарядки від сонячних панелей | Solar panels not connected or reverse polarity. Insufficient sunlight. PV voltage занадто низький або занадто високий. | Перевірте підключення та полярність сонячних панелей. Забезпечте достатнє сонячне освітлення. Перевірте об'єм фотоелектричних панелей.tage is within operating range (e.g., 18V-96V for 12V system, 36V-96V for 24V system). |
| Навантаження не працює | Load output disabled. Load short circuit or overload. Battery voltage занадто низький. | Check load output status on LCD. Disconnect load and check for short circuit. Ensure battery is sufficiently charged. |
| Перегрів контролера | Poor ventilation. Excessive load or charging current. | Забезпечте достатній потік повітря навколо контролера. Зменште навантаження або струм зарядки, якщо можливо. |
| Неточно обtage показання | Loose connections. Faulty temperature sensor. | Check all wiring connections. Ensure temperature sensor is properly connected. |
9. Технічні характеристики
Technical specifications for the OOYCYOO MPPT 60A Solar Charge Controller.
| Параметр | Значення |
|---|---|
| Номінальний струм заряду | 60А |
| System Voltage | 12V/24V Auto Identification |
| Макс. PV Open Circuit Voltage | 100 В постійного струму |
| Макс. вхідна потужність фотоелектричних систем (система 12 В) | 750 Вт |
| Макс. вхідна потужність фотоелектричних систем (система 24 В) | 1500 Вт |
| DC/DC Transfer Efficiency | до 98.7% |
| Робоча температура | від -20 ℃ до +55 ℃ |
| Розмір терміналу | 10 AWG |
| Розміри (Д*Ш*В) | 8.3 x 8.4 x 3.4 дюйми (21.2 x 20.8 x 8.4 см) |
| вага | 3 фунти (1.28 кг) |
| Тип дисплея | Підсвічування LCD |
| UPC | 768461886785 |
| Номер моделі | P 60A |


10. Гарантія та підтримка
For warranty information or technical support, please contact your retailer or the manufacturer directly. Refer to the product packaging or purchase documentation for specific contact details.
Ask a question about this manual
Ask about setup, troubleshooting, compatibility, parts, safety, or missing instructions. Manuals+ will review the question and use this page’s manual context to help answer it.