
вступ
This manual provides essential information for the safe and effective use of your Vividia CT-6010 LCD/WiFi Flexible Two-Way Articulating Inspection Camera Borescope Videoscope. Please read these instructions carefully before operating the device and retain them for future reference.

Figure 1: Vividia CT-6010 Borescope main unit with flexible probe.
Налаштування
1. Розпакування та ідентифікація компонентів
Carefully unpack all items from the packaging. Ensure all components are present and undamaged. The package typically includes:
- Vividia CT-6010 Main Unit with LCD Display
- Flexible Articulating Probe (6mm diameter, 1.0m length)
- Адаптер живлення/зарядний пристрій
- USB кабель
- Чохол для транспортування
- Плечовий ремінь

Figure 2: Contents of the Vividia CT-6010 package.
2. Зарядка пристрою
Before first use, fully charge the device. Connect the power adapter to the DC In port on the main unit and plug it into a power outlet. The charging indicator will show the charging status.
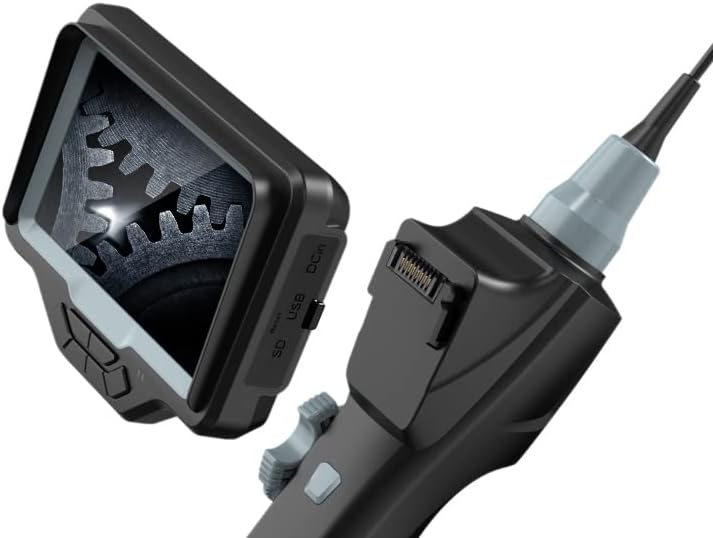
Figure 3: DC In port for charging, along with SD and USB ports.
3. Вставлення SD-карти
To save photos and videos, insert a compatible Micro SD card (not included) into the SD card slot on the side of the main unit. Ensure the card is inserted correctly until it clicks into place.
4. Увімкнення/вимкнення живлення
Натисніть і утримуйте потужність button located on the control panel to turn the device on or off. The LCD screen will illuminate upon startup.
5. WiFi Connection (Optional)
The CT-6010 features built-in WiFi for connecting to iPhone, iPad, or Android devices. Follow these steps:
- Turn on the CT-6010 device.
- Enable WiFi on your mobile device.
- шукати the CT-6010's WiFi network (usually named 'Vividia_XXXX').
- Connect to the network using the provided password (refer to the device screen or a sticker on the unit).
- Open the dedicated Vividia app on your mobile device to view the live feed and control functions.

Малюнок 4: Впрample of WiFi connection to a mobile device.
Інструкція з експлуатації
1. Основні елементи керування
Основний пристрій оснащений кількома кнопками для керування:
- Кнопка живлення: Вмикає/вимикає пристрій.
- Кнопка ОК: Confirms selections in the menu or captures media.
- Кнопка меню: Доступ до налаштувань пристрою.
- Кнопка світла (*): Adjusts the brightness of the LED lights on the probe tip.
- Photo/Video Capture Button: A dedicated button on the handle for quick photo or video recording.

Figure 5: Location of the Photo/Video Capture button.
2. Шарнірне з'єднання зонда
The CT-6010 features a two-way articulating probe. Use the articulation knob on the handle to precisely control the bending direction of the probe tip. The probe can bend more than 180 degrees in two directions, allowing for comprehensive inspection of hard-to-reach areas.
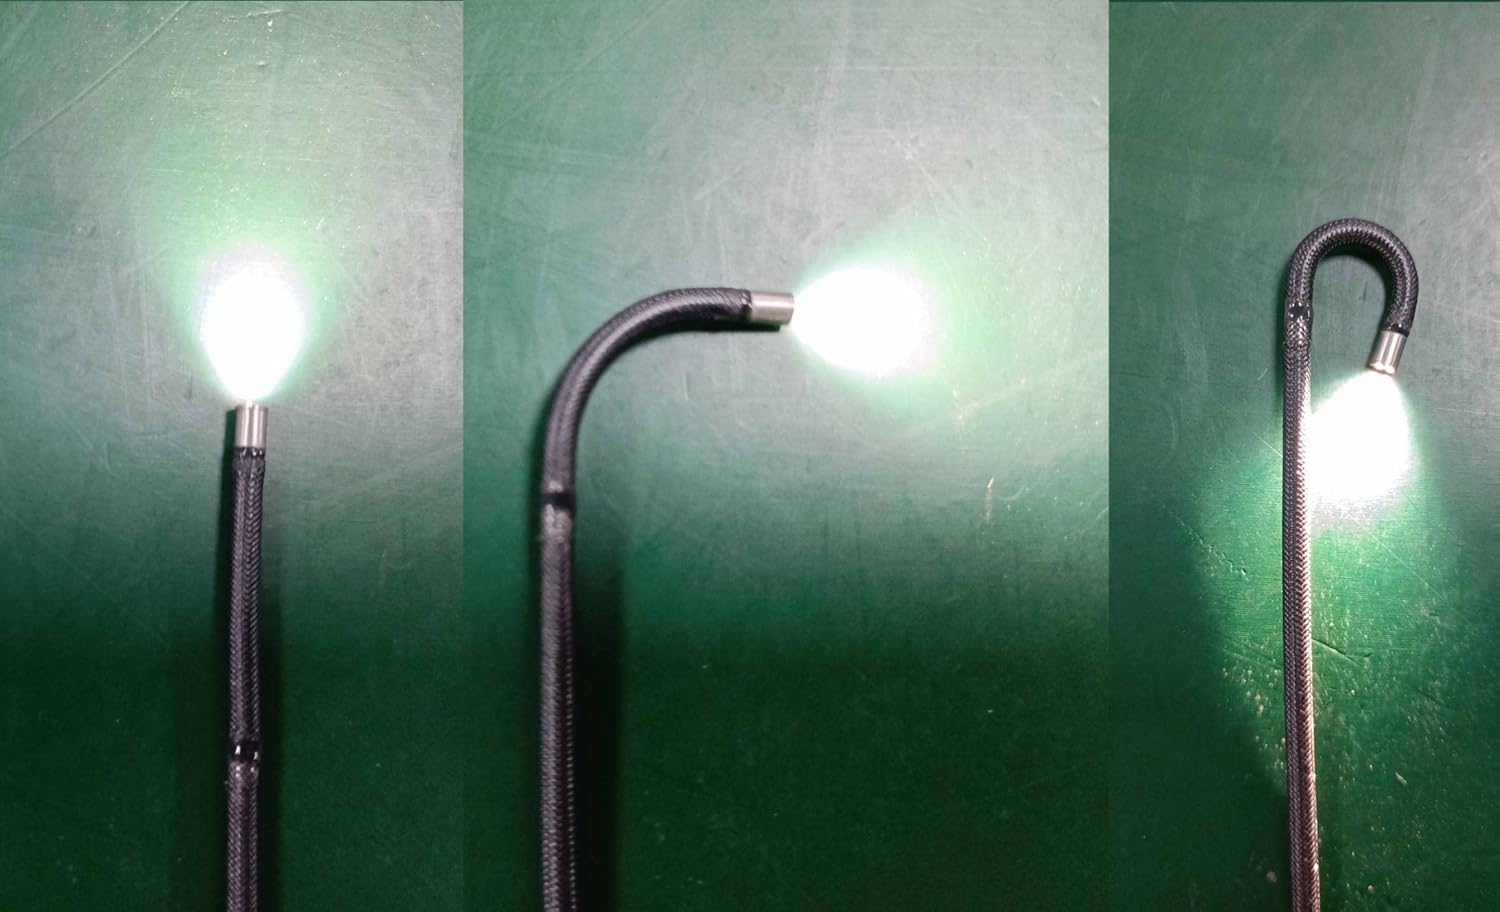
Малюнок 6: Впрamples of probe articulation.

Figure 7: Close-up of the articulating probe tip.
3. Adjusting Illumination
Натисніть * (Light) button to cycle through different brightness levels for the LED lights at the probe tip. Adjust the illumination to achieve optimal visibility in various inspection environments.
4. Зйомка фотографій і відео
Поки viewпід час прямої трансляції натисніть кнопку Кнопка зйомки фото/відео on the handle to take a still image. To record a video, press and hold the button briefly to start recording, and press it again to stop. Captured media is saved to the inserted SD card.
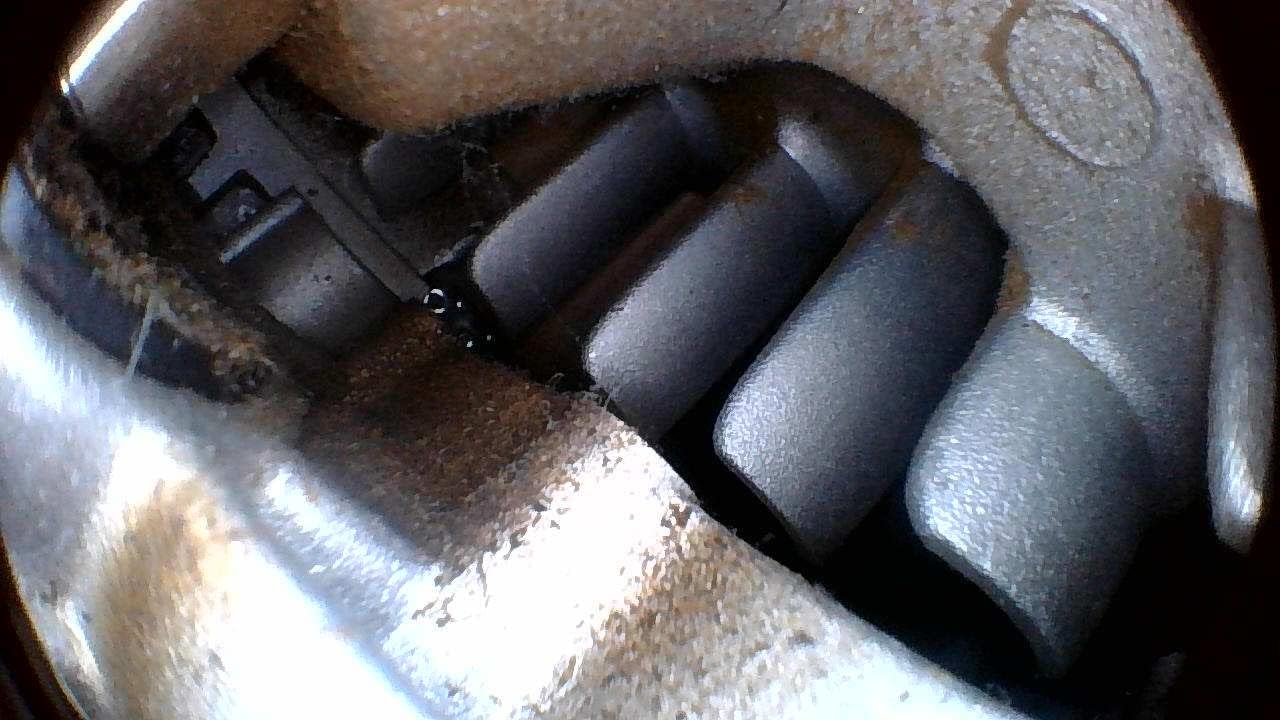
Малюнок 8: Впрample of an inspection view.
5. Навігація по меню та налаштування
Натисніть Меню button to access device settings. Use the directional buttons (often integrated with OK/Light buttons) to navigate through options such as resolution, date/time, language, and playback. Press OK для підтвердження вибору та Меню знову для виходу.
Технічне обслуговування
1. прибирання
- Зонд: After each use, gently wipe the probe and camera lens with a soft, damp cloth. For stubborn dirt, use a mild cleaning solution. Ensure no liquid enters the main unit.
- Основний блок: Wipe the main unit with a dry, soft cloth. Avoid using abrasive cleaners or solvents.
2. Догляд за акумулятором
Щоб продовжити термін служби акумулятора:
- Charge the device fully before long periods of storage.
- Уникайте зберігання пристрою в дуже жаркому або холодному середовищі.
- If not used for an extended period, charge the battery every 3-6 months.
3. Зберігання
Store the CT-6010 in its carrying case in a cool, dry place, away from direct sunlight and extreme temperatures. Ensure the probe is coiled loosely and not sharply bent to prevent damage.
4. Водонепроникність
The flexible probe is rated IP67 waterproof, meaning it can withstand immersion in water up to 1 meter for 30 minutes. The main unit is NOT waterproof. Do not immerse the main unit in water or expose it to heavy rain.
Усунення несправностей
| проблема | Можлива причина | Рішення |
|---|---|---|
| Пристрій не включається. | Низький заряд батареї; кнопка живлення натиснута неправильно. | Charge the device fully; Press and hold the Power button for a few seconds. |
| Немає зображення на екрані. | Probe not connected properly; Camera lens obstructed/dirty. | Ensure the probe is securely connected; Clean the camera lens. |
| Збій підключення до Wi-Fi. | Incorrect password; App not installed; Device out of range. | Verify WiFi password; Install the correct Vividia app; Move closer to the device. |
| Probe articulation is stiff or stuck. | Obstruction; Mechanical issue. | Do not force the articulation. Gently retract the probe and check for obstructions. If the issue persists, contact support. |
| Погана якість зображення. | Insufficient lighting; Dirty lens; Incorrect focus (if adjustable). | Adjust LED brightness; Clean the camera lens; Ensure proper distance from object. |
Технічні характеристики
| Особливість | Деталь |
|---|---|
| Діаметр зонда | 6 мм (0.236 дюйма) |
| Довжина зонда | 1.0 метрів (3.3 футів) |
| Роздільна здатність камери | HD 1280x720 |
| Артикуляція | 2-way, max. bending angle >180 degrees |
| Підключення | Built-in WiFi (for iPhone, iPad, Android) |
| Рейтинг водонепроникності | IP67 (лише зонд) |
| Дисплей | Integrated LCD |
| Роздільна здатність захоплення відео | 720p |
| Спалах камери | Вбудовані світлодіоди |
| Виробник | Технології Vividia |
| Дата першої доступності | 12 січня 2022 р |

Figure 9: Probe diameter measurement.

Figure 10: Probe length illustration.
Гарантія та підтримка
Інформація про гарантію
The Vividia CT-6010 is covered by a manufacturer's warranty. Please refer to the warranty card included with your product or visit the official Vividia Technologies webсайт для отримання детальних гарантійних умов.
Підтримка клієнтів
For technical assistance, troubleshooting beyond this manual, or warranty claims, please contact Vividia Technologies customer support. Contact information can typically be found on the manufacturer's webсайті або в документації до вашого продукту.