1. Вступ
This manual provides instructions for the proper setup, operation, and maintenance of your Andoer Mini Ball Head Tripod Head. Please read this manual thoroughly before use to ensure optimal performance and longevity of the product.
2. Продукт закінчивсяview
2.1 Особливості
- Top 1/4 inch screw for attaching cameras, video lights, flashes, microphones, or video monitors.
- Bottom 1/4 inch screw hole for installation on tripods, selfie sticks, or other mounts.
- Side locking button for 90° tilt adjustment and 360° rotation.
- Non-slip rubber ring on the top surface to protect attached devices from scratches and ensure stability.
- Constructed from aluminum alloy with anti-oxidation treatment for durability and portability.
2.2 Компоненти
The Andoer Mini Ball Head consists of the following main components:
- Top 1/4 Inch Screw: For mounting your device.
- Non-slip Rubber Ring: Located on the top plate, beneath the 1/4 inch screw.
- Кульовий шарнір: Allows for flexible angle adjustments.
- Ручка блокування: Secures the ball joint in position for tilt and rotation.
- Основний корпус: The central aluminum alloy housing.
- Bottom 1/4 Inch Screw Hole: For attaching the ball head to a support.

Figure 1: Key connection points of the Andoer Mini Ball Head, illustrating the top 1/4 inch screw and the bottom 1/4 inch screw hole.
3. Налаштування
3.1 Attaching to a Support
To attach the ball head to a tripod, monopod, or other compatible mount:
- Locate the 1/4 inch screw on your support device.
- Align the bottom 1/4 inch screw hole of the Andoer Mini Ball Head with the screw on your support.
- Rotate the ball head clockwise onto the support's screw until it is securely fastened. Do not overtighten.

Figure 2: The Andoer Mini Ball Head ready for attachment to a support device.
3.2 Підключення пристрою
To attach your camera, video light, or other device to the ball head:
- Ensure the locking knob on the ball head is tightened to prevent accidental movement during attachment.
- Locate the 1/4 inch screw hole on the bottom of your device.
- Align your device's screw hole with the top 1/4 inch screw of the ball head.
- Rotate your device clockwise onto the ball head's screw until it is securely fastened. The non-slip rubber ring will help protect your device and provide a stable connection.
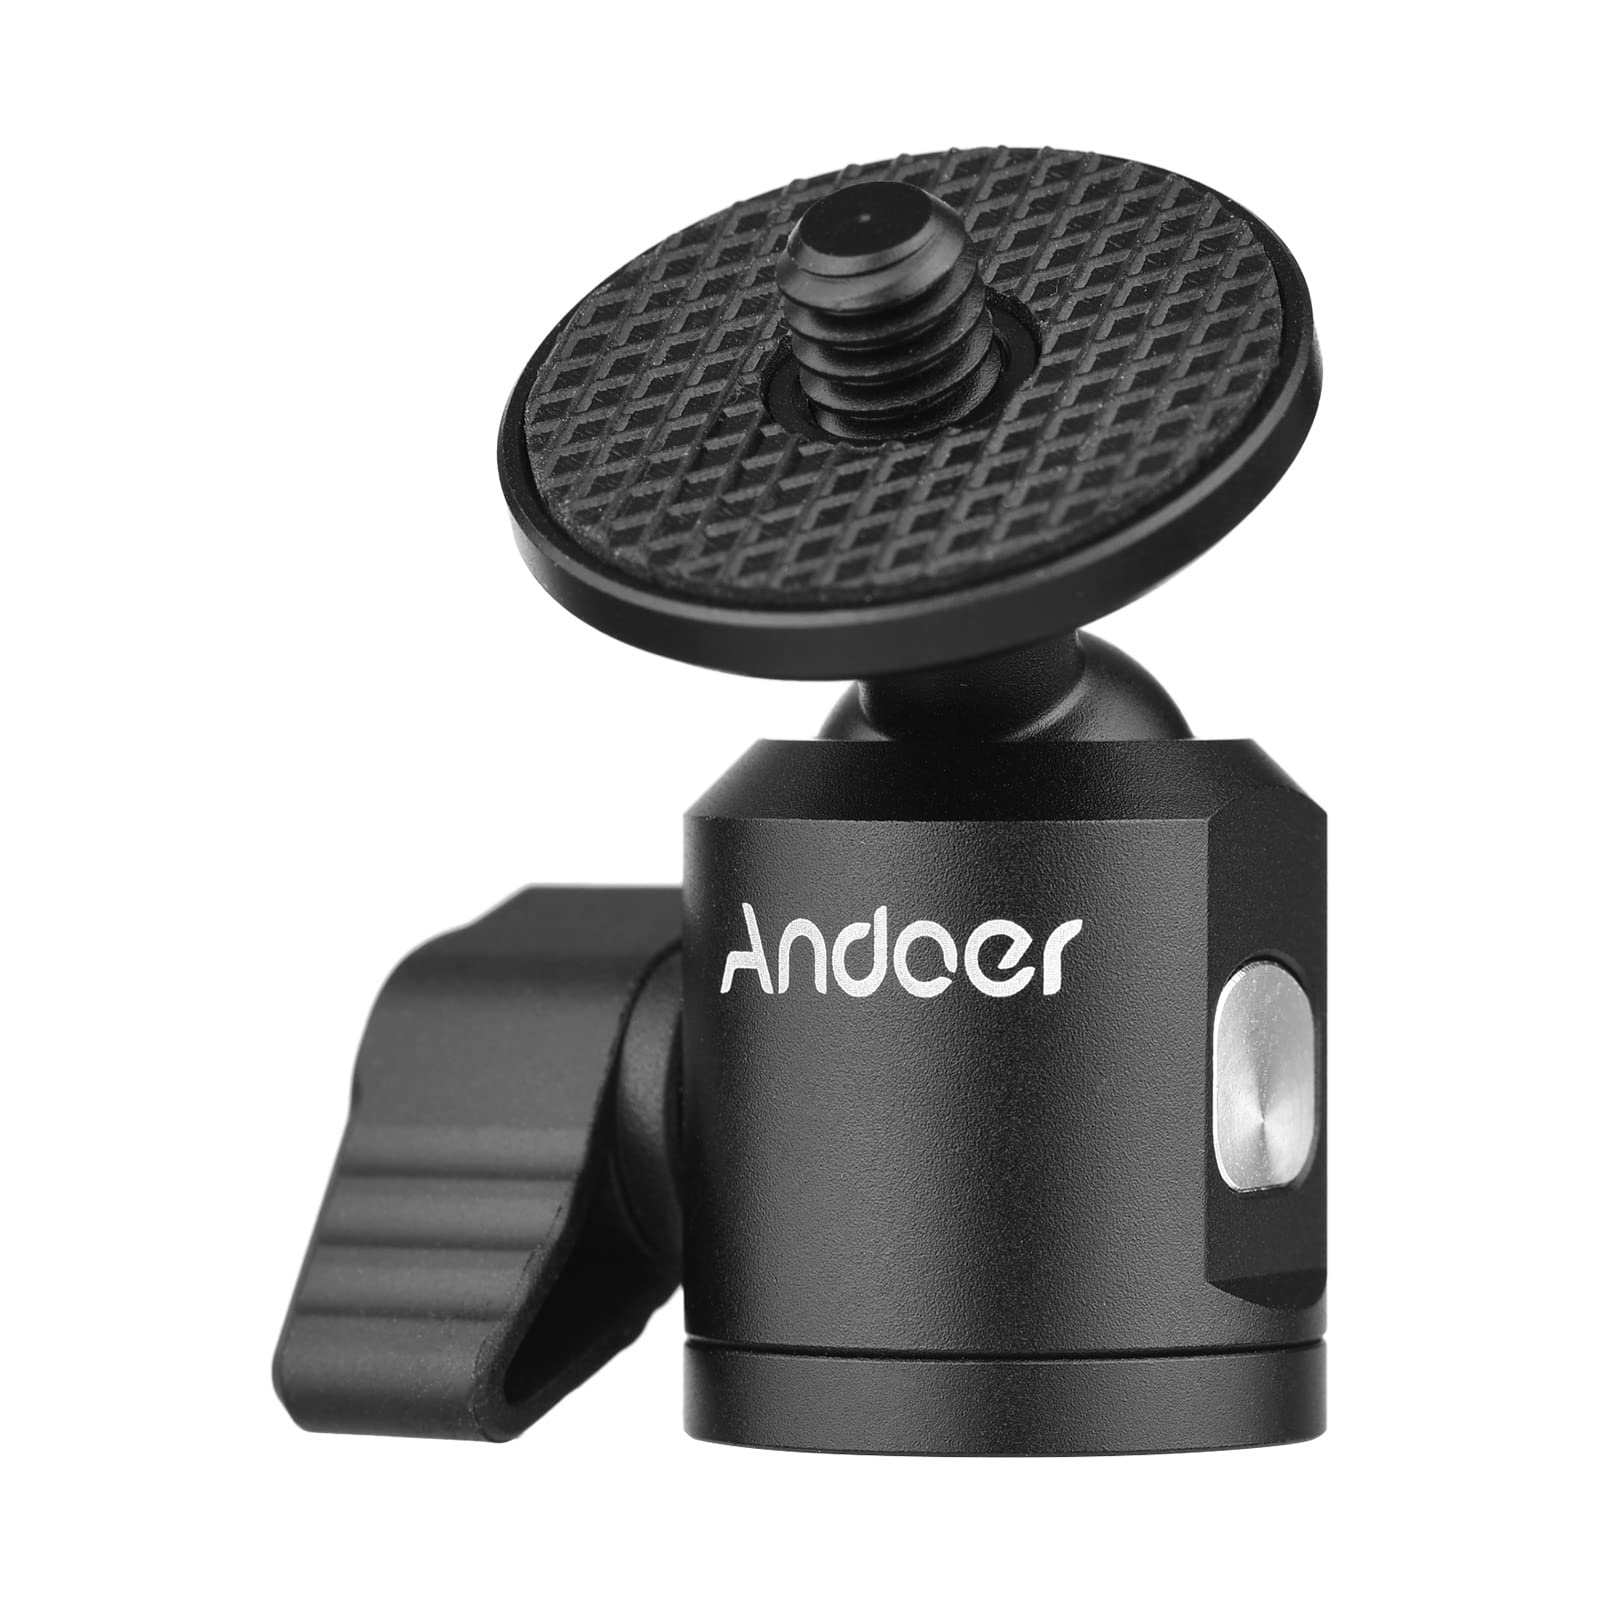
Figure 3: The top 1/4 inch screw for mounting a device.
4. Інструкція з експлуатації
4.1 Adjusting Tilt and Rotation
The ball head allows for flexible positioning of your attached device:
- Послабте фіксуючу ручку: Gently turn the side locking knob counter-clockwise to loosen the ball joint.
- Відрегулювати кут: Position your device to the desired tilt (up to 90°) or rotate it horizontally (360°).
- Безпечна позиція: Once the desired angle is achieved, turn the locking knob clockwise to tighten and secure the ball joint. Ensure it is firm enough to hold your device's weight without slipping.

Figure 4: The locking knob for angle adjustment.
5. Технічне обслуговування
- Прибирання: Wipe the ball head with a soft, dry cloth. For stubborn dirt, a slightly damp Можна використовувати тканину, після чого негайно висушити. Уникайте абразивних засобів для чищення або розчинників.
- Зберігання: Store the ball head in a dry, cool place away from direct sunlight and extreme temperatures.
- Огляд: Періодично перевіряйте всі гвинти та з'єднання на міцність затягування.
6. Вирішення проблем
- Device Slipping: If your device is slipping after tightening the locking knob, ensure the knob is fully tightened. Verify that the combined weight of your device and any accessories does not exceed the ball head's maximum weight recommendation.
- Складність регулювання кута: If the ball joint is stiff, ensure the locking knob is sufficiently loosened. Do not force adjustments.
- Послаблені з'єднання: Always ensure both the top 1/4 inch screw connection to your device and the bottom 1/4 inch screw hole connection to your support are securely tightened before use. Avoid excessive force when tightening, as this can damage threads.
7. Технічні характеристики
| Атрибут | Значення |
|---|---|
| Колір | чорний |
| матеріал | Алюмінієвий сплав |
| Верхнє з'єднання | Гвинт 1/4 дюйма |
| Нижнє підключення | Отвір для гвинта 1/4 дюйма |
| Вага товару | 22 грамів (0.7 унції) |
| Рекомендована максимальна вага | 22 грамів |
| Регулювання нахилу | До 90° |
| Обертання | 360 ° панорамний |