
1. Вступ
Thank you for choosing the Vancer Gretxa Wireless Ultralight Gaming Mouse. This manual provides essential information for setting up, operating, and maintaining your new gaming mouse. Please read it thoroughly to ensure optimal performance and longevity of your device.
Вміст упаковки
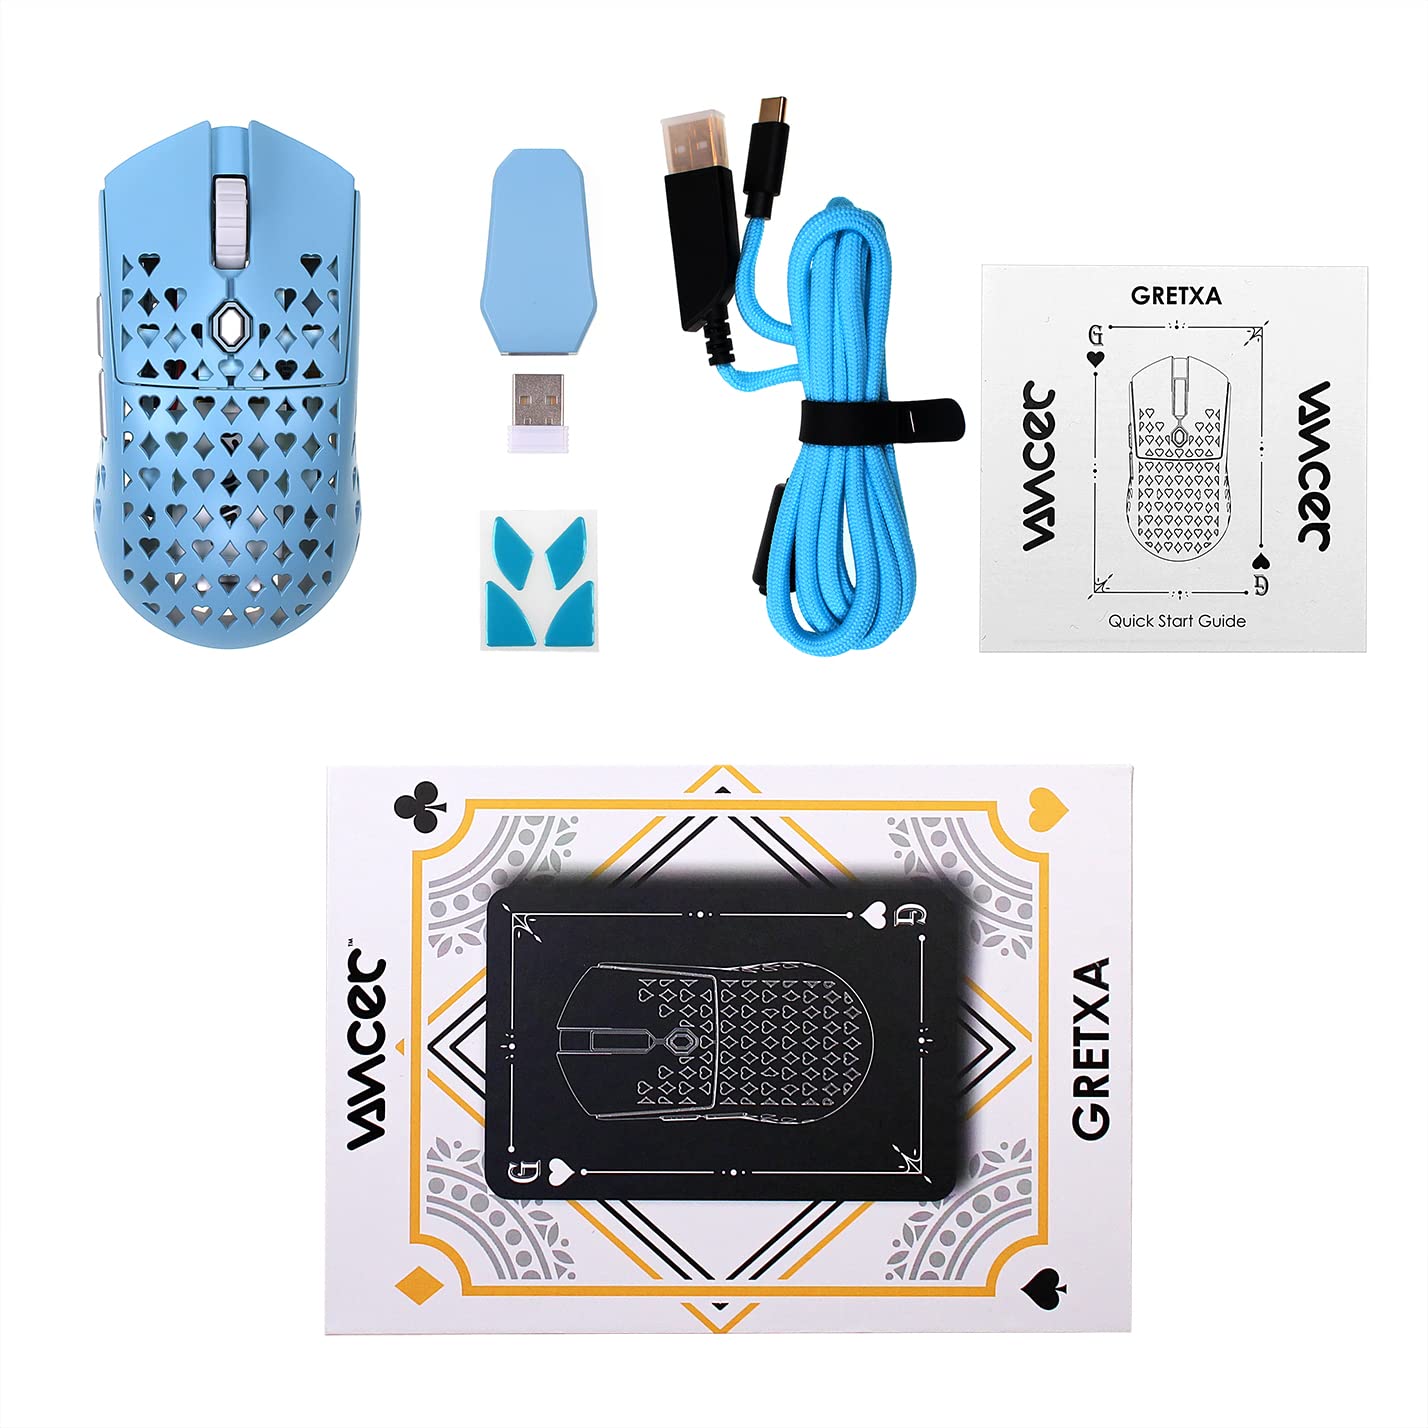
The Vancer Gretxa Wireless Ultralight Gaming Mouse package includes the following items:
- Vancer Gretxa Wireless Gaming Mouse
- USB-C to USB-A Charging Cable (Red)
- USB Extension Dongle
- Ключ бездротового приймача
- Extra Set of PTFE Skates
- Короткий посібник
2. Налаштування
2.1 Підключення бездротового приймача
- Locate the wireless receiver dongle.
- Plug the receiver dongle into an available USB-A port on your computer. For optimal signal strength, use the provided USB extension dongle to place the receiver closer to the mouse.
- Turn on the mouse using the power switch located on the underside of the mouse.
- Your computer should automatically detect the mouse. No additional drivers are typically required for basic functionality on Windows 10.
2.2 Заряджання миші
The Vancer Gretxa mouse is equipped with a rechargeable Lithium Ion battery.
- Connect the USB-C end of the charging cable to the front port of the mouse.
- Connect the USB-A end of the charging cable to an available USB-A port on your computer or a USB wall adapter.
- Мишу можна використовувати в дротовому режимі під час заряджання.
- A full charge typically takes a few hours. The LED indicator on the mouse will change to indicate charging status (refer to the Quick Start Guide for specific LED behaviors).

2.3 Optional Software Installation
For advanced customization, such as remapping buttons, adjusting DPI steps, or configuring macros, Vancer may provide optional software. Please visit the official Vancer website for the latest software downloads and installation instructions. Note that some features like RGB lighting may be tied to DPI settings.
3. Інструкція з експлуатації
3.1 Основні функції миші
- Клацніть лівою кнопкою миші: Кнопка основної дії.
- Клацніть правою кнопкою миші: Кнопка додаткової дії, часто для контекстних меню.
- Колесо прокрутки: Прокручує вміст вертикально. Також можна натиснути для функції клацання середньою кнопкою миші.
- Бічні кнопки: Зазвичай використовується для навігації вперед/назад у web browsers or customizable functions in games/software.
- Кнопка DPI: Перемикає попередньо встановлені рівні чутливості DPI.

3.2 Налаштування DPI
The Vancer Gretxa mouse features a dedicated DPI button, usually located behind the scroll wheel or on the underside, to cycle through different sensitivity settings. The default DPI steps are 400, 800, 1800, 3200, 4800, and 6400. Each step may correspond to a different LED color for visual indication. Press the DPI button to switch between these settings to find your preferred sensitivity.
3.3 Налаштування частоти опитування
The polling rate determines how often the mouse reports its position to the computer. The Gretxa mouse supports polling rates of 125Hz (8ms), 500Hz (2ms), and 1000Hz (1ms). Higher polling rates generally provide smoother tracking and lower latency. Adjustment of the polling rate is typically done via the optional Vancer software.
3.4 Дротовий режим
When the USB-C charging cable is connected to the mouse and your computer, the mouse will automatically switch to wired mode. This allows for continuous use even if the battery is depleted, and can be preferred for competitive gaming to eliminate any potential wireless interference.
4. Технічне обслуговування
4.1 Очищення миші
Регулярне чищення допомагає підтримувати продуктивність та гігієну.
- Зовні: Злегка протріть м’якою тканиною без ворсу dampводою або м’яким миючим розчином. Уникайте агресивних хімікатів.
- датчик: Gently clean the optical sensor on the underside of the mouse with a cotton swab or compressed air to remove dust and debris.
- Колесо прокрутки: Використовуйте стиснене повітря, щоб очистити пил або частинки, які можуть накопичуватися навколо механізму колеса прокручування.
4.2 Replacing PTFE Skates
The Vancer Gretxa mouse comes with high-quality PTFE skates for smooth gliding. Over time, these may wear down. An extra set of PTFE skates is included in your package for replacement.
- Обережно зніміть старі фторопластові ковзани тонким неабразивним інструментом.
- Ensure the surface where the skates were is clean and free of adhesive residue.
- Peel the backing from the new PTFE skates and carefully align them with the recesses on the mouse's underside.
- Міцно притисніть, щоб забезпечити належне зчеплення.

4.3 Догляд за акумулятором
- Уникайте частого повного розряджання акумулятора.
- Зберігайте мишу в прохолодному, сухому місці, якщо вона не використовується протягом тривалого часу.
- Use only the provided charging cable or a certified USB-C cable to prevent damage.
5. Вирішення проблем
If you encounter issues with your Vancer Gretxa mouse, please refer to the following common solutions:
| проблема | Можливе рішення |
|---|---|
| Миша не відповідає |
|
| Рух курсора нерівномірний або стрибкоподібний |
|
| Кнопки або колесо прокручування не працюють |
|
| Низький час автономної роботи |
|
6. Технічні характеристики
Below are the technical specifications for the Vancer Gretxa Wireless Ultralight Gaming Mouse:
| Особливість | Деталь |
|---|---|
| Модель | Gretxa |
| Підключення | 2.4GHz Wireless, USB-C (Wired) |
| датчик | Оптичний датчик Pixart 3370 |
| вага | Приблизно 69 г |
| Розміри (Д x Ш x В) | 123 x 62 x 37 мм |
| Налаштування DPI | 400 / 800 / 1800 / 3200 / 4800 / 6400 (Adjustable) |
| Швидкість опитування | 125 Гц / 500 Гц / 1000 Гц |
| LOD (дистанція старту) | 2mm (default), 1mm (adjustable via software) |
| Перемикачі | TTC Gold Switches (V2 improvement) |
| Ковзани | PTFE |
| Тип батареї | Літій-іонний (1 в комплекті) |
| Операційна система | Windows 10 (and compatible with other modern OS) |
| Сумісні пристрої | Персональний комп'ютер |
7. Гарантія та підтримка
7.1 Інформація про гарантію
For the most current and detailed warranty information regarding your Vancer Gretxa Wireless Ultralight Gaming Mouse, please refer to the official Vancer website or the warranty card included with your product. Warranty terms and conditions, including duration and coverage, may vary by region and are subject to change by the manufacturer.
7.2 Підтримка клієнтів
If you require further assistance, have questions not covered in this manual, or need technical support, please visit the official Vancer website. You can typically find FAQs, driver downloads, and contact information for customer service there.