
1. Вступ
The NOCO Genius10 is an advanced, multi-purpose 6V and 12V battery charger designed for a wide range of battery types and applications. It features a maximum output of 10 Amperes and includes a power supply mode. This charger automatically adjusts the charging current based on the battery's condition and is compatible with various battery chemistries, including flooded, EFB, AGM, and lithium-ion. It also incorporates repair and force modes for enhanced battery maintenance. This product is PSE certified for the Japanese market, ensuring safety and compliance.

Малюнок 1: Спереду view of the NOCO Genius10 battery charger, showcasinйого компактний дизайн та інтерфейс користувача.
2. Інформація про безпеку
Always read and understand the entire instruction manual before using the product. Failure to follow safety instructions could result in electric shock, explosion, fire, which could result in serious injury, death, or property damage.
- Електрична безпека: Ensure the charger is connected to a properly grounded outlet. Do not expose the charger to rain or wet conditions.
- Поводження з акумулятором: Wear eye protection and gloves when working with batteries. Ensure adequate ventilation during charging.
- Вибухові гази: Batteries generate explosive gases during normal operation. Avoid flames and sparks near the battery.
- Порядок підключення: Завжди підключайте позитивний (+) клемний полюсamp to the positive battery terminal first, then the negative (-) clamp to the negative battery terminal or chassis ground. Disconnect in reverse order.
- Пошкоджене обладнання: Не використовуйте зарядний пристрій, якщо він будь-яким чином пошкоджений.
3. Особливості продукту
- Багатотомнийtage Сумісність: Підтримує акумулятори 6 В та 12 В.
- Високий зарядний струм: Доставляє до 10 Amperes for efficient charging.
- Automatic Current Adjustment (Ampmatic): The charger automatically adjusts the charging current based on the battery size and condition, from small scooter batteries (3Ah) to large car batteries (144Ah).
- Широка підтримка типу батареї: Compatible with flooded, EFB, AGM, Gel, Calcium, and Lithium-ion (LiFePO4) batteries.
- Режим ремонту: Advanced mode for recovering new or damaged batteries, detecting and reversing sulfation and acid stratification.
- Примусовий режим: Allows manual initiation of charging for deeply discharged batteries below 1V, even down to zero volts.
- Режим живлення: Converts the charger into a 10-amp power supply, useful for maintaining battery charge during vehicle display or service.
- Термічна компенсація: Optimizes charging performance across a wide temperature range, from -40°C to +70°C, preventing over-charging in hot weather and under-charging in cold weather.
- Повністю автоматична робота: Provides year-round, all-weather charging with zero overcharge risk. Can be left plugged in 24/7.
- Автоматична пам'ять: Automatically returns to its last selected mode after power interruption.
- PSE Certified: Complies with Japanese electrical product safety standards.
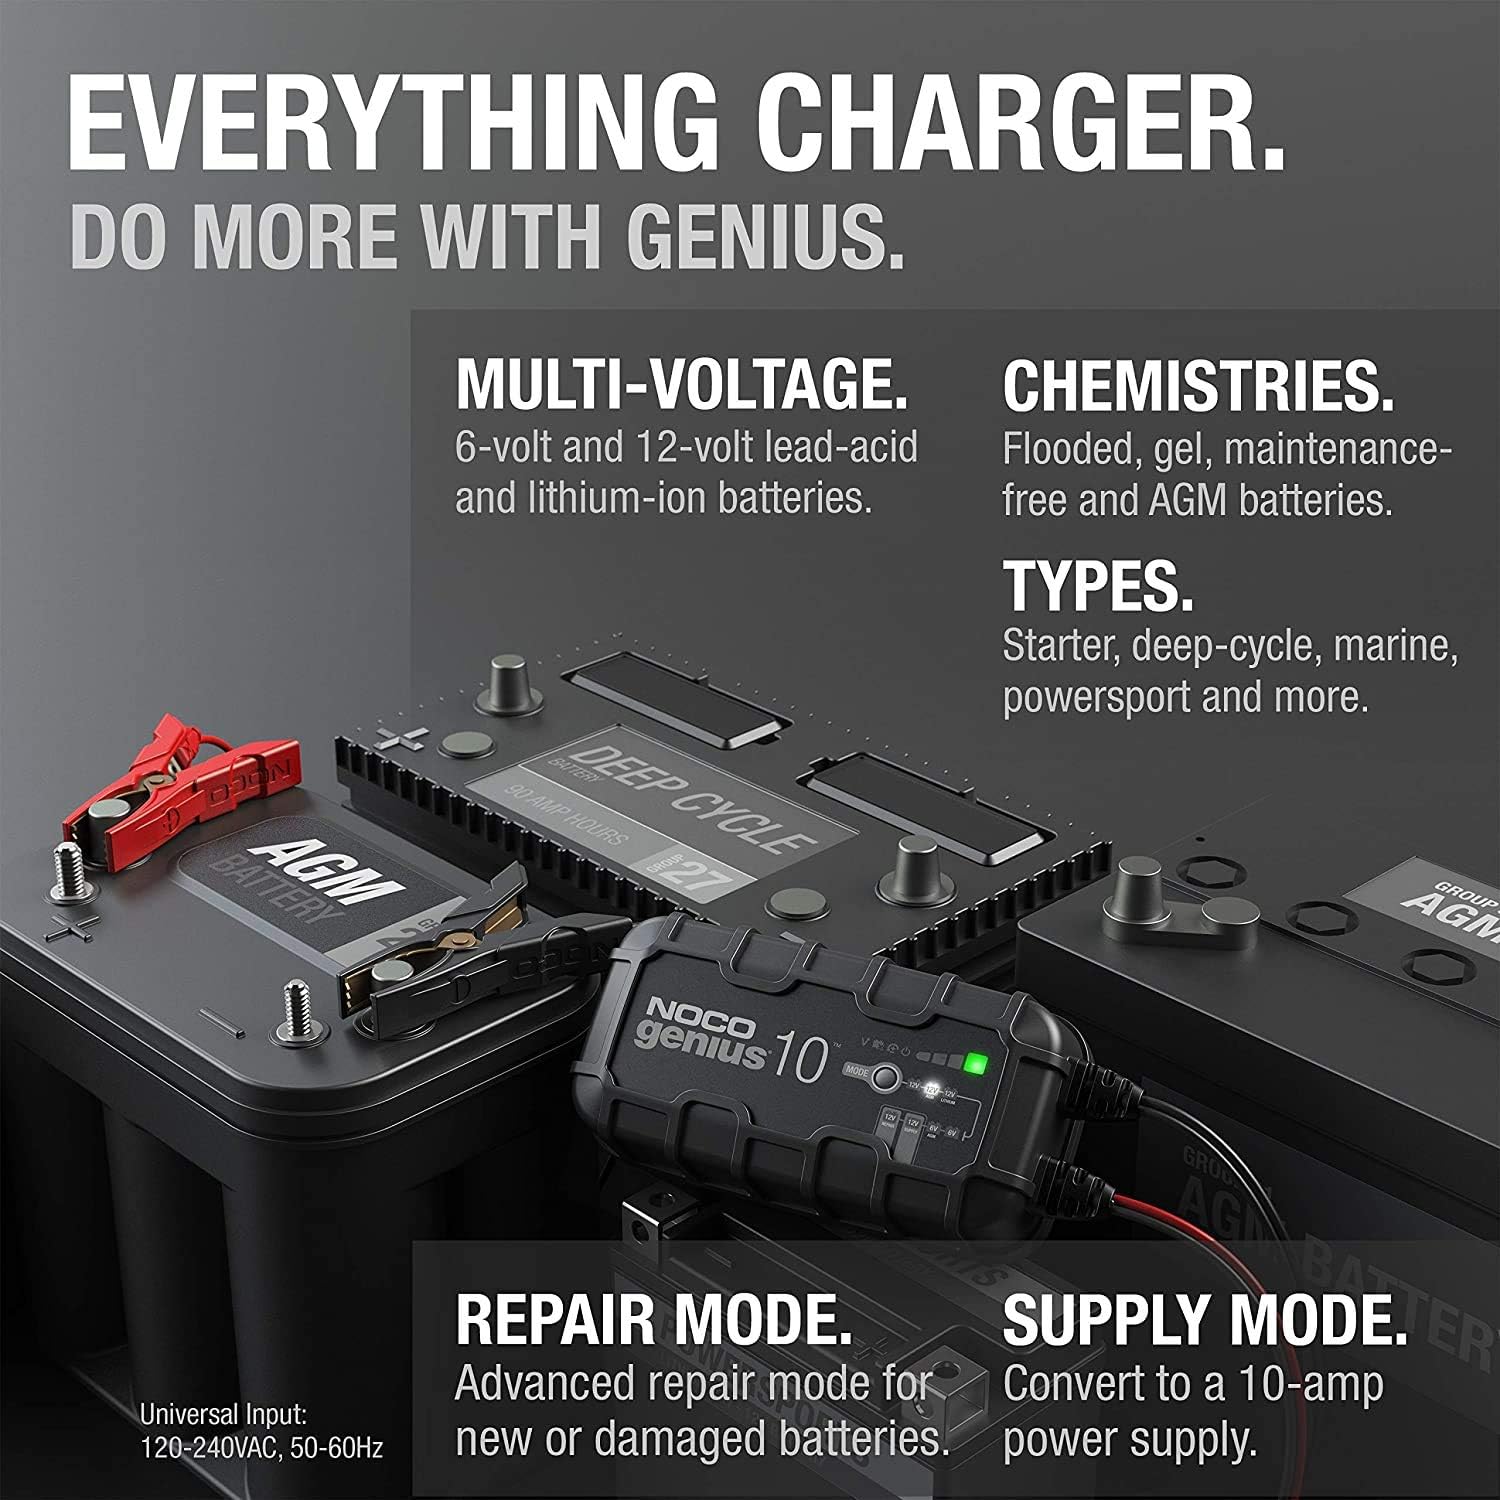
Figure 2: An illustration of the NOCO Genius10's versatility, showing its compatibility with multi-voltage (6V/12V) and various battery chemistries (flooded, gel, maintenance-free, AGM, lithium-ion). It also highlights Repair Mode and Supply Mode.
4. Налаштування
Before connecting the charger, ensure the vehicle is turned off and in a well-ventilated area. Identify the battery terminals.
4.1 Підключення до акумулятора
- Підключіть зарядний пристрій до акумулятора: Підключіть червоний позитивний (+) клемний вивідamp до позитивного полюса акумулятора. Під’єднайте чорний негативний (-) клемний вивід.amp to the negative battery terminal or a chassis ground point away from the battery.
- Підключіть до розетки: Plug the charger's AC power cord into a suitable electrical outlet. The charger will automatically detect the battery voltage and begin the charging process.

Figure 3: The NOCO Genius10 charger connected to a car battery, demonstrating its ability to charge deeply discharged batteries, even down to zero volts, using its Start Voltage and Force Mode features.
5. Інструкція з експлуатації
The NOCO Genius10 operates automatically, but you can select specific modes for different battery conditions.
5.1 Автоматичне заряджання
- Once connected to a battery and power, the charger will automatically begin charging.
- The LED indicators will show the charging progress and battery status. A blue LED indicates a healthy battery and charging in progress.
- The charger will transition through various stages (Connect, Save, Charge, Optimize, Maintain) to ensure optimal battery health.
5.2 Спеціальні режими
- Режим ремонту: For heavily sulfated or damaged batteries. Consult the full manual for activation.
- Примусовий режим: To initiate charging on batteries below 1V. This mode bypasses safety features and should be used with caution.
- Режим живлення: Provides a constant 10A output. Useful for maintaining vehicle systems during battery changes or diagnostics.

Figure 4: The NOCO Genius10 connected to a battery, showing its fully automatic operation with features like year-round charging, zero overcharge protection, and auto-memory for selected modes.
6. Технічне обслуговування
The NOCO Genius10 is designed for continuous maintenance charging, ensuring your battery remains in optimal condition.
- Long-Term Connection: The charger can be left connected to the battery indefinitely. It will automatically monitor the battery and provide a maintenance charge as needed, preventing overcharging.
- Контроль стану акумулятора: The charger continuously checks the battery's state of health. Green LEDs indicate a good battery, yellow indicates slight degradation, and red indicates significant wear, suggesting replacement.
- Прибирання: Keep the charger and its connectors clean and free of dirt or corrosion.

Figure 5: A cutaway view of a battery being restored by the NOCO Genius10, emphasizing its auto-detection for sulfation and acid stratification, auto-repair capabilities, and overall performance improvement for stronger engine starts and extended battery life.
7. Вирішення проблем
If you encounter issues with your NOCO Genius10, refer to the following common troubleshooting steps:
- Зарядний пристрій не вмикається: Переконайтеся, що шнур живлення змінного струму надійно підключено до розетки. Перевірте, чи не спрацювали автоматичні вимикачі.
- Червоний світлодіодний індикатор: A red LED often indicates a poor connection to the battery. Disconnect and reconnect the clamps, ensuring they are firmly attached to the correct terminals.
- Зарядка не починається: Якщо об'єм батареїtage is extremely low (below 1V), the charger may not detect it automatically. Use Force Mode (refer to the full manual for instructions) to initiate charging.
- Захист від перезарядки: The charger is designed with zero overcharge protection. If the battery is fully charged, it will enter maintenance mode, indicated by green, yellow, or red LEDs depending on battery health.
8. Технічні характеристики
| Виробник | NOCO |
| Бренд | NOCO |
| Назва моделі | G10JP |
| Розміри продукту | 20.8 х 9.4 х 6 см |
| Номер моделі товару | G10JP |
| Особливості | Charging Current: 10A, Input Voltage: 100V-120V, 50/60Hz, Output Power: 150W (Max) / Back Current Drain: < 0.5mA, Operating Ambient Temperature: -20°C ~ +40°C | Waterproof/Dustproof Performance: IP65, Minimum Detection Voltage: ~ 1V |
| Колір | чорний |
| Атестація | 1-річна гарантія виробника |
| Вага товару | 1.84 кілограма |
| Вихідний випtage | 12 вольт |
9. Гарантія та підтримка
The NOCO Genius10 G10JP comes with a 1-year manufacturer's warranty. For technical support, troubleshooting assistance, or warranty claims, please contact NOCO customer service through their official website or the retailer where the product was purchased. Please have your model number (G10JP) and proof of purchase ready when contacting support.