
1. Продукт закінчивсяview
The KUIDAMOS DSO FNIRSI PRO is a portable digital oscilloscope designed for various measurement tasks. It features a 2.4-inch LCD display, a real-time sampling rate of up to 20MS/s, and an analog bandwidth of 5MHz. This device is equipped with a built-in 1200mAh rechargeable lithium battery, offering approximately 3 hours of continuous operation. It supports waveform storage and management, making it suitable for both maintenance and research and development applications.
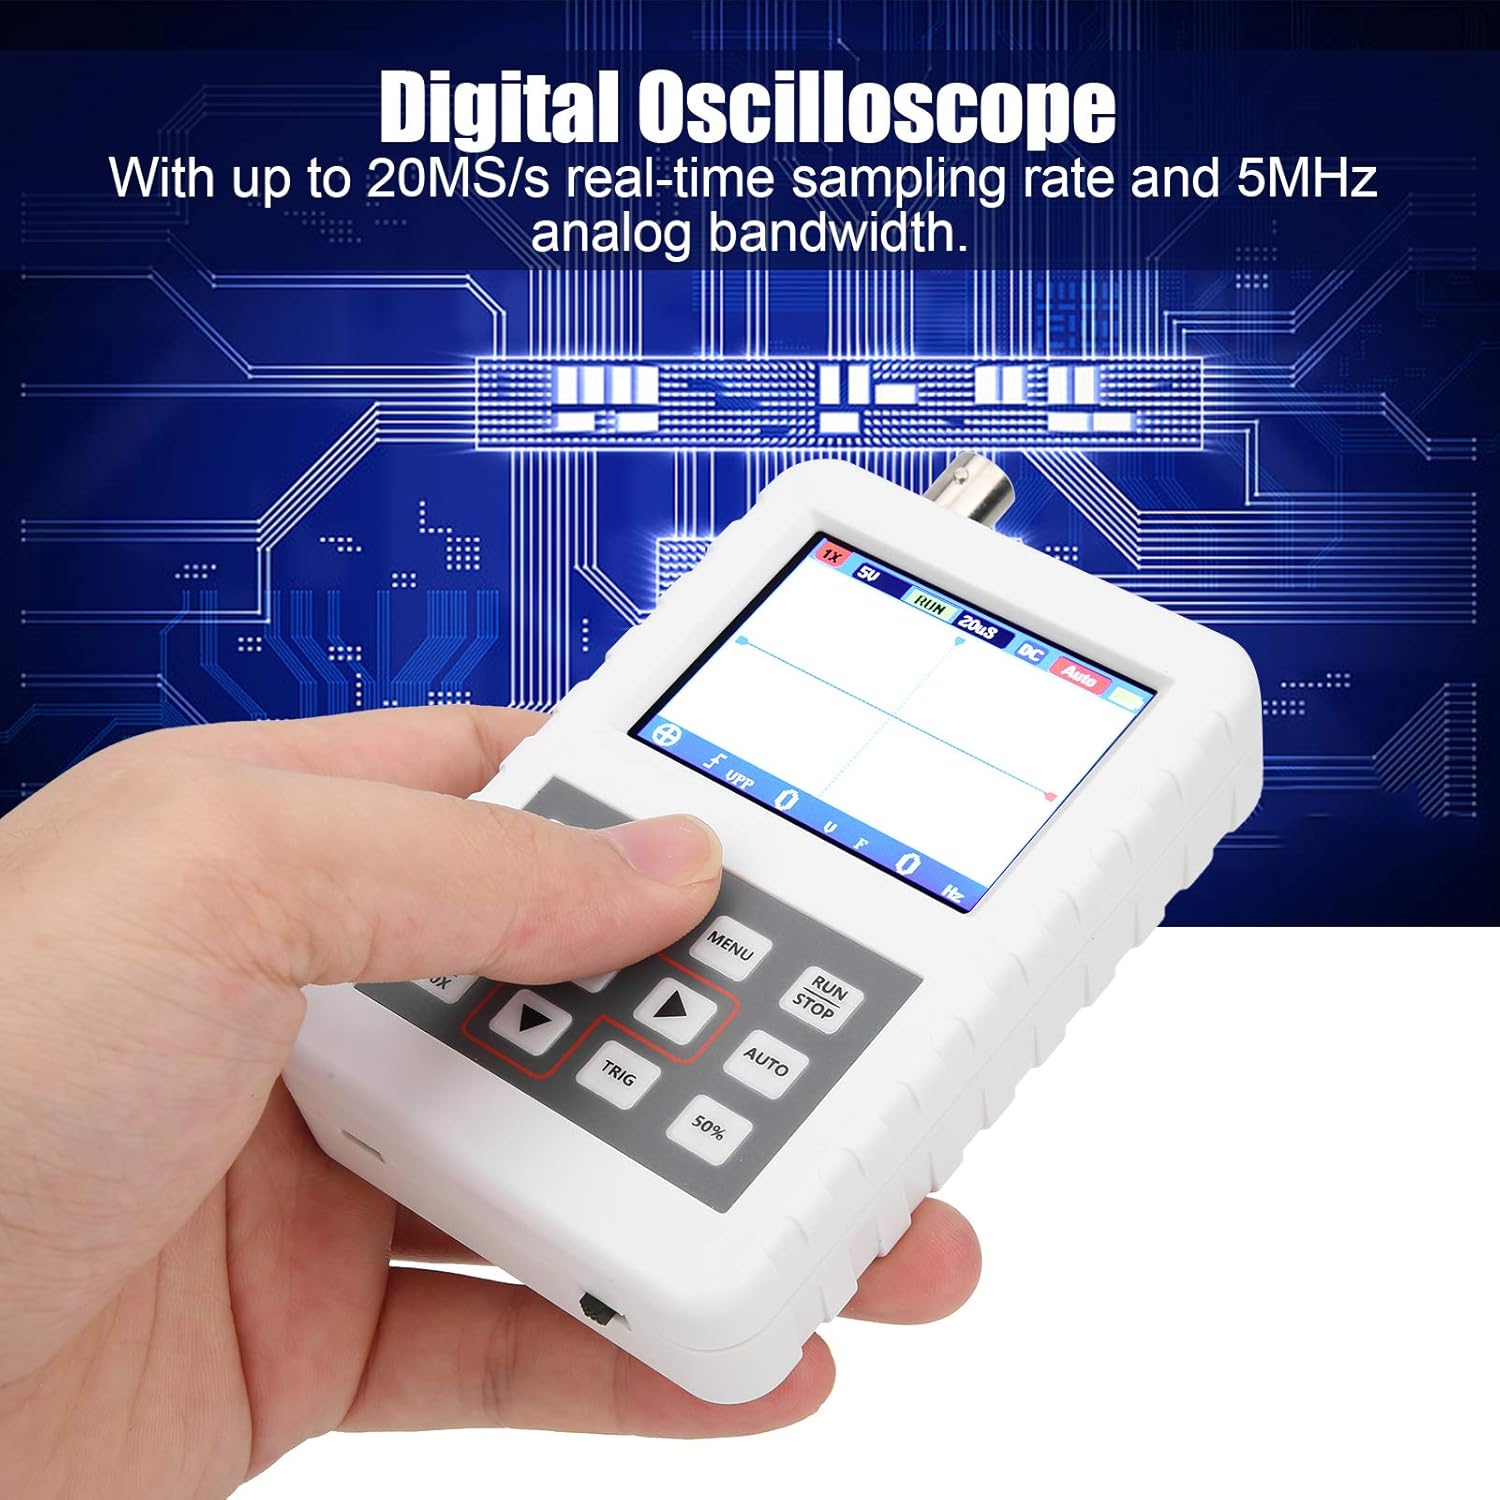
Image 1.1: The DSO FNIRSI PRO Digital Oscilloscope, highlighting its 20MS/s sampling rate and 5MHz analog bandwidth.

Image 1.2: The oscilloscope's 2.4-inch HD LCD screen with 320 x 240 resolution for clear waveform display.

Зображення 1.3: Передня та задня частини views of the DSO FNIRSI PRO, illustrating its physical layout.
2. Вміст упаковки
Перевірте, чи всі перелічені нижче предмети входять до вашої упаковки:
- 1 x DSO FNIRSI PRO Digital Oscilloscope
- 1 x Matching Probe
- 1 x USB Data Line
- 1 x Посібник користувача (цей документ)
3. Початкове налаштування
3.1 Зарядка пристрою
Before first use, fully charge the oscilloscope. Connect the provided USB data line to the device's charging port and to a 5V/1A, 2A, 3A, or 4A USB power adapter. The built-in 1200mAh lithium battery can be charged continuously for approximately 3 hours.
3.2 Підключення зонда
Connect the matching probe to the BNC connector on the top of the oscilloscope. Ensure a secure connection by twisting the probe connector clockwise until it locks into place.
3.3 Увімкнення/вимкнення
To power on the device, press and hold the power button (usually located on the side or bottom) for a few seconds until the screen illuminates. To power off, press and hold the power button again until the device shuts down.
4. Інструкція з експлуатації
4.1 Елементи керування та інтерфейс
The oscilloscope features a user-friendly interface with several buttons for navigation and function control.

Image 4.1: Operating the DSO FNIRSI PRO, showing the placement of control buttons.
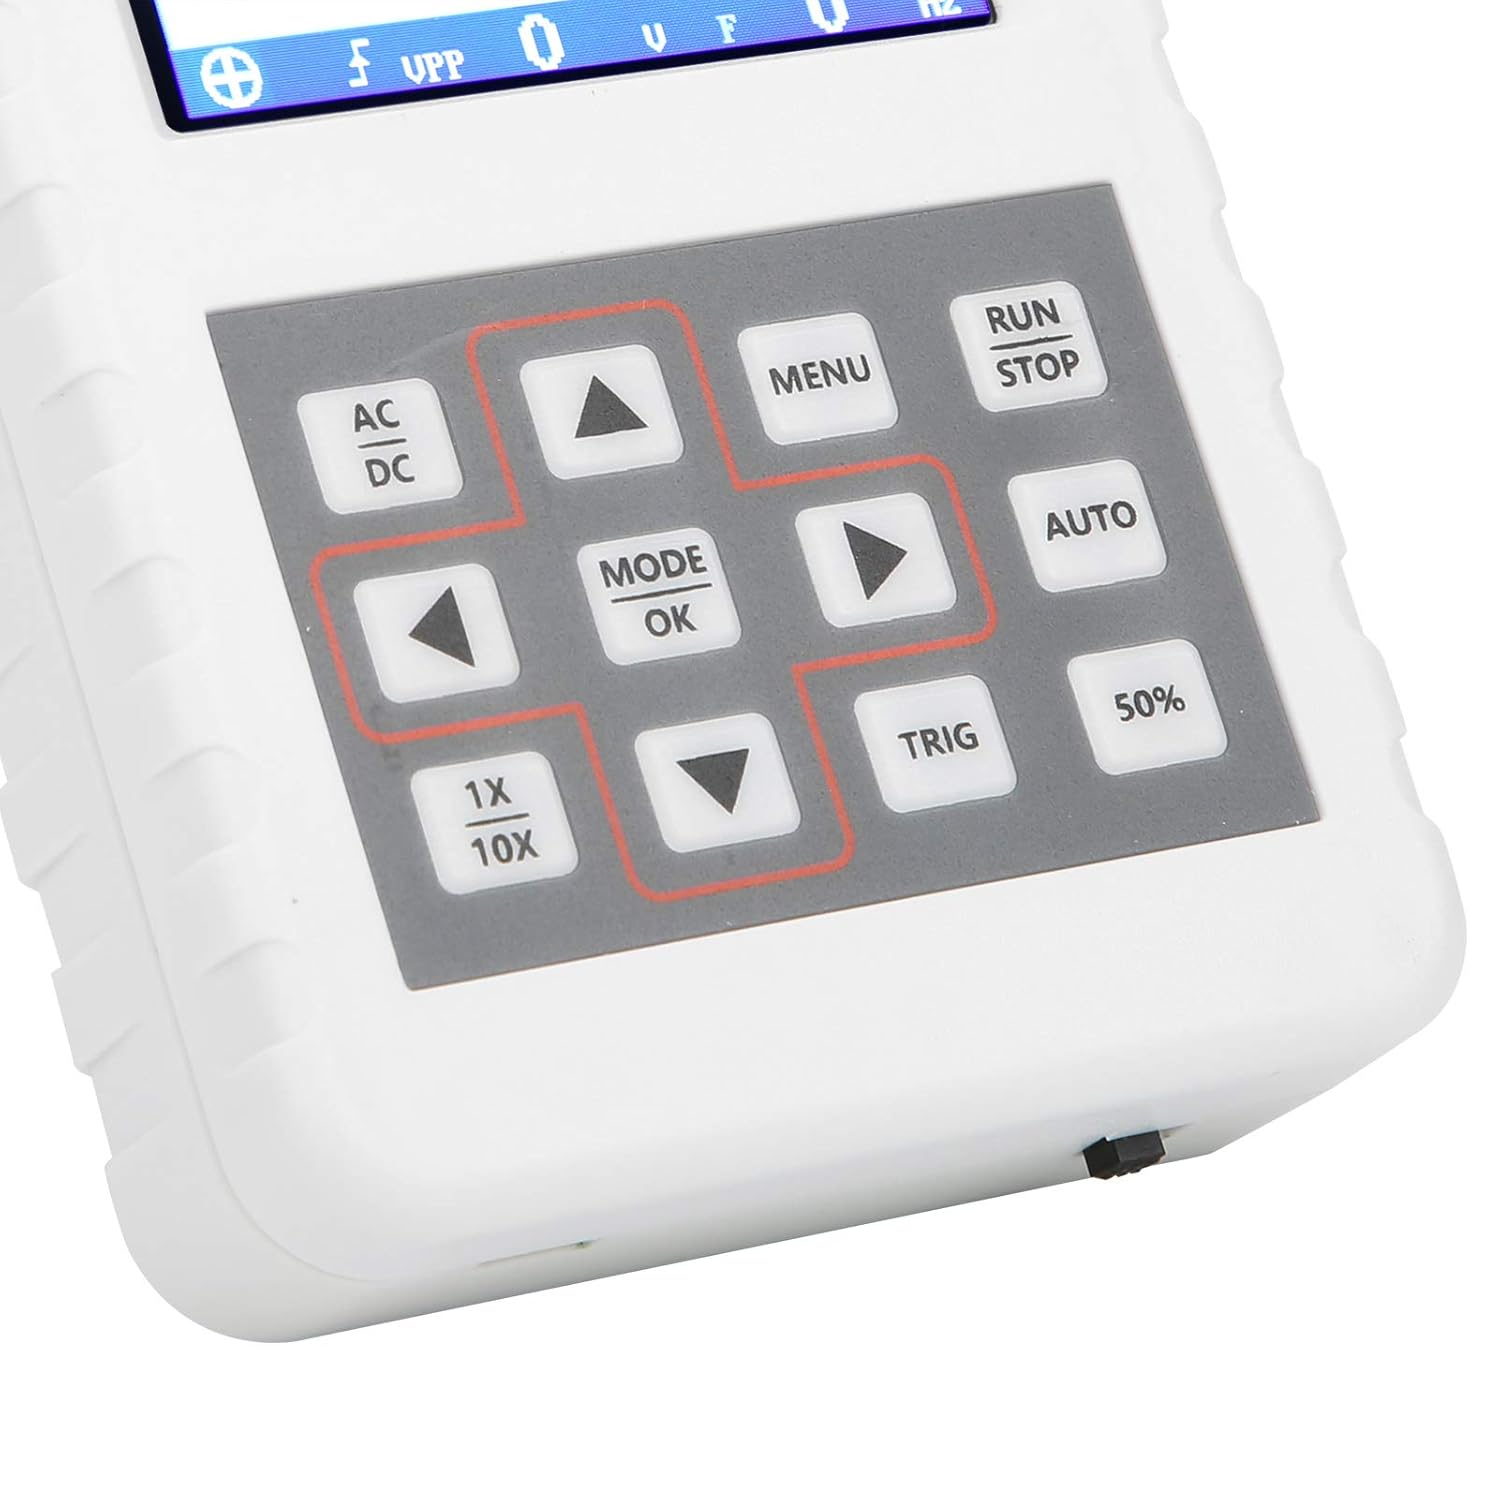
Зображення 4.2: Детальний опис view of the oscilloscope's control panel.
- МЕНЮ: Accesses the main menu for settings and functions.
- RUN/STOP: Starts or pauses waveform acquisition.
- АВТО: Automatically adjusts settings for optimal waveform display.
- TRIG: Adjusts trigger level.
- 50%: Sets the trigger level to 50% of the waveform ampсвітла.
- ЕЙСІ ДІСІ: Toggles between AC and DC coupling modes.
- 1X/10X: Sets the oscilloscope's input attenuation to match the probe's setting.
- MODE/OK: Confirms selections or changes modes.
- Кнопки зі стрілками (Вгору, Вниз, Вліво, Вправо): Навігація по меню та налаштування параметрів.
4.2 Probe Attenuation Settings
It is critical to match the probe's attenuation setting with the oscilloscope's input setting to ensure accurate measurements.
- для 1X measurement (0-40V): Set both the physical switch on the probe and the 1X/10X button on the oscilloscope to the 1X положення.
- для 10X measurement (40-800V): Set both the physical switch on the probe and the 1X/10X button on the oscilloscope to the 10X положення.
4.3 Measurement Modes and Triggering
The oscilloscope supports various trigger modes to stabilize waveform display:
- Одиночний: Captures a single waveform event and then stops.
- Нормальний: Captures a waveform only when a trigger condition is met.
- Авто: Continuously acquires waveforms, even without a trigger, but will trigger if a signal is present.
Використовуйте ТРІГ button and arrow keys to adjust the trigger level, which determines the voltage point at which the oscilloscope begins to acquire data.
4.4 Зберігання та керування сигналами
The device includes 16MB of built-in storage, capable of storing up to 500 waveform images. Use the file manager function to browse, view, and manage saved waveforms. This includes viewing detailed information, flipping through images, and deleting unwanted files.

Зображення 4.3: Наприкладamples of sine wave measurements at various frequencies.

Зображення 4.4: Наприкладamples of square, triangular, and sawtooth wave measurements.
5. Догляд і технічне обслуговування
5.1 Очищення
Протріть пристрій м’якою сухою тканиною. Не використовуйте абразивні засоби для чищення або розчинники, оскільки вони можуть пошкодити корпус.asing або екран. Перед чищенням переконайтеся, що пристрій вимкнено та від’єднано від будь-якого джерела живлення.
5.2 Догляд за акумулятором
Щоб продовжити термін служби акумулятора, уникайте частого повного розряджання. Якщо пристрій зберігається протягом тривалого часу, заряджайте його приблизно до 50% та перезаряджайте кожні кілька місяців.
5.3 Зберігання
Store the oscilloscope in a cool, dry place, away from direct sunlight, extreme temperatures, and high humidity. Keep it protected from dust and physical impact.
6. Вирішення проблем
- Issue: Abnormal measured data.
рішення: Check the probe's attenuation switch (1X or 10X) and ensure it matches the setting on the oscilloscope (using the 1X/10X button). If the probe is set to 10X and the oscilloscope is set to 1X, the device will not be damaged, but the data displayed will be incorrect. - Issue: Device does not power on.
рішення: Ensure the battery is sufficiently charged. Connect the device to a power source using the USB data line and allow it to charge for at least 30 minutes before attempting to power it on again. - Issue: Screen is blank or frozen.
рішення: Try performing a soft reset by pressing and holding the power button for an extended period (e.g., 10-15 seconds) until the device powers off, then power it back on. If the issue persists, ensure the battery is charged.
7. Технічні характеристики
| Особливість | Специфікація |
|---|---|
| Модель продукту | DSO FNIRSI PRO |
| Матеріал продукту | ABS |
| Кількість каналів | 1 |
| Розмір екрана | прибл. 6.1 см / 2.4 дюйма |
| Роздільна здатність екрана | 320 х 240 |
| Тип дисплея | рідкокристалічний екран |
| Аналогова пропускна здатність | 5 МГц |
| Максимум Sampлінг -курс | 20MSps |
| Режим запуску | Одинарний/Звичайний/Автоматичний |
| Зберігання сигналів | 16MB (up to 500 waveform pictures) |
| Вбудований акумулятор | Літієва батарея 1200mAh |
| Час очікування | 3 години |
| Вхід зарядки | 5V/1A/2A/3A/4A |
| Виробник | KUIDAMOS |
| Країна походження | США |
| Номер деталі товару | KUIDAMOStgaix9hwck |
8. Гарантія та підтримка клієнтів
For warranty information, technical support, or service inquiries, please refer to the documentation provided with your purchase or contact the seller directly. Keep your purchase receipt as proof of purchase for any warranty claims.


