
1. Вступ
Thank you for choosing the lightmaXX Vega 3-Way PRO Beam/WASH/FX Moving Head Scanner. This versatile lighting fixture is designed for professional stage, event, and club applications, offering dynamic beam, wash, and special effect capabilities. This manual provides essential information for safe operation, setup, maintenance, and troubleshooting to ensure optimal performance and longevity of your device.
2. Техніка безпеки
Please read and understand all safety instructions before installing or operating this device. Failure to comply with these instructions may result in electric shock, fire, or personal injury.
- Цей пристрій призначений лише для професійного використання.
- Переконайтеся, що блок живлення обtage відповідає обtage зазначено на пристрої.
- Завжди підключайте пристрій до заземленої розетки.
- Disconnect from mains power before any service, cleaning, or maintenance.
- Do not operate the device if the power cord is damaged.
- Уникайте прямого впливу на очі джерела світла.
- Ensure adequate ventilation around the unit to prevent overheating. Maintain a minimum distance of 0.5 meters from flammable materials.
- Mount the device securely using appropriate clampта запобіжні троси.
- Не відкривайте корпус; всередині немає деталей, які може обслуговувати користувач. Зверніться до кваліфікованого персоналу для проведення будь-яких технічних робіт.
- Тримайте пристрій подалі від дощу, вологи та екстремальних температур.
3. Продукт закінчивсяview
The lightmaXX Vega 3-Way PRO is a hybrid moving head fixture designed to deliver powerful and versatile lighting effects. It combines beam, wash, and special effect functionalities in one compact unit.
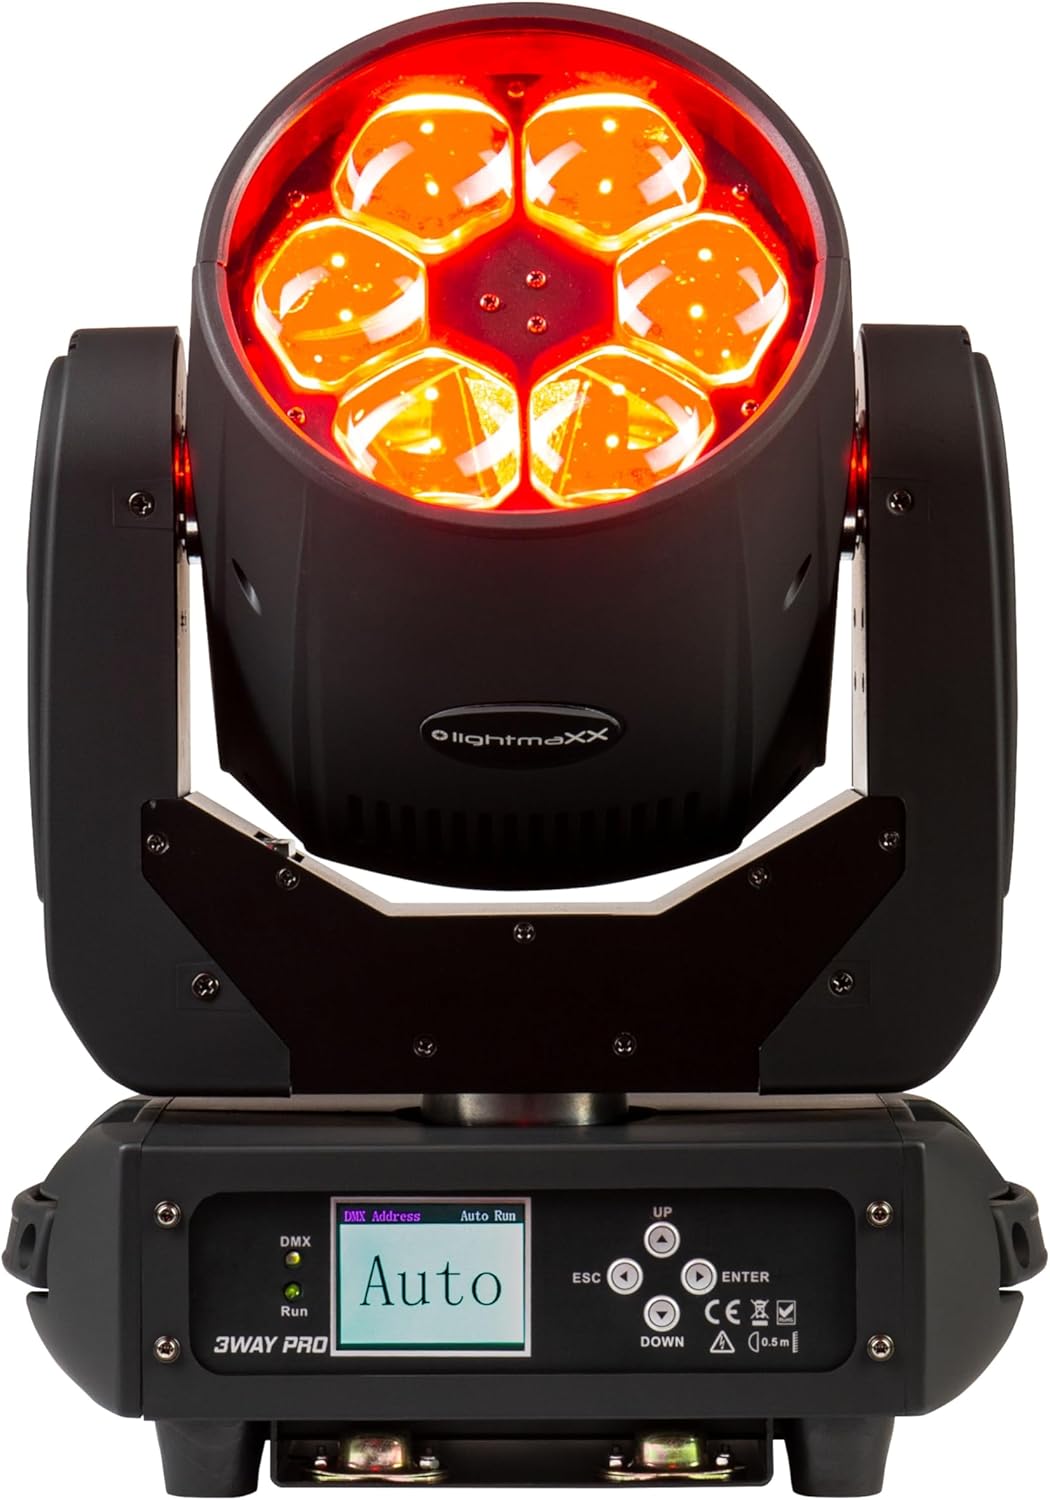
Малюнок 3.1: Спереду view of the lightmaXX Vega 3-Way PRO, displaying red light output.

Малюнок 3.2: Спереду view of the lightmaXX Vega 3-Way PRO with lights off, showing the lens array.
3.1 Панель керування та підключення
The rear of the unit features the control panel and various input/output connections for power and DMX control.

Figure 3.3: Close-up of the control panel and connection ports.

Малюнок 3.4: Задня частина view of the lightmaXX Vega 3-Way PRO, showing DMX In/Out, Power In/Out, and fuse.
- DMX IN/OUT: 3-контактні роз'єми XLR для входу та виходу сигналу DMX.
- ВХІД/ВИХІД ЖИВЛЕННЯ: PowerCon compatible connectors for mains power input and daisy-chaining power to other units.
- Запобіжник: Тримач запобіжника для захисту ланцюга.
- Перемикач ON/OFF: Головний вимикач живлення агрегату.
- Дисплей: LCD screen for menu navigation and settings.
- Кнопки управління: UP, DOWN, ESC, ENTER for navigating the menu and adjusting settings.
- DMX/Run Indicators: LEDs indicating DMX signal presence and auto-run mode.
4. Налаштування
4.1 Монтаж
The lightmaXX Vega 3-Way PRO can be mounted in various orientations (floor, truss, wall) using appropriate mounting hardware (not included). Always ensure the mounting surface or truss is capable of supporting the weight of the fixture and any additional equipment.
- Use a safety cable (not included) attached to the designated safety point on the fixture to prevent accidental drops.
- Ensure the fixture is securely fastened and balanced.
- Allow sufficient space around the fixture for ventilation and movement.
4.2 Підключення живлення
Connect the provided power cable to the POWER IN connector on the fixture and then to a suitable grounded power outlet. The unit supports daisy-chaining power to other fixtures using the POWER OUT connector, but ensure the total current draw does not exceed the circuit breaker's rating.
4.3 Підключення DMX
To control the fixture via DMX, connect a DMX controller to the DMX IN port using a 3-pin XLR cable. If connecting multiple DMX fixtures, daisy-chain them by connecting the DMX OUT of the first fixture to the DMX IN of the next. The last fixture in the chain should have a DMX terminator connected to its DMX OUT port to prevent signal reflection.
5. Операційна
5.1 Навігація панелі керування
Use the control buttons to navigate the menu and adjust settings:
- ВВЕРХ ВНИЗ: Scroll through menu options or increase/decrease values.
- Введіть: Виберіть опцію або підтвердьте налаштування.
- ESC: Go back to the previous menu or cancel an action.
5.2 Налаштування адреси DMX
To control the fixture with a DMX controller, you must set a unique DMX start address for each unit. Refer to the DMX channel chart in your DMX controller's manual for channel assignments.
- Прес ENTER щоб отримати доступ до головного меню.
- Navigate to the 'DMX Address' or 'Address Set' option using ВГОРУ/ВНИЗ.
- Прес ENTER вибрати.
- використання ВГОРУ/ВНИЗ to set the desired DMX start address.
- Прес ENTER to confirm and save the address.
5.3 Режими роботи
The lightmaXX Vega 3-Way PRO typically offers several operating modes:
- Режим DMX: Full control over all functions via a DMX controller.
- Автоматичний режим роботи: Pre-programmed internal light shows that run automatically. Select 'Auto Run' from the menu and choose a program.
- Активний режим звуку: The fixture reacts to sound via its built-in microphone. Select 'Sound Active' from the menu.
- Режим Master/Slave: Link multiple units together. Set one unit as 'Master' and others as 'Slave'. The slave units will mirror the master's actions.
6. Технічне обслуговування
Regular maintenance ensures the longevity and optimal performance of your lightmaXX Vega 3-Way PRO.
- Прибирання: Periodically clean the lenses and exterior housing with a soft, lint-free cloth. Do not use abrasive cleaners or solvents. Ensure the unit is powered off and cool before cleaning.
- Вентиляція: Keep ventilation openings clear of dust and debris. Use compressed air to gently clear vents if necessary.
- Заміна запобіжника: If the unit does not power on, check the fuse. Disconnect power, unscrew the fuse holder, and replace with a fuse of the exact same type and rating (refer to specifications).
- Огляд: Регулярно перевіряйте силові кабелі, DMX-кабелі та монтажні елементи на наявність будь-яких ознак зносу або пошкоджень. Негайно замінюйте пошкоджені компоненти.
7. Вирішення проблем
If you encounter issues with your lightmaXX Vega 3-Way PRO, refer to the following common problems and solutions:
| проблема | Можлива причина | Рішення |
|---|---|---|
| Немає живлення | No mains power; Blown fuse; Damaged power cable | Check power outlet; Replace fuse; Replace power cable |
| Немає контролю DMX | Incorrect DMX address; Faulty DMX cable; No DMX signal; Missing terminator | Verify DMX address; Check/replace DMX cables; Ensure DMX controller is active; Add DMX terminator to last fixture |
| Fixture not moving/responding | DMX issue; Internal error; Motor blockage | Check DMX connection/address; Power cycle the unit; Ensure no physical obstructions |
| Перегрів | Blocked ventilation; Insufficient airflow | Clear vents; Ensure proper spacing for airflow |
If the problem persists after attempting these solutions, please contact lightmaXX customer support or your authorized dealer.
8. Технічні характеристики
| Особливість | Специфікація |
|---|---|
| Модель | Vega 3-Way PRO Beam/WASH/FX |
| Довідка виробника | LIG0014819-000 |
| Споживана потужність | 240 Вт |
| Розміри (Д x Ш x В) | 43.5 х 36.5 х 33 см |
| вага | 11.1 кілограма |
| Підключення | DMX (3-pin XLR), PowerCon compatible (In/Out), USB (for service/firmware) |
| Технологія оптичного датчика | CMOS |
| роздільна здатність | 600 (units not specified, likely for internal sensor) |
9. Гарантія та підтримка
For warranty information, please refer to the terms and conditions provided at the time of purchase or contact your authorized lightmaXX dealer. If you require technical assistance or have questions not covered in this manual, please contact lightmaXX customer support or your retailer for further guidance.