
вступ
Welcome to the world of sewing with your new Janome IT 1028 Glamour mechanical sewing machine. This manual provides essential information for the safe and efficient operation, setup, maintenance, and troubleshooting of your machine. Please read it thoroughly before using the machine to ensure optimal performance and longevity.
The Janome IT 1028 Glamour is designed for ease of use, featuring 12 stitch types, a free arm for circular sewing, an oscillating hook, automatic buttonholes, and adjustable stitch length and width. It also includes a double presser foot lift, feed dog lowering, a thread cutter, a needle threader, and a soft cover for protection.
Інструкції з техніки безпеки
Щоб зменшити ризик ураження електричним струмом, опіків, пожежі чи травмування людей:
- Завжди відключайте машину від електромережі одразу після використання та перед чищенням, зніманням кришок або виконанням будь-яких регулювань з боку користувача.
- Не дозволяйте використовувати машину як іграшку. Будьте пильні, коли машина використовується дітьми або поблизу них.
- Use this machine only for its intended use as described in this manual. Use only attachments recommended by the manufacturer.
- Never operate this machine if it has a damaged cord or plug, if it is not working properly, if it has been dropped or damaged, or dropped into water.
- Ніколи не кидайте та не вставляйте предмети в будь-які отвори.
- Не використовуйте на вулиці.
- Не працюйте там, де використовуються аерозолі (розпилювачі) або де подається кисень.
- Тримайте пальці подалі від усіх рухомих частин. Потрібна особлива обережність навколо голки швейної машини.
- Завжди використовуйте правильну голкову пластину. Неправильна пластина може спричинити поломку голки.
- Не використовуйте зігнуті голки.
- Не тягніть і не штовхайте тканину під час шиття. Це може призвести до відхилення голки, що призведе до її поломки.
- Вимикайте швейну машину під час будь-яких налаштувань у зоні голки, таких як заправка нитки в голку, зміна голки, заправка нитки в шпульку або зміна притискної лапки.
- Always unplug the machine when removing the light bulb.
- Не виймайте вилку, тягнучи за шнур. Щоб відключити, візьміться за вилку, а не за шнур.
Продукт закінченийview
Ключові характеристики
- 12 Stitch Types: Versatile options for various sewing projects.
- Вільна рука: Facilitates sewing cuffs, sleeves, and other small, circular items.
- Oscillating Hook: Ensures smooth and consistent stitch formation.
- Adjustable Stitch Length and Width: Provides control over stitch appearance.
- Automatic Four-Step Buttonhole: Simplifies the creation of professional-looking buttonholes.
- Double Presser Foot Lift: Allows for sewing thicker fabrics.
- Feed Dog Lowering: Useful for darning and free-motion quilting.
- Різьбовий різак: Conveniently trims threads.
- Нитковдевач: Assists in quickly threading the needle.
- М'яка обкладинка: Protects the machine from dust and damage.
Компоненти машини
Familiarize yourself with the main parts of your Janome IT 1028 Glamour sewing machine.

Малюнок 1: Спереду view of the Janome IT 1028 Glamour sewing machine with the soft cover in place. This image shows the overall design and the stitch selection and length dials.

Малюнок 2: Збільшений план view of the stitch selector dial (left) and stitch length dial (right) on the Janome IT 1028 Glamour. The decorative illustration on the machine body is also visible.
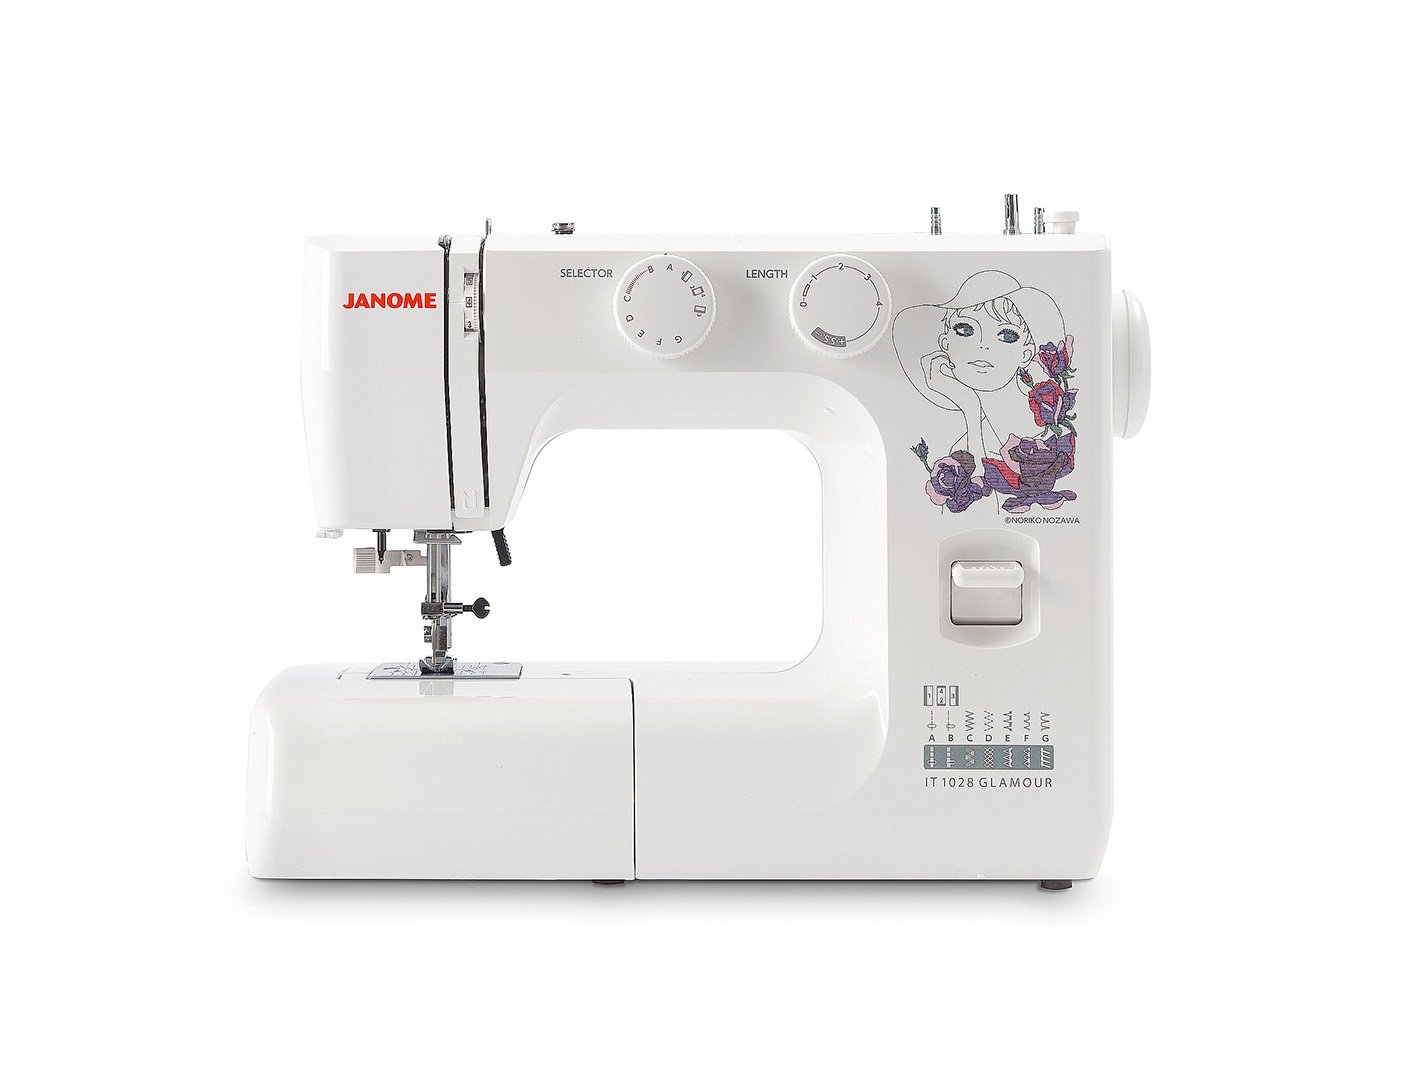
Figure 3: The Janome IT 1028 Glamour sewing machine with the accessory tray removed, revealing the free arm and the bobbin case area. This view is essential for bobbin insertion and cleaning.
Налаштування
1. Розпакування та розміщення
- Обережно вийміть машину з упаковки.
- Поставте машину на стійку рівну поверхню.
- Зніміть будь-які захисні плівки або пакувальні матеріали.
2. Підключення живлення
- Переконайтеся, що вимикач живлення машини знаходиться в положенні «ВИМК.».
- Підключіть шнур живлення до вхідного гнізда живлення апарата.
- Підключіть шнур живлення до відповідної електричної розетки.
3. Намотування шпульки
- Покладіть котушку з ниткою на шпильку котушки.
- Проведіть нитку через верхній напрямник нитки та навколо диска натягу намотування шпульки.
- Вставте нитку через отвір у шпульці зсередини назовні.
- Помістіть шпульку на шпиндель намотувача шпульки та посуньте шпиндель праворуч.
- Start the machine. The bobbin will wind automatically. Stop when the bobbin is full.
- Cut the thread and push the bobbin winder spindle to the left. Remove the bobbin.
4. Вставлення шпульки
- Вимкніть машину.
- Open the bobbin cover plate located on the free arm.
- Insert the bobbin into the bobbin case with the thread running in the direction indicated by the arrows.
- Pull the thread through the tension spring and into the guide slot.
- Закрийте кришку шпульки.
5. Заправка верхньої нитки
- Підніміть підйомник лапки.
- Покладіть котушку з ниткою на шпильку котушки.
- Проведіть нитку через верхній нитенаправитель.
- Bring the thread down the right channel, up the left channel, and through the take-up lever from right to left.
- Продовжуйте направляти нитку вниз до нітенаправителя голкотримача.
- Використовуйте вбудований нитковдівач або вручну заправте нитку в голку спереду назад.
- Протягніть приблизно 6 дюймів нитки через вушко голки.
6. Підняття нитки на шпульці
- Злегка притримуйте верхню нитку лівою рукою.
- Turn the handwheel towards you to lower the needle into the needle plate and then raise it.
- Верхня нитка захопить нитку шпульки, утворюючи петлю.
- Pull the loop to bring the bobbin thread up through the needle plate hole.
- Протягніть обидві нитки (верхню та шпульну) під притискну лапку та до задньої частини машини.
Інструкція з експлуатації
1. Вибір стібка
Поверніть Циферблат для вибору стібка (refer to Figure 2) to choose your desired stitch pattern. The available stitches are indicated by letters or symbols on the dial.
2. Регулювання довжини та ширини стібка
- Довжина стібка: Використовуйте Циферблат довжини стібка (refer to Figure 2) to adjust the length of your stitches. Higher numbers indicate longer stitches.
- Ширина стібка: For stitches that allow width adjustment, use the corresponding dial or setting. (Note: The Janome IT 1028 Glamour has adjustable stitch width, typically integrated with the stitch selector or a separate dial. Consult the machine's markings for specific controls.)
3. Основи шиття
- Покладіть тканину під лапку.
- Опустіть підйомник лапки.
- Увімкніть машину.
- Обережно натисніть на ножну педаль, щоб розпочати шиття. Чим сильніше ви натискаєте, тим швидше шитиме машина.
- Guide the fabric gently with your hands, but do not pull or push forcefully.
- To secure the beginning and end of a seam, use the reverse lever to sew a few stitches backward.
- When finished, raise the needle to its highest position, lift the presser foot, and pull the fabric away from the machine.
- Use the built-in thread cutter or scissors to trim the threads.
4. Використання вільної руки
To use the free arm, simply slide off the accessory tray (refer to Figure 3). This exposes the narrow free arm, ideal for sewing small, tubular items like sleeves, pant hems, and cuffs.
5. Automatic Four-Step Buttonholes
The Janome IT 1028 Glamour features an automatic four-step buttonhole function. Refer to the stitch selector dial for the buttonhole settings (usually marked with a buttonhole symbol and steps 1-4).
- Прикріпіть лапку для петлі.
- Позначте положення петлі для ґудзиків на тканині.
- Set the stitch selector to the first buttonhole step.
- Sew the first side of the buttonhole.
- Change the stitch selector to the next step and sew the bar tack.
- Continue through all four steps, following the machine's markings for each segment of the buttonhole.
- Carefully cut open the buttonhole using a seam ripper, ensuring not to cut the stitches.
Технічне обслуговування
1. Очищення машини
Регулярне чищення допомагає підтримувати продуктивність вашої машини. Завжди відключайте машину від мережі перед чищенням.
- Площа шпульки: Remove the needle plate and bobbin case. Use a small brush to remove lint and dust from the bobbin area and feed dogs.
- Зовні: Протріть зовнішні поверхні м’якою сухою тканиною. Не використовуйте агресивні хімікати або абразивні засоби для чищення.
2. Заміна голки
Replace the needle regularly (after 8-10 hours of sewing) or if it becomes bent, dull, or damaged. A damaged needle can cause skipped stitches or fabric damage.
- Вимкніть машину та від'єднайте її від мережі.
- Послабте голку клamp гвинт.
- Вийміть стару голку.
- Вставте нову голку плоскою стороною до задньої частини машини, проштовхуючи її вгору до упору.
- Затягніть голку клamp надійно закрутити.
Усунення несправностей
У цьому розділі розглядаються поширені проблеми, з якими ви можете зіткнутися. Якщо у вас проблеми, не перелічені тут, зверніться до служби підтримки клієнтів.
| проблема | Можлива причина | Рішення |
|---|---|---|
| Пропущені шви | Неправильна голка, погнута голка, неправильне заправлення нитки, неправильний розмір голки для тканини. | Замініть голку, перезаправте нитку в машину, переконайтеся, що голка правильного типу/розміру. |
| Обрив нитки (верхньої) | Improper threading, tension too tight, poor quality thread, bent needle, burr on needle plate. | Re-thread machine, adjust upper tension, use quality thread, replace needle, check needle plate for damage. |
| Обрив нитки (шпульки) | Неправильно намотана шпулька, неправильно вставлена шпулька, ворс у шпульному ковпачку, занадто сильний натяг. | Re-wind bobbin, re-insert bobbin correctly, clean bobbin case, adjust bobbin tension (if adjustable). |
| Нерівні шви | Incorrect tension settings, pulling/pushing fabric, wrong presser foot. | Adjust tension, guide fabric gently, use appropriate presser foot. |
| Машина не запускається | Не підключено, живлення вимкнено, ножний контролер не підключено. | Check power connections, ensure switch is ON, connect foot controller. |
Технічні характеристики
- Номер моделі: 8100000017663 (IT 1028 Glamour)
- Бренд: ЯНОМ
- матеріал: пластик
- вага: 8 кілограма
- Розміри (Ш x Д x В): 10 cm x 35 cm x 25 cm (Depth x Width x Height)
- Джерело живлення: Електричний кабель
- Види стібків: 12
- Тип гачка: Коливальний
- Тип петлі для ґудзиків: Automatic Four-Step
Гарантія та підтримка
For warranty information, service, or technical support, please refer to the warranty card included with your product or contact your authorized Janome dealer or customer service center. Keep your purchase receipt as proof of purchase.