
1. Вступ
This manual provides detailed instructions for the installation, operation, and maintenance of your Anlapus 8CH Full HD 720P HD-TVI Security Camera System. Please read this manual thoroughly before using the product to ensure proper setup and functionality. Keep this manual for future reference.
2. Вміст упаковки
Перевірте, чи всі перелічені нижче предмети входять до вашої упаковки. Якщо будь-які предмети відсутні або пошкоджені, зверніться до служби підтримки клієнтів.

Image showing the contents included in the Anlapus 8CH Security Camera System package.
- 1 x 8CH DVR (Digital Video Recorder)
- 2 x HD-TVI Bullet Cameras
- 1 х USB миша
- 2 x 60ft BNC Cables (for camera connection)
- 1 x 1 to 4 Power Splitter Cable
- 2 x 12V Power Supplies (for DVR and cameras)
- 2 x Mounting Screw Bags
- 1 x Quick Start Guide (Instruction Manual)
- 2 x попереджувальні наклейки
3. Налаштування
3.1 DVR Connections
Перед увімкненням відеореєстратора підключіть усі необхідні периферійні пристрої, як описано нижче.

Diagram illustrating the rear panel connections of the Anlapus 8CH DVR, including video input, monitor/TV, audio input, network, USB, and power supply ports.
- Відеовхід (BNC): Connect the BNC cables from your cameras to these ports. The DVR supports up to 8 cameras.
- Monitor/TV (VGA/HDMI): Connect a monitor or TV using either the VGA or HDMI port for local viewінж.
- Audio Input/Output (RCA): Connect external audio devices if required.
- Мережа (RJ45): Connect an Ethernet cable from your router to this port for remote access and network features.
- USB (USB 2.0): Connect the included USB mouse for system navigation. Additional USB ports can be used for USB backup devices.
- Power Supply (DC 12V): Connect the DVR power adapter to this port and then to a power outlet.
3.2 Встановлення камери
The bullet cameras are designed for both indoor and outdoor use. Choose strategic locations that provide optimal coverage and are within reach of the provided BNC cables.

Image demonstrating various indoor and outdoor installation possibilities for the Anlapus bullet cameras, highlighting their suitability for different environments and conditions.
- Виберіть місце розташування: Identify areas requiring surveillance, considering factors like viewing angle, lighting, and proximity to power outlets.
- Монтаж: Use the provided mounting screws and anchors to securely attach the camera base to a wall or ceiling.
- Відрегулювати кут: Loosen the adjustment screws on the camera bracket to position the camera for the desired viewпід кутом, потім затягніть, щоб закріпити.
- Прокладка кабелю: Route the BNC cable from the camera to the DVR, ensuring cables are protected from damage and weather.
3.3 Підключення системи
Follow these steps to connect your entire security system:
- Connect each camera's BNC connector to a Video Input port on the DVR.
- Connect the camera power cables to the 1-to-4 power splitter, then connect the splitter to one of the 12V power supplies.
- Connect the second 12V power supply to the DVR's DC 12V input.
- Connect your monitor/TV to the DVR via HDMI or VGA.
- Підключіть USB-мишу до USB-порту на відеореєстраторі.
- For remote access, connect an Ethernet cable from your router to the DVR's Network port.
- Plug both 12V power supplies into electrical outlets. The system will power on.
4. Робота з системою
4.1 Initial Setup and First-Time Wizard
Upon first power-on, the DVR will guide you through an initial setup wizard. This typically includes setting the language, date/time, creating an administrator password, and configuring network settings. Follow the on-screen prompts using the USB mouse.
4.2 Remote Access (Mobile App)
Access your security system remotely using the 365SECU mobile application.
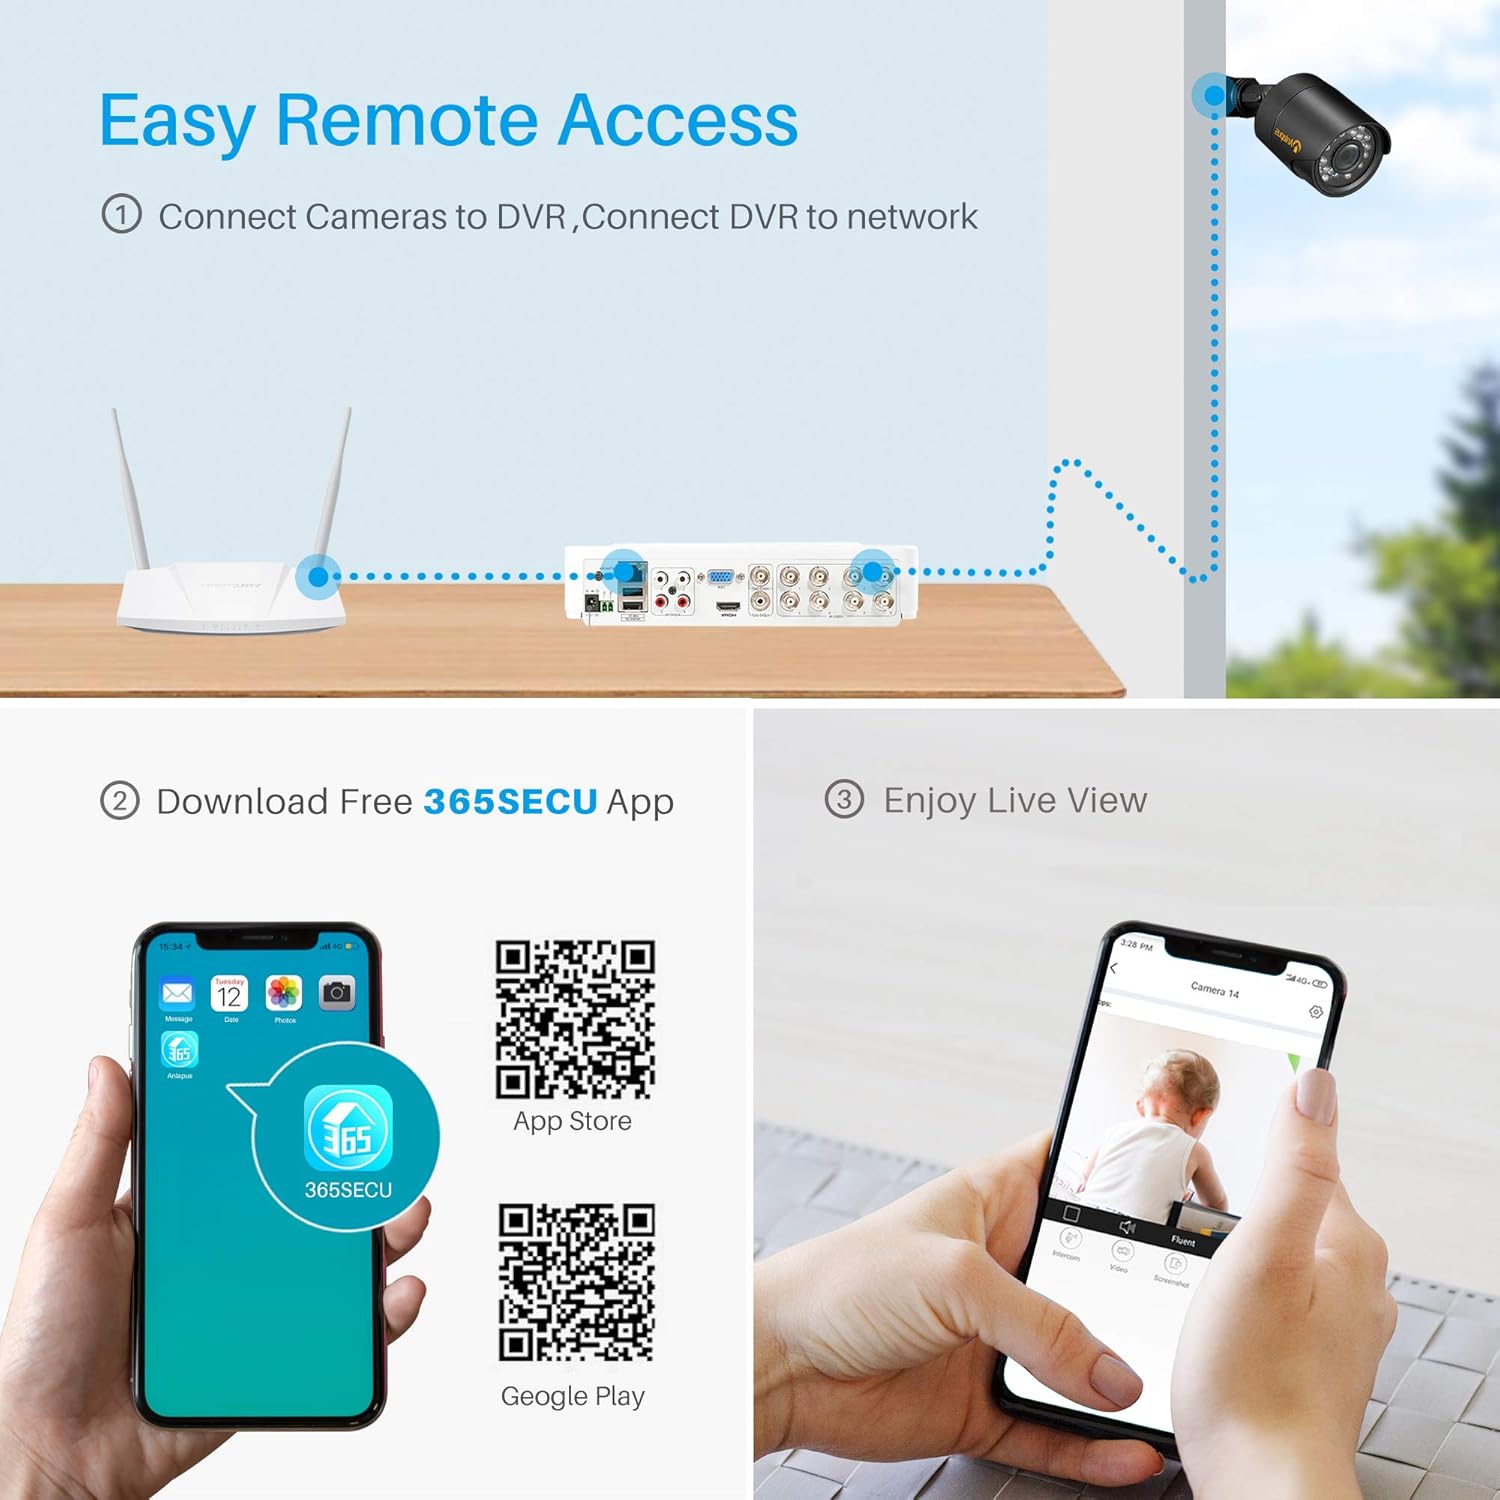
Diagram showing the process for remote access, including connecting cameras to DVR, DVR to network, downloading the 365SECU app, and viewing live footagе на смартфоні.
- Завантажте додаток: шукати "365SECU" in your smartphone's app store or scan the QR codes below.

Image displaying QR codes for downloading the 365SECU app from the App Store and Google Play, along with a smartphone screen showing the app interface.
- Для Android: Google Play Store
- Для iOS: Apple App Store
- Реєстрація/Вхід: Create an account or log in to the 365SECU app.
- Додати пристрій: Follow the in-app instructions to add your DVR. This usually involves scanning a QR code displayed on the DVR's monitor or manually entering the device ID.
- Жити View: Після додавання ви можете view прямі трансляції з камер, доступ до записаних продуктівtage, and configure settings directly from your smartphone.
4.3 Motion Detection & Email Alert
Configure your system to detect motion and send alerts.

Image illustrating the motion detection and email alert feature, showing a camera detecting an intruder and the alert being displayed on a smartphone.
- Налаштування доступу: Navigate to the DVR's main menu, then to 'Alarm' or 'Motion Detection' settings.
- Увімкнути виявлення руху: Activate motion detection for desired cameras.
- Define Area: Customize the detection area to reduce false triggers.
- Configure Email Alert: Enter your email server details and recipient email addresses to receive instant alerts when motion is detected.
4.4 Smart Playback Function
Review записаний footage efficiently with the smart playback feature.

Image demonstrating the smart playback function, showing a monitor displaying recorded video timeline and individual snapshots for quick review.
- Відтворення доступу: From the DVR's main menu, select 'Playback'.
- Виберіть дату/час: Choose the date and time range for the footage you wish to review.
- пошук: The system will display a timeline with recorded events. You can quickly navigate through the timeline or use event markers to find specific moments.
4.5 Нічне бачення
The cameras are equipped with infrared (IR) LEDs for clear night vision, automatically activating in low-light conditions.

Comparison image showing the same outdoor scene during daytime (color) and nighttime (black and white with night vision active), illustrating the camera's night vision capability.
- Автоматична активація: The cameras automatically switch to black and white night vision mode when ambient light levels are insufficient.
- ІЧ діапазон: Ensure no obstructions block the IR LEDs for optimal night vision performance.
4.6 3D Digital Noise Reduction (3D DNR)
The cameras feature 3D Digital Noise Reduction technology to enhance image clarity in challenging lighting conditions.

Comparison image showing video quality without and with 3D Digital Noise Reduction, highlighting the reduction of noise interference in weak signal images.
- Покращена якість зображення: 3D DNR reduces visual noise, especially in low-light environments, resulting in a cleaner and more detailed image.
- Ефективне зберігання: By reducing noise, the system can compress video more efficiently, saving storage space.
5. Технічне обслуговування
- Об'єктиви камери: Regularly clean camera lenses with a soft, dry cloth to remove dust and smudges. Avoid abrasive cleaners.
- Кабельні з'єднання: Periodically check all BNC and power connections for tightness and signs of wear or corrosion.
- Вентиляція відеореєстратора: Ensure the DVR is placed in a well-ventilated area to prevent overheating. Keep vents clear of dust.
- Оновлення прошивки: Перевірте виробника website for any available firmware updates for your DVR to ensure optimal performance and security.
- Стан жорсткого диска: If a hard drive is installed, monitor its health through the DVR's system settings to prevent data loss.
6. Вирішення проблем
| проблема | Можлива причина | Рішення |
|---|---|---|
| Немає відео на моніторі | Loose video cable; Incorrect input selected on monitor; DVR not powered on. | Check HDMI/VGA cable connections; Select correct input source on monitor; Ensure DVR power adapter is connected and power light is on. |
| Немає зображення камери | Loose BNC cable; Camera not powered; Damaged cable/camera. | Check BNC cable connection at both camera and DVR; Verify camera power supply connection; Test with a known working cable/camera if possible. |
| Віддалений доступ не працює | No network connection; Incorrect network settings; App not configured correctly. | Ensure Ethernet cable is connected to DVR and router; Check DVR network settings (DHCP enabled or static IP configured); Verify app device ID and network permissions. |
| Виявлення руху не спрацьовує | Motion detection disabled; Sensitivity too low; Detection area not set. | Enable motion detection for the specific camera; Increase sensitivity; Define the detection area in DVR settings. |
| Немає запису | No hard drive installed; Hard drive full; Recording schedule not set. | Install a compatible hard drive (not included); Format or replace hard drive; Configure recording schedule in DVR settings. |
7. Технічні характеристики
| Особливість | Деталь |
|---|---|
| Бренд | Анлапус |
| Номер моделі | 8KS-124W4-00-US |
| Технологія підключення | Провідний |
| Роздільна здатність захоплення відео | 1080p, 720p |
| Особливості | Motion Sensor, Night Vision, Waterproof |
| Кількість каналів | 8 |
| Ємність пам'яті | 2 TB (Hard Drive Not Included) |
| Джерело живлення | Провідний електричний |
| Operating System (DVR) | Android (for mobile app compatibility) |
| Сумісні пристрої | Cameras, Personal Computers, Smartphones, Tablets |
| Технологія низького освітлення | Night color (refers to general night vision capability) |
| Режим запису | Motion detection, Continuous, Schedule |
| Вага товару | 7.19 фунта |
| Розміри упаковки | 11.4 x 11.4 x 8.2 дюймів |
| UPC | 615068923699 |
8. Гарантія та підтримка
Anlapus products typically come with a limited warranty. For specific warranty terms, technical support, or service inquiries, please refer to the warranty card included in your package or visit the official Anlapus webсайт. Зберігайте чек про покупку як підтвердження покупки для гарантійних претензій.