
1. Вступ
The SECULINK 16-Channel 4K/8MP Network Video Recorder (NVR) provides a comprehensive surveillance solution. This NVR supports full 4K (3840x2160P) video viewing and recording across all 16 channels, compatible with 8MP/5MP/4MP/3MP/1080p ONVIF-compliant IP cameras. It features advanced H.265+ compression technology for efficient storage and bandwidth usage, motion detection recording, and Cloud P2P functionality for remote access via smartphone, tablet, or PC.
This manual provides detailed instructions for setting up, operating, and maintaining your NVR system.

Малюнок 1: Спереду view of the SECULINK 16-Channel 4K/8MP NVR.
2. Вміст упаковки
Переконайтеся, що всі перелічені нижче предмети присутні у вашій упаковці:
- 1x Seculink 16-Ch Network Video Recorder
- 1x адаптер живлення
- 1x USB миша
3. Фізичний overview
3.1. Задня панель
The rear panel of the NVR provides various ports for connectivity:
- Вихід VGA: 1x VGA port for connecting to a monitor.
- Вихід HDMI: 1x HDMI port for connecting to a high-definition display.
- Порт LAN: 1x RJ45 10M/100M Ethernet port for network connection.
- Порти USB: 2x USB2.0 ports for mouse, USB flash disk, or USB DVR writer.
- Аудіовихід: 1x RCA port for audio output.
- Вхідна потужність 12 В постійного струму: Для підключення адаптера живлення.

Figure 2: Rear panel connections of the NVR.
4. Налаштування
4.1. Встановлення жорсткого диска
The NVR does not include a pre-installed hard drive. A 3.5" SATA HDD (up to 6TB recommended) is required for recording. Follow these steps to install the hard drive:
- Відкрутіть та зніміть верхню кришку відеореєстратора.
- Підключіть кабелі живлення та передачі даних SATA від відеореєстратора до жорсткого диска.
- Align the hard drive with the screw holes on the NVR's base and secure it with screws.
- Replace the NVR's top cover and secure it with screws.
Video 1: Guide on how to install a hard drive in an NVR. (Note: This video is a general guide for an 8-channel DVR and may not perfectly match the NVR1616PF-4K model, but the installation principles are similar.)
4.2. Підключення камер
The NVR supports 4K/8MP ONVIF-compliant IP cameras. Ensure your cameras are compatible.
4.2.1. Direct Connection to NVR PoE Ports
If your NVR has built-in PoE ports, connect your IP cameras directly to these ports using Ethernet cables. The NVR will automatically provide power and data connection.
4.2.2. Connection via PoE Switch or Router
If your cameras are not directly connected to the NVR's PoE ports (e.g., using an external PoE switch or router), ensure both the NVR and the cameras are connected to the same local area network (LAN).
Video 2: Guide on how to connect cameras to an NVR, including direct PoE and network connections.
4.2.3. Connecting WiFi Cameras (General Guide)
For WiFi cameras, ensure they are connected to the same network as your NVR. You may need to configure the camera's WiFi settings via its manufacturer's app or web interface first. Once on the same LAN, the NVR should be able to discover and add them.
Video 3: General guide on connecting WiFi cameras to a PoE NVR. (Note: This video is provided by ReolinkDirect and serves as a general example for connecting WiFi cameras to an NVR system.)
4.3. Майстер початкового налаштування
After connecting the NVR to a monitor (via VGA or HDMI) and powering it on, an initial setup wizard will guide you through basic configurations:
- Language and Time Zone: Select your preferred language and set the correct time zone.
- Встановлення пароля: Create a strong password for the 'admin' user.
- Налаштування мережі: Confirm network settings (DHCP is usually enabled by default).
- Camera Discovery: The NVR will automatically search for and add connected IP cameras. If cameras are not discovered, ensure their IP addresses are compatible with the NVR's network segment.
5. Експлуатація відеореєстратора
5.1. Жити View
Once cameras are added, you can view жити footage on your connected monitor. The NVR supports full 4K video viewing on all 16 channels.
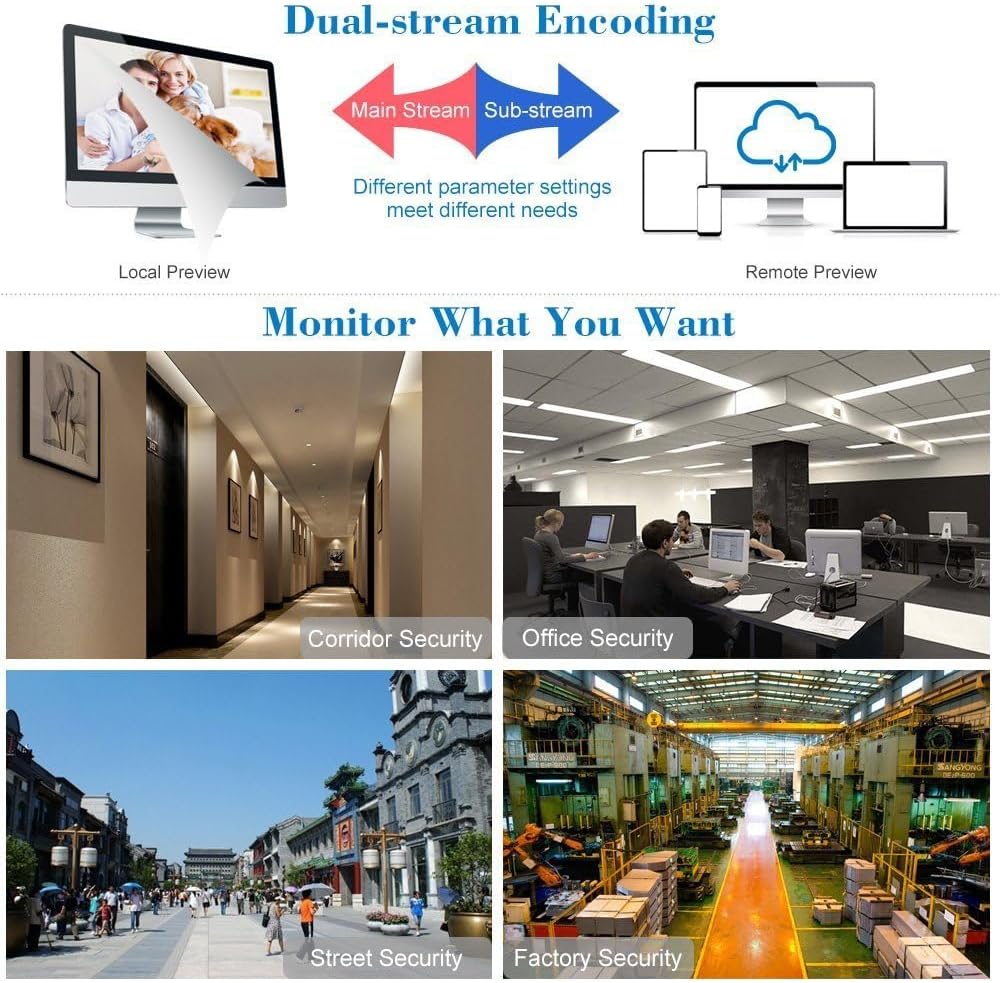
Рисунок 3: Багатоканальний прямий ефір view displaying various surveillance scenarios.
5.2. Відтворення
Доступ до записаного footage through the NVR's menu. You can search by time, date, event, or channel. The H.265+ compression allows for longer recording times and simultaneous network transmission and playback.
5.3. Remote Access (Cloud P2P)
The NVR features Cloud P2P functionality for remote viewing and playback. Install the XMeye app on your smartphone or tablet, or use client software on your PC, to monitor your premises from anywhere.

Figure 4: Multi-platform remote access for live view та відтворення.
5.4. Запис за допомогою детектора руху
Configure the NVR to record only when motion is detected, saving storage space. You can set specific areas for motion detection and adjust sensitivity levels.
Figure 5: Motion detection recording in action.
5.5. H.265+ Compression Technology
The NVR utilizes H.265+ video compression, which significantly increases bandwidth and storage efficiency compared to older standards like H.264. This results in smaller file sizes, higher definition, and longer recording times without compromising video quality.
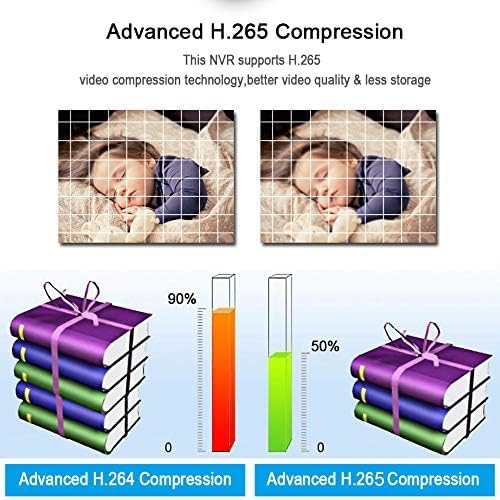
Figure 6: Comparison of H.264 and H.265+ compression efficiency.
6. Технічне обслуговування
6.1. Скидання пароля
If you forget your NVR's login password, you can reset it using the security questions you set during initial setup or by scanning a CAPTCHA QR code with the mobile app.
Video 4: Guide on how to reset an NVR password.
7. Вирішення проблем
7.1. Cameras Not Connecting/Offline
If cameras appear offline or cannot be added:
- IP Address Mismatch: Ensure the camera's IP address is in the same network segment as the NVR's IP address (e.g., 172.16.0.x). If not, you may need to use the camera manufacturer's firmware or tools to change the camera's IP address.
- Incorrect Login Credentials: If the NVR indicates "wrong user name and password," enter the correct username (default is often 'admin') and password (default is often 'ipc123456' for new Hikvision/Dahua cameras, or check your camera's manual).
- Підключення до мережі: Verify all Ethernet cables are securely connected and that the network (router/switch) is functioning correctly.
7.2. Немає відеовиходу на моніторі
If you see no video on your monitor:
- Кабельне підключення: Ensure the HDMI or VGA cable is securely connected between the NVR and the monitor.
- Моніторний вхід: Check that your monitor is set to the correct input source (HDMI/VGA).
- роздільна здатність: The NVR's output resolution might be incompatible with your monitor. Access the NVR's settings (if possible, or try connecting to a different monitor) and adjust the VGA/HDMI resolution to a supported setting (e.g., 1920*1080/60Hz).
8. Технічні характеристики
- Номер моделі: NVR1616PF-4K
- Роздільна здатність відео: 16*4K 8MP (3840x2160P)
- Відеовихід: 1x VGA, 1x HDMI
- Аудіовихід: 1x RCA
- Мережевий порт: 1x RJ45 10M/100M
- Порт USB: 2x USB2.0
- Streaming Specification: ONVIF
- Режим запису: Manual > Alarm > Motion Detection > Timing
- Video Search: Time, Date, Event, Channel Search
- Потужність: 12 В постійного струму
- Розмір корпусу: 260*43*190MM (10.24 x 7.48 x 1.69 inches)
- Інтерфейс жорсткого диска: SATA (Max 6TB)
- ДОДАТОК: XMeye
- Вага товару: 2.23 фунта
- Технологія підключення: Ethernet, HDMI, USB, VGA
9. Гарантія та підтримка
For warranty information, technical support, or service inquiries, please contact SECULINK customer support directly. Refer to the product packaging or the official SECULINK webна сайті для отримання контактної інформації.