
1. Вступ
This manual provides instructions for the proper setup, operation, and maintenance of your Levenhuk 720B Binocular Microscope. Please read these instructions carefully before using the instrument to ensure correct usage and to prolong its lifespan. This microscope is designed for laboratory, clinical, and medical research applications.
2. Продукт закінчивсяview
The Levenhuk 720B is a binocular compound microscope featuring multiple objective lenses and eyepieces for various magnification levels. It includes a mechanical stage, LED illumination, and coarse/fine focusing mechanisms.

Малюнок 2.1: Спереду view of the Levenhuk 720B Binocular Microscope, showing the binocular head, objective lenses, mechanical stage, and base.
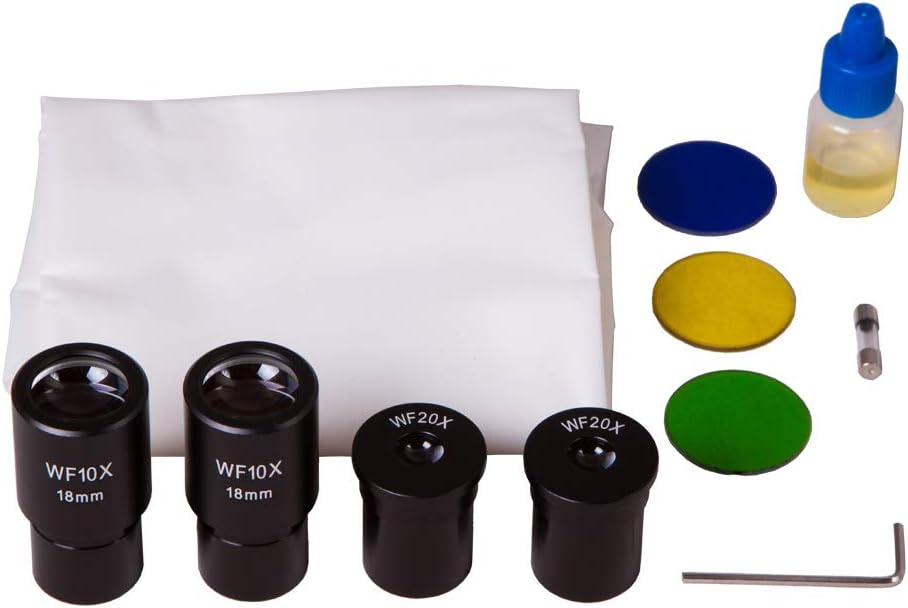
Figure 2.2: Included accessories: WF10x/18mm eyepieces (2), WF20x eyepieces (2), color filters (blue, yellow, green), immersion oil, cleaning cloth, hex key, and spare fuse.
3. Налаштування
- Розпакування: Обережно вийміть усі компоненти з упаковки. Зберігайте оригінальну упаковку для подальшого транспортування або зберігання.
- Розміщення: Place the microscope on a stable, level surface away from direct sunlight, high temperatures, dust, and vibrations.
- Підключення живлення: Connect the power cord to the microscope's power input (AC100V-240V, 50/60Hz) located at the rear of the base, then plug it into a suitable electrical outlet. Ensure the power switch is in the OFF position before connecting.
- Встановлення окуляра: Insert the desired eyepieces (e.g., WF10x) into the eyepiece tubes of the binocular head.
- Binocular Head Adjustment: If the binocular head is rotatable, adjust it to a comfortable viewположення.
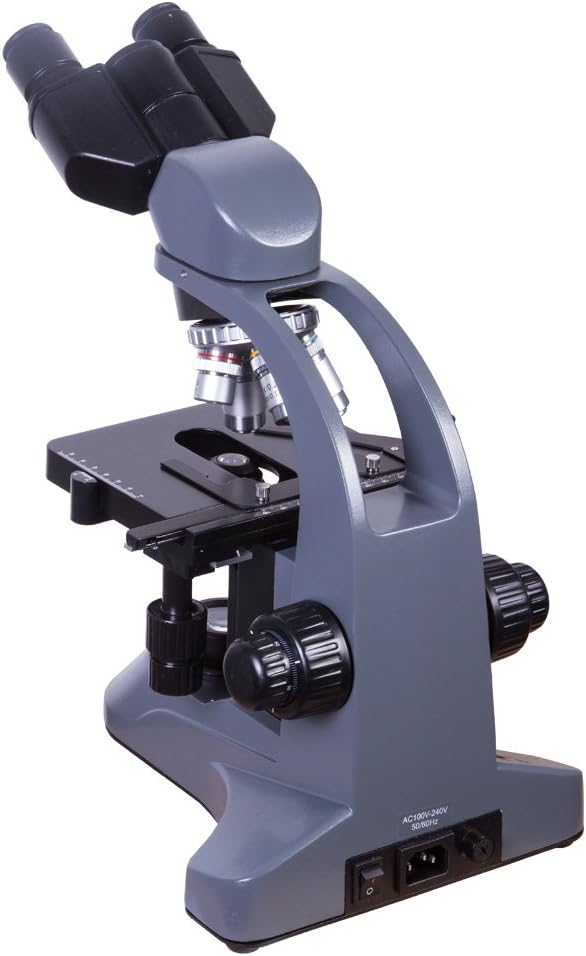
Малюнок 3.1: Задня частина view of the microscope showing the power input and switch.
4. Інструкція з експлуатації
- Увімкнення: Flip the power switch located on the rear of the microscope base to the ON position. Adjust the illumination intensity using the dimmer control.
- Розміщення зразка: Place a prepared microscope slide onto the mechanical stage. Secure it with the stage clips. Use the stage control knobs to center the specimen area of interest over the condenser aperture.
- Magnification Selection: Rotate the revolving nosepiece to select the lowest power objective lens (e.g., 4x). Ensure the objective clicks firmly into place.
- Фокусування:
- While looking through the eyepieces, use the coarse focus knob to bring the specimen into approximate focus.
- Потім використовуйте fine focus knob for precise focusing until the image is sharp and clear.
- Регулювання освітлення:
- Відрегулюйте яскравість за допомогою регулятора яскравості.
- Adjust the iris diaphragm lever on the condenser to control the amount of light reaching the specimen and improve contrast.
- Регулювання міжзіничної відстані: Adjust the distance between the two eyepiece tubes by gently pushing them together or pulling them apart until you see a single, circular field of view.
- Діоптрійне регулювання: If one eyepiece has a diopter adjustment ring, focus on the specimen with your dominant eye (usually the right eye) using only the fine focus knob. Then, close your dominant eye and use the diopter adjustment ring on the other eyepiece to focus for your non-dominant eye without touching the fine focus knob.
- Higher Magnification: Once focused at low power, rotate the nosepiece to a higher power objective. Only minor adjustments with the fine focus knob should be needed due to the parfocal design.
- Immersion Oil (for 100x objective): For the 100x objective lens, a drop of immersion oil must be placed directly on the specimen slide. Lower the objective into the oil carefully. After use, clean the 100x objective and slide thoroughly with lens cleaning solution.

Малюнок 4.1: Збільшений план view механічного сtage with the condenser and iris diaphragm visible below.

малюнок 4.2: View of the illuminated condenser and objective lens from below the stage.
5. Технічне обслуговування
- Очищення лінз: Use a soft, lint-free lens cleaning cloth and a specialized lens cleaning solution. Never touch optical surfaces with your fingers.
- Генеральне прибирання: Протріть корпус мікроскопа м’якою серветкоюamp тканина. Уникайте використання абразивних засобів чи розчинників.
- Зберігання: When not in use, cover the microscope with a dust cover to protect it from dust and debris. Store in a dry, cool place.
- Заміна запобіжника: If the illumination fails, check the fuse located near the power input. Replace it with a fuse of the same type and rating (a spare fuse is included).
6. Вирішення проблем
| проблема | Можлива причина | Рішення |
|---|---|---|
| Немає підсвічування | Power cord disconnected, power switch off, dimmer at minimum, blown fuse. | Check power connection, turn on switch, increase dimmer, replace fuse. |
| Image unclear/blurry | Неправильне фокусування, брудний об'єктив, брудний окуляр, слайдер перевернутий догори дном. | Adjust focus, clean lenses, check slide orientation. |
| Темне поле view | Iris diaphragm closed, low illumination, objective not clicked into place. | Open diaphragm, increase brightness, rotate nosepiece until objective clicks. |
| Two overlapping images | Interpupillary distance incorrect. | Adjust interpupillary distance until a single field of view is seen. |
7. Технічні характеристики
- Номер моделі: 69656
- Бренд: Левенгук
- Максимальне збільшення: 2000x
- Тип джерела світла: LED
- Опис об'єктива: Ахроматичний
- Реальний кут View: 45 градусів
- Джерело живлення: Провідний електричний
- томtage: 110 вольт
- Розміри продукту: 19.29 x 15.75 x 10.63 дюймів
- Вага товару: 12.36 фунта (5.62 кілограма)
- UPC: 611901504766
8. Гарантія та підтримка
For warranty information and technical support, please refer to the documentation provided with your purchase or visit the official Levenhuk webсайт. Зберігайте чек про покупку для гарантійних претензій.