
1. Вступ
Thank you for choosing the Pro'sKit SS-206E Temperature Controlled Soldering Station. This device is designed for precise and efficient soldering tasks, featuring an analog temperature display and an ergonomically designed soldering iron. Please read this manual thoroughly before operation to ensure safe and correct use.
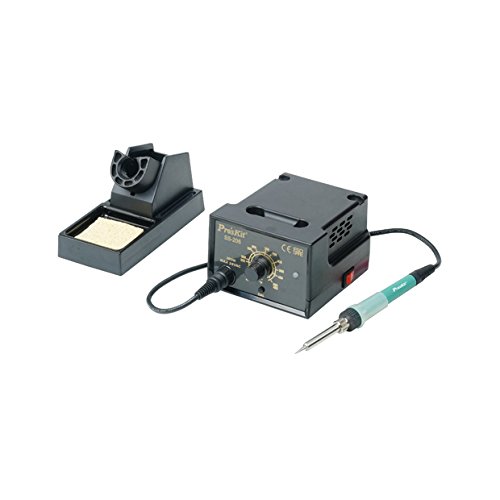
Image 1.1: The Pro'sKit SS-206E Soldering Station, showing the main unit with analog display and the connected soldering iron.
2. Техніка безпеки
Завжди дотримуйтесь наступних запобіжних заходів, щоб запобігти травмуванню або пошкодженню обладнання:
- Електрична безпека: Переконайтеся, що джерело живлення відповідає об’ємуtage requirements of the unit (110V or 220V). Do not operate with wet hands or in damp середовищ.
- Небезпека тепла: The soldering iron tip reaches very high temperatures. Avoid direct contact with skin or flammable materials. Use the provided soldering iron stand.
- Вдихання диму: Паяння утворює випари. Завжди працюйте в добре провітрюваному приміщенні або використовуйте витяжку.
- Захист очей: Wear safety glasses to protect against solder splashes.
- Захист від ESD: This unit is ESD safe. However, take appropriate ESD precautions when working with sensitive electronic components.
- Діти та домашні тварини: Зберігайте паяльну станцію в недоступному для дітей та домашніх тварин місці.
3. Вміст упаковки
Перевірте наявність усіх елементів в упаковці:
- Pro'sKit SS-206E Soldering Station Main Unit
- Soldering Iron with connecting cable
- Підставка для паяльника
- Губка для чищення
- Шнур живлення
4. Налаштування
- Розпакувати: Акуратно вийміть усі компоненти з упаковки.
- Підключення паяльника: Plug the soldering iron's connector into the designated port on the front panel of the soldering station. Ensure a secure connection.
- Позиція стійки: Place the soldering iron stand on a stable, heat-resistant surface near your workspace. Insert the soldering iron into the stand when not in use.
- Приготуйте губку: Dampen the cleaning sponge with water (do not soak) and place it in the sponge tray of the soldering iron stand.
- Підключення живлення: Connect the power cord to the back of the soldering station and then plug it into a suitable electrical outlet. Note: This model is available in 110V and 220V versions. Verify your unit's voltage requirement before plugging it in.
5. Інструкція з експлуатації
- Увімкнення: Flip the power switch located on the front panel to the 'ON' position. The analog display will illuminate.
- Встановити температуру: Rotate the temperature control knob to your desired temperature. The analog meter will indicate the set temperature. The unit supports a temperature range of 200°C to 480°C (392°F to 896°F).
- Celsius/Fahrenheit Adjustment: A switch or internal jumper (refer to specific model documentation if available) allows selection between Celsius and Fahrenheit display.
- Попередній нагрів: Allow the soldering iron to preheat for approximately 2-3 minutes until the tip reaches the set temperature.
- Лудіння наконечника: Before first use and periodically during operation, apply a small amount of solder to the hot tip. This 'tins' the tip, preventing oxidation and improving heat transfer.
- пайка: Bring the hot, tinned tip into contact with both the component lead and the PCB pad simultaneously. Apply solder to the joint, not directly to the iron tip. Remove the solder, then the iron, allowing the joint to cool naturally.
- Очищення наконечника: Регулярно протирайте жало паяльника обamp sponge to remove excess solder and flux residue.
- Вимкнення живлення: After use, turn the temperature control knob to its lowest setting, then flip the power switch to 'OFF'. Allow the iron to cool completely in its stand before storing.
6. Технічне обслуговування
- Догляд за паяльним жалом: Always keep the tip tinned. Replace tips when they become pitted or heavily oxidized and cannot be cleaned. Use only compatible replacement tips.
- Догляд за губкою: Тримайте губку damp during operation. Replace the sponge when it becomes worn or heavily soiled.
- Очищення агрегату: Periodically wipe the exterior of the soldering station with a soft, dry cloth. Do not use abrasive cleaners or solvents.
- Перевірка кабелю: Regularly inspect the power cord and soldering iron cable for any signs of damage. Replace immediately if damaged.
7. Вирішення проблем
| проблема | Можлива причина | Рішення |
|---|---|---|
| Паяльник не нагрівається | Power switch off; Loose connection; Incorrect voltage; Faulty heating element. | Ensure power is on. Check all cable connections. Verify unit voltage matches outlet. Contact support if heating element is suspected. |
| Погані паяні з'єднання | Tip not tinned; Incorrect temperature; Dirty tip; Old solder. | Tin the tip. Adjust temperature. Clean or replace tip. Use fresh solder. |
| Analog display not working | Unit not powered; Internal fault. | Check power connection. If power is on and display is off, contact support. |
| Пристрій не включається | Power cord not connected; Outlet fault; Incorrect voltage. | Переконайтеся, що шнур живлення надійно підключений. Перевірте розетку з іншим пристроєм. Confirm unit voltage (110V or 220V) matches your power supply. |
8. Технічні характеристики
- модель: SS-206E
- Вхідний об'ємtage: AC 110V or 220V (Питома обtage depends on the purchased model. Please verify your unit.)
- Діапазон температур: 200°C - 480°C (392°F - 896°F)
- Тип дисплея: Аналоговий
- Сертифікати: CE, ESD Safe
- Включені компоненти: Паяльник
9. Гарантія та підтримка
For warranty information and technical support, please refer to the warranty card included with your product or visit the official Pro'sKit webсайт. Зберігайте чек про покупку як підтвердження покупки.


