
1. Вступ
This manual provides essential information for the safe and efficient operation of your Technaxx Wireless CarPlay & Android Car Monitor TX-361. Please read this manual thoroughly before using the device and retain it for future reference. The TX-361 is designed to integrate modern smartphone connectivity, including Apple CarPlay and Android Auto, into your vehicle without requiring a complex car radio replacement. It also features an integrated DAB digital radio for enhanced audio experience.
2. Інформація про безпеку
- Завжди використовуйте пристрій відповідально та відповідно до місцевих правил дорожнього руху. Неуважність водія може призвести до аварій.
- Не намагайтеся розбирати або модифікувати пристрій. Це може призвести до анулювання гарантії та створення ризиків для безпеки.
- Тримайте пристрій подалі від екстремальних температур, прямих сонячних променів та вологи.
- Переконайтеся, що пристрій надійно закріплений і не заважає view або заважати керуванню автомобіля.
- Використовуйте лише наданий кабель живлення та аксесуари.
- If the device malfunctions, disconnect it from the power source and contact customer support.
3. Вміст упаковки
Перевірте, чи всі перелічені нижче предмети входять до вашої упаковки:
- DAB 7-inch CarPlay with Touch Screen TX-361
- Power Supply (USB-A to USB-C, 1.5m cable)
- AUX-кабель (1 м)
- Антена DAB
- Holder (Mounting Bracket)
- Посібник користувача
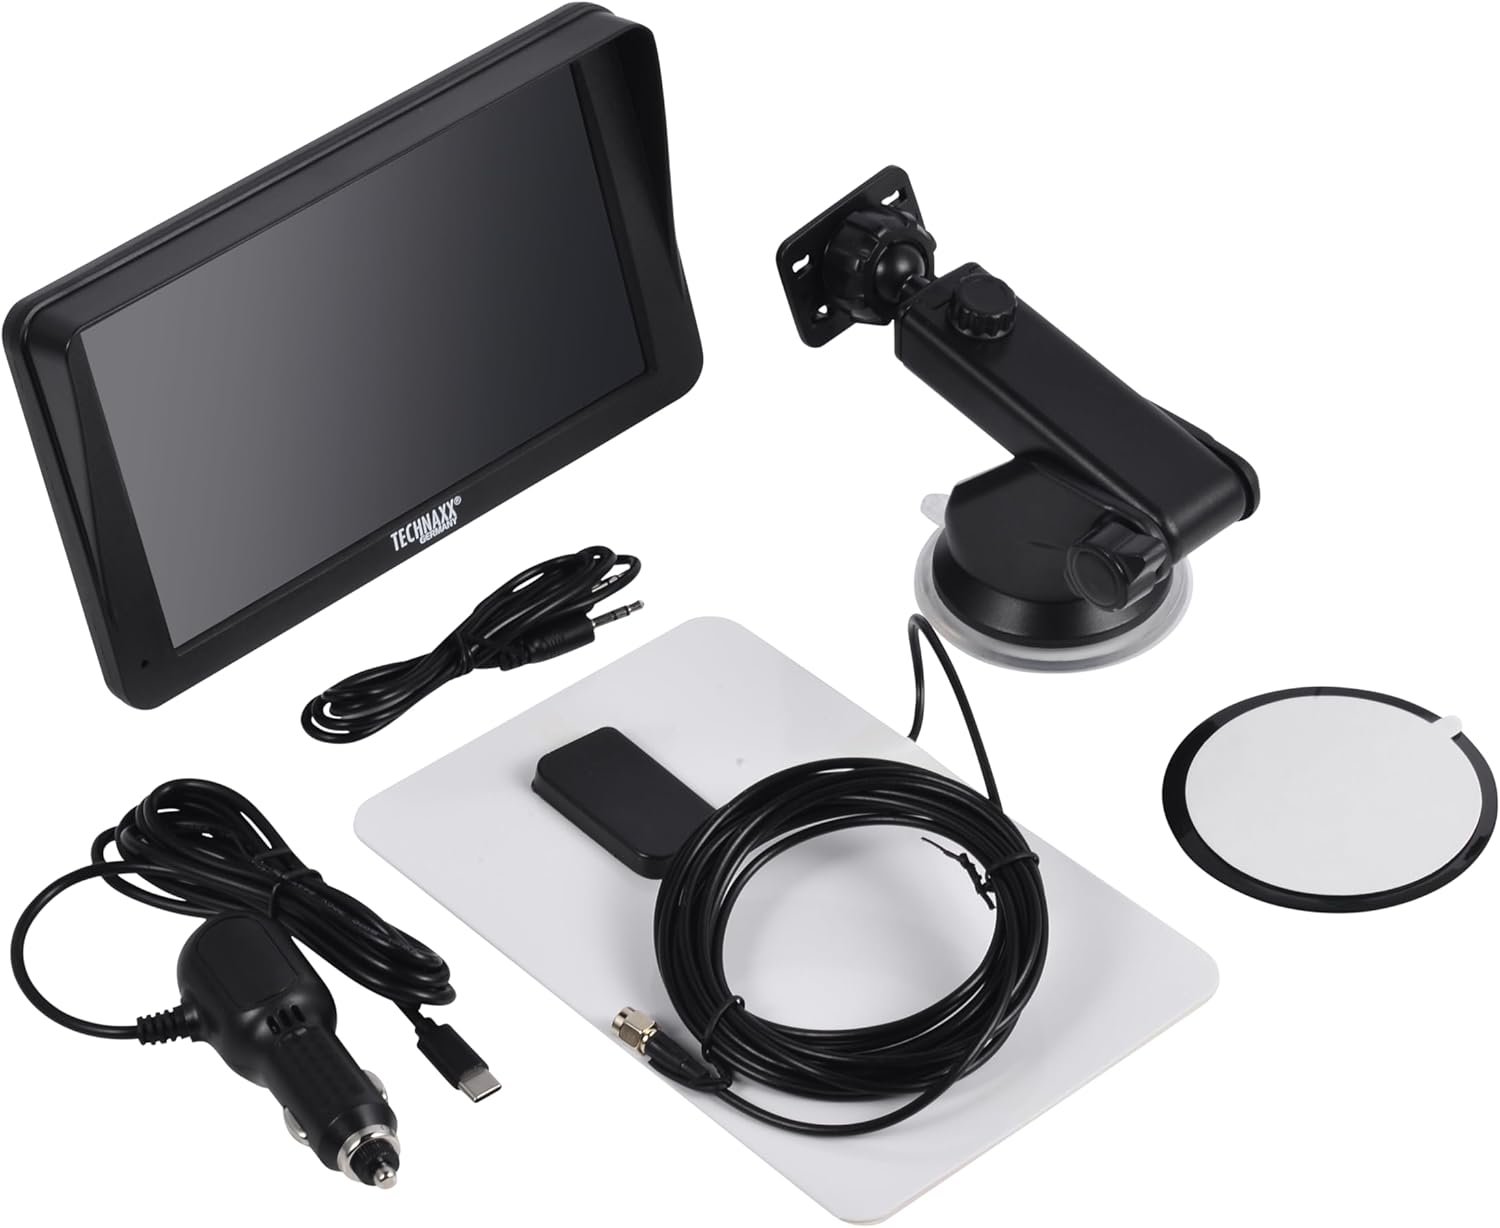
Image: All components included in the Technaxx TX-361 package, neatly laid out.
4. Продукт закінчивсяview
Familiarize yourself with the main components of your TX-361 monitor.
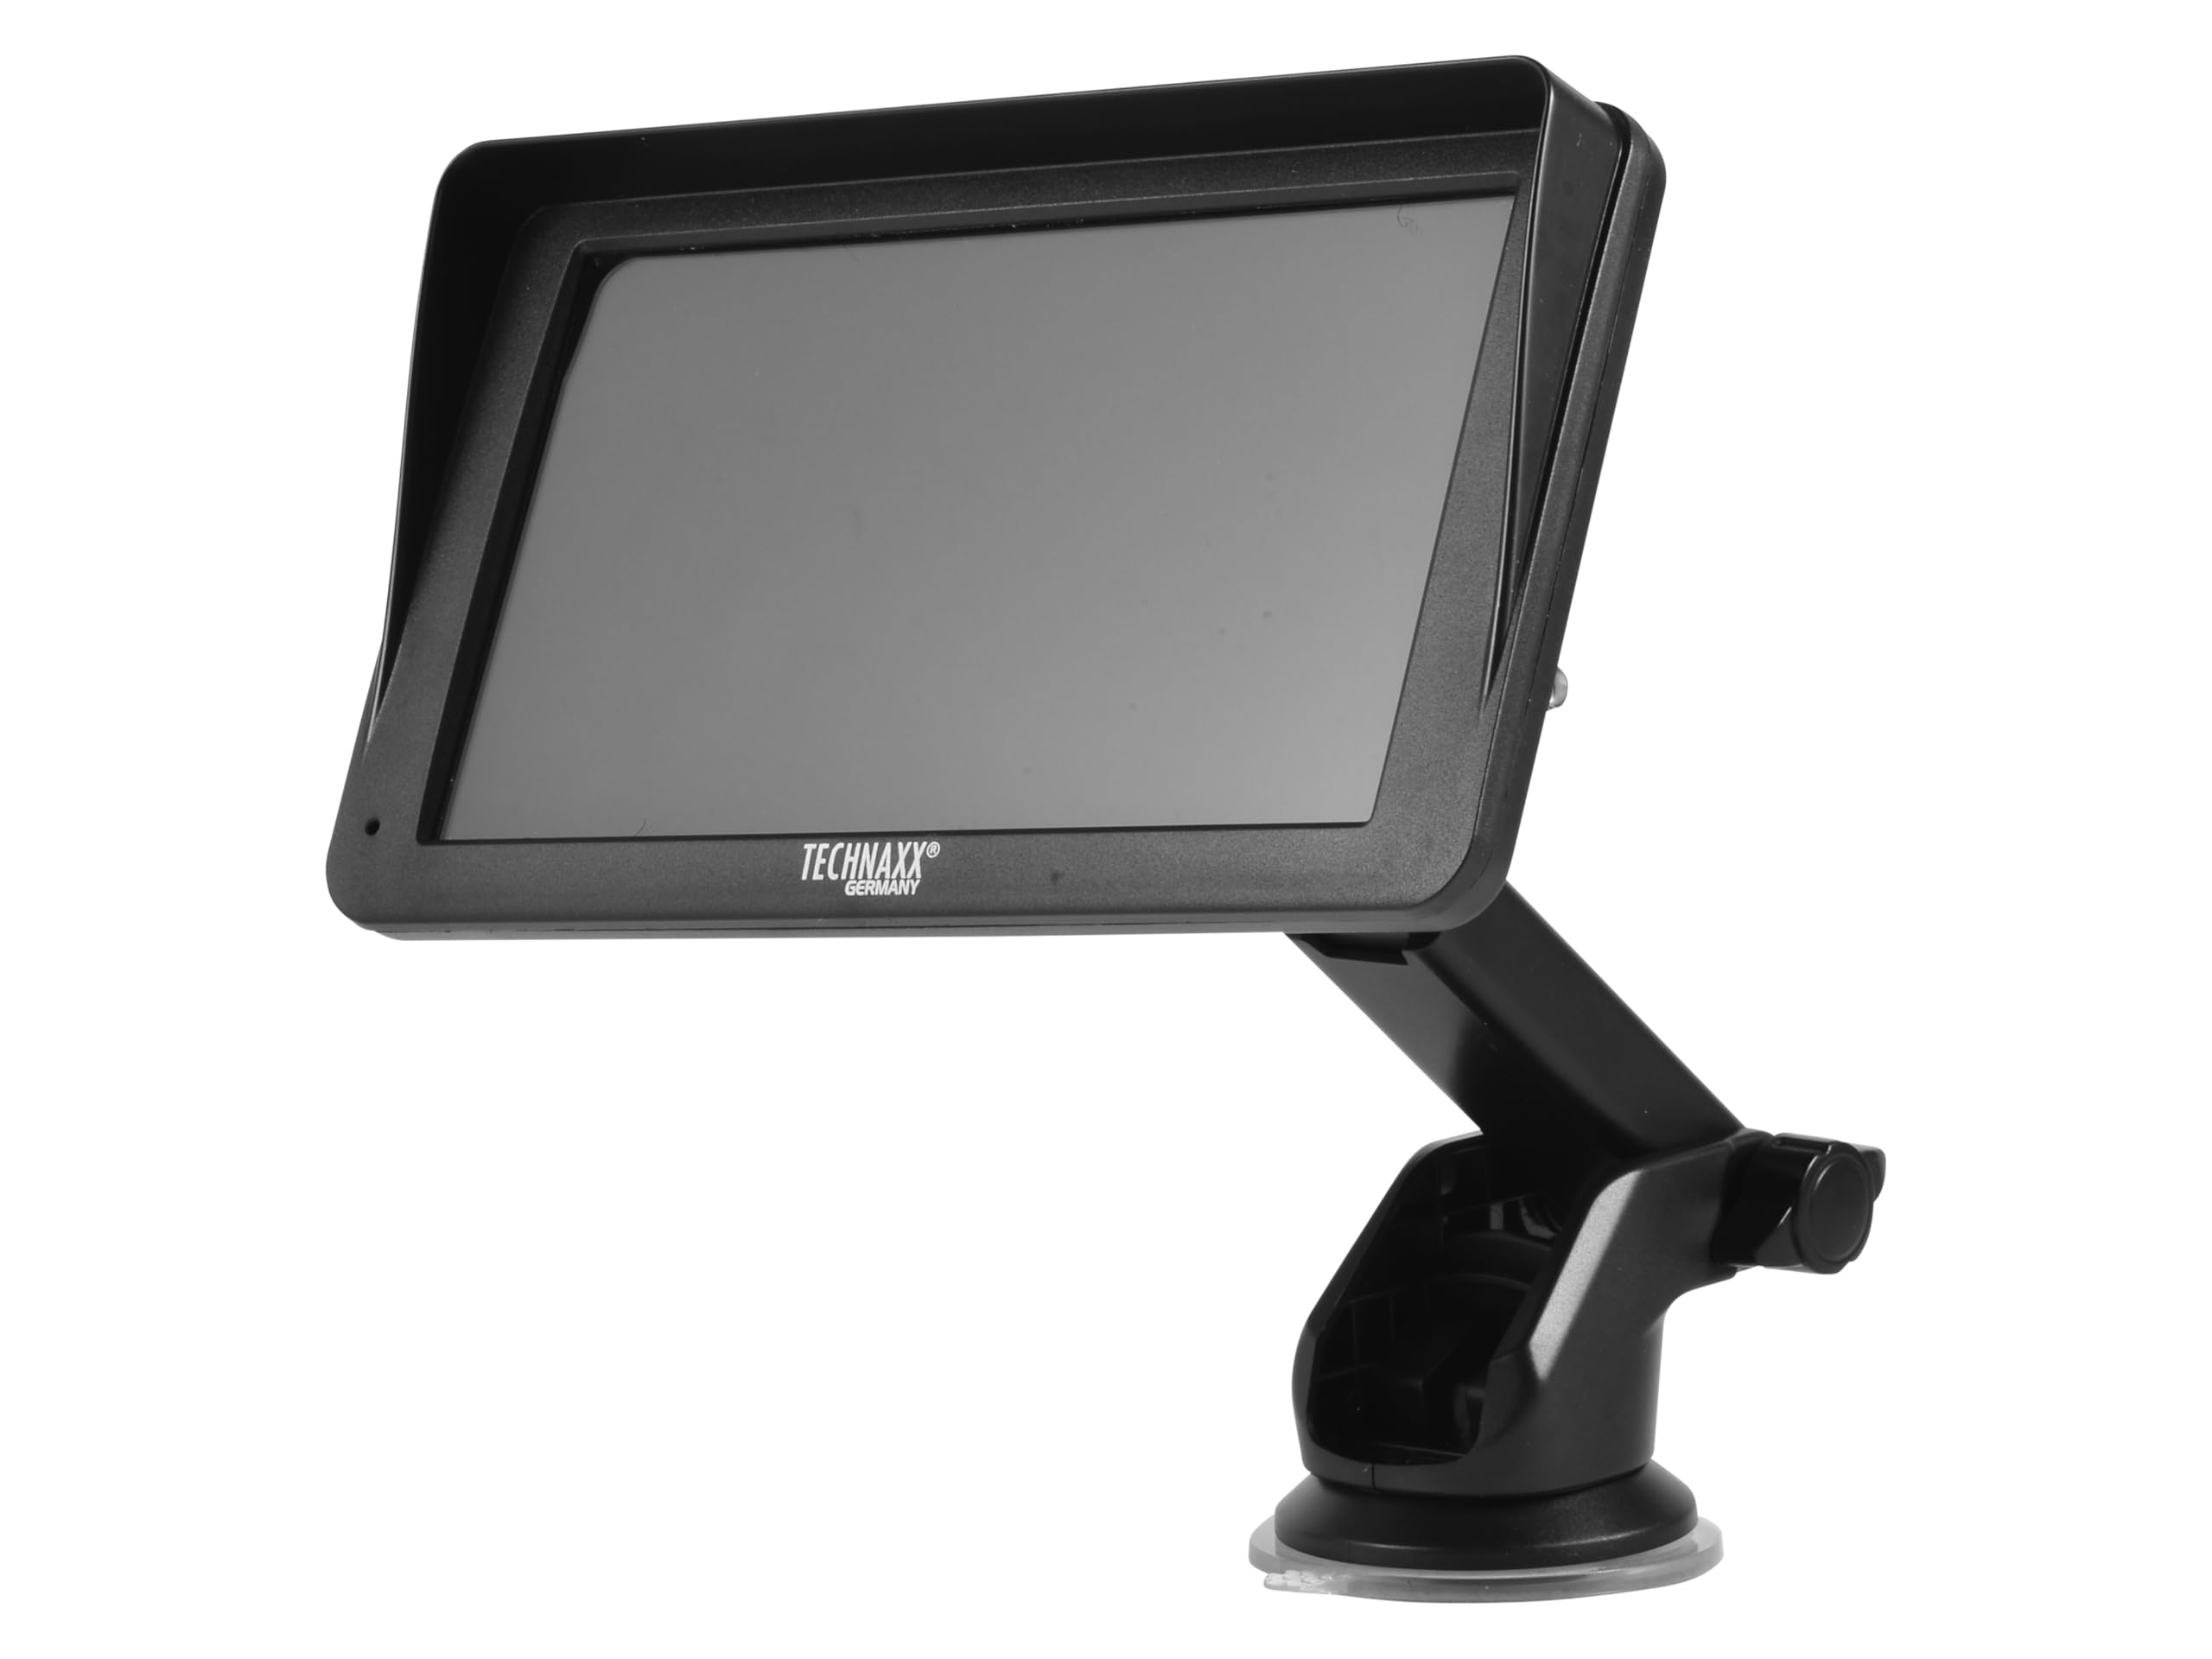
Зображення: спереду view of the TX-361 monitor with its 7-inch display and 'TECHN AXX GERMANY' branding, attached to the adjustable mounting stand.

Зображення: Задня частина view of the TX-361 monitor, highlighting the ventilation grilles and the attachment point for the mounting bracket.

Зображення: Детальне view of the right side of the TX-361 monitor, showing the power button, reset button, USB-C power input, AUX output, and USB-A port.
4.1. Компоненти пристрою
- 7-дюймовий ємнісний сенсорний екран: Main display for all functions.
- Кнопка живлення: Located on the top right side.
- Кнопка скидання: Small pinhole button for system reset.
- Порт USB-C: Для вхідної потужності.
- Вихід AUX: 3.5mm jack for wired audio transmission.
- Порт USB-A: For media playback or charging external devices.
- Вхід антени DAB: Connector for the external DAB antenna.
- Вбудований динамік: Для прямого відтворення аудіо.
5. Налаштування
5.1. Монтаж пристрою
The TX-361 can be mounted on your vehicle's windscreen or dashboard using the provided holder.
- Attach the monitor to the mounting bracket.
- For Windscreen Mounting: Clean the desired area on the windscreen. Press the suction cup firmly against the glass and engage the lever to secure it.
- For Dashboard Mounting: Clean the desired area on the dashboard. If necessary, use the adhesive disc provided for a more secure attachment point for the suction cup. Press the suction cup firmly and engage the lever.
- Відрегулюйте кут монітора для оптимального viewне перешкоджаючи вашому керуванню view.

Image: The TX-361 monitor securely mounted on a car dashboard, showing its position relative to the driver's view.

Image: The TX-361 monitor mounted on a car windscreen, demonstrating an alternative placement option.
5.2. Підключення живлення
- Connect the USB-C end of the power cable to the USB-C port on the monitor.
- Plug the USB-A end of the power cable into the provided 12V/24V cigarette lighter adapter.
- Insert the cigarette lighter adapter into your vehicle's 12V/24V power socket. The device will power on automatically or can be turned on using the power button.
5.3. DAB Antenna Connection
For optimal DAB radio reception, connect the included DAB antenna:
- Connect the DAB antenna cable to the dedicated DAB antenna input on the monitor.
- Mount the DAB antenna on your windscreen or another suitable location, ensuring it has clear line of sight for best signal reception.
6. Інструкція з експлуатації
6.1. Увімкнення/вимкнення живлення
- Увімкнення: The device typically powers on automatically when connected to the vehicle's power. If not, press and hold the power button on the top right side.
- Вимкнення живлення: Press and hold the power button until the device shuts down. A short press will turn the screen off/on.
6.2. Initial Setup and Smartphone Connection
The TX-361 supports wireless Apple CarPlay and Android Auto via Wi-Fi and Bluetooth 5.0.
- Переконайтеся, що на вашому смартфоні увімкнено Wi-Fi та Bluetooth.
- On the TX-361 monitor, navigate to the CarPlay or Android Auto section.
- The monitor will display a Bluetooth name. On your smartphone, search for and connect to this Bluetooth device.
- Once connected via Bluetooth, the device will prompt you to enable Wi-Fi for CarPlay/Android Auto functionality. Confirm the connection on your phone.
- After successful pairing, Apple CarPlay or Android Auto will launch automatically on the monitor.
6.3. Робота з сенсорним екраном
The 7-inch capacitive touchscreen allows for intuitive control:
- Торкніться: Виберіть елементи або підтвердьте дії.
- Проведіть пальцем: Navigate through menus or lists.
- Масштабування за допомогою розведення пальців: (Where supported, e.g., in navigation apps) Adjust map zoom levels.
6.4. DAB Digital Radio
To use the integrated DAB digital radio:
- Ensure the DAB antenna is properly connected.
- From the main menu, select the 'DAB Radio' option.
- The device will automatically scan for available DAB stations.
- Select your desired station from the list.
6.5. FM-радіо
For traditional FM radio reception:
- From the main menu, select the 'FM Radio' option.
- Використовуйте екранні елементи керування для пошуку станцій або ручного налаштування частоти.
6.6. Параметри аудіовиходу
The TX-361 offers several ways to transmit audio to your vehicle's sound system:
- Вбудований динамік: Audio will play directly from the monitor's built-in speaker.
- Кабель AUX: Connect the provided 3.5mm AUX cable from the monitor's AUX output to your car's AUX input. Select 'AUX' as the input source on your car radio.
- FM-передача: Select an unused FM frequency on the TX-361 and tune your car radio to the same frequency. Audio will be transmitted wirelessly to your car's speakers.
7. Технічне обслуговування
- Прибирання: Використовуйте м’яку суху тканину для очищення екрана та зовнішньої частини пристрою. Не використовуйте абразивні засоби для чищення або розчинники.
- Зберігання: Якщо пристрій зберігатиметься протягом тривалого часу, від’єднайте його від живлення та зберігайте у прохолодному сухому місці.
- Оновлення програмного забезпечення: Періодично перевіряйте дані виробника webсайт для отримання будь-яких доступних оновлень прошивки для забезпечення оптимальної продуктивності.
8. Вирішення проблем
| проблема | Можливе рішення |
|---|---|
| Пристрій не включається. |
|
| Cannot connect to CarPlay/Android Auto. |
|
| Poor DAB/FM radio reception. |
|
| Немає аудіовиходу. |
|
9. Технічні характеристики
| Особливість | Специфікація |
|---|---|
| Номер моделі | 5361 |
| Дисплей | 7-дюймовий ємнісний сенсорний екран |
| Технологія підключення | Wi-Fi (Dual-band 2.4 / 5 GHz), Bluetooth 5.0 |
| Особливості | Wireless CarPlay & Android Auto, DAB Digital Radio, FM Radio, Touchscreen Display |
| Діапазон частот DAB | Band III: 174-240 MHz |
| Аудіовихід | AUX, FM Transmission, Integrated Speaker |
| Джерело живлення | 12V/24V via Cigarette Lighter |
| Розміри продукту (Д x Ш x В) | 18.8 Г x 10.8 Ш x 3.5 В сантиметрів |
| Вага товару | 0.58 фунта (приблизно 263 грамів) |
10. Гарантія та підтримка
Technaxx products are covered by a manufacturer's warranty. For detailed warranty information, please refer to the warranty card included with your product or visit the official Technaxx website. For technical support, troubleshooting assistance, or service inquiries, please contact Technaxx customer support through their official channels.
Ви часто можете знайти додаткові ресурси, відповіді на поширені запитання та контактну інформацію на Technaxx official webсайт.